Four Calling Birds and Three French Hens Needlepoint Guides
Stitched and written By: Peggy Bond
Day 3, Three French Hens Needlepoint Kit

The French hens were just too plump to put all three on the block so we only have one, sitting fat and happy on her flowering nest. No eggs in view!
All but one of the stitches for this and the next block can be found in The Needlepoint Book by Jo Ippolito Christensen. However, some are worked in different directions than shown in the book.
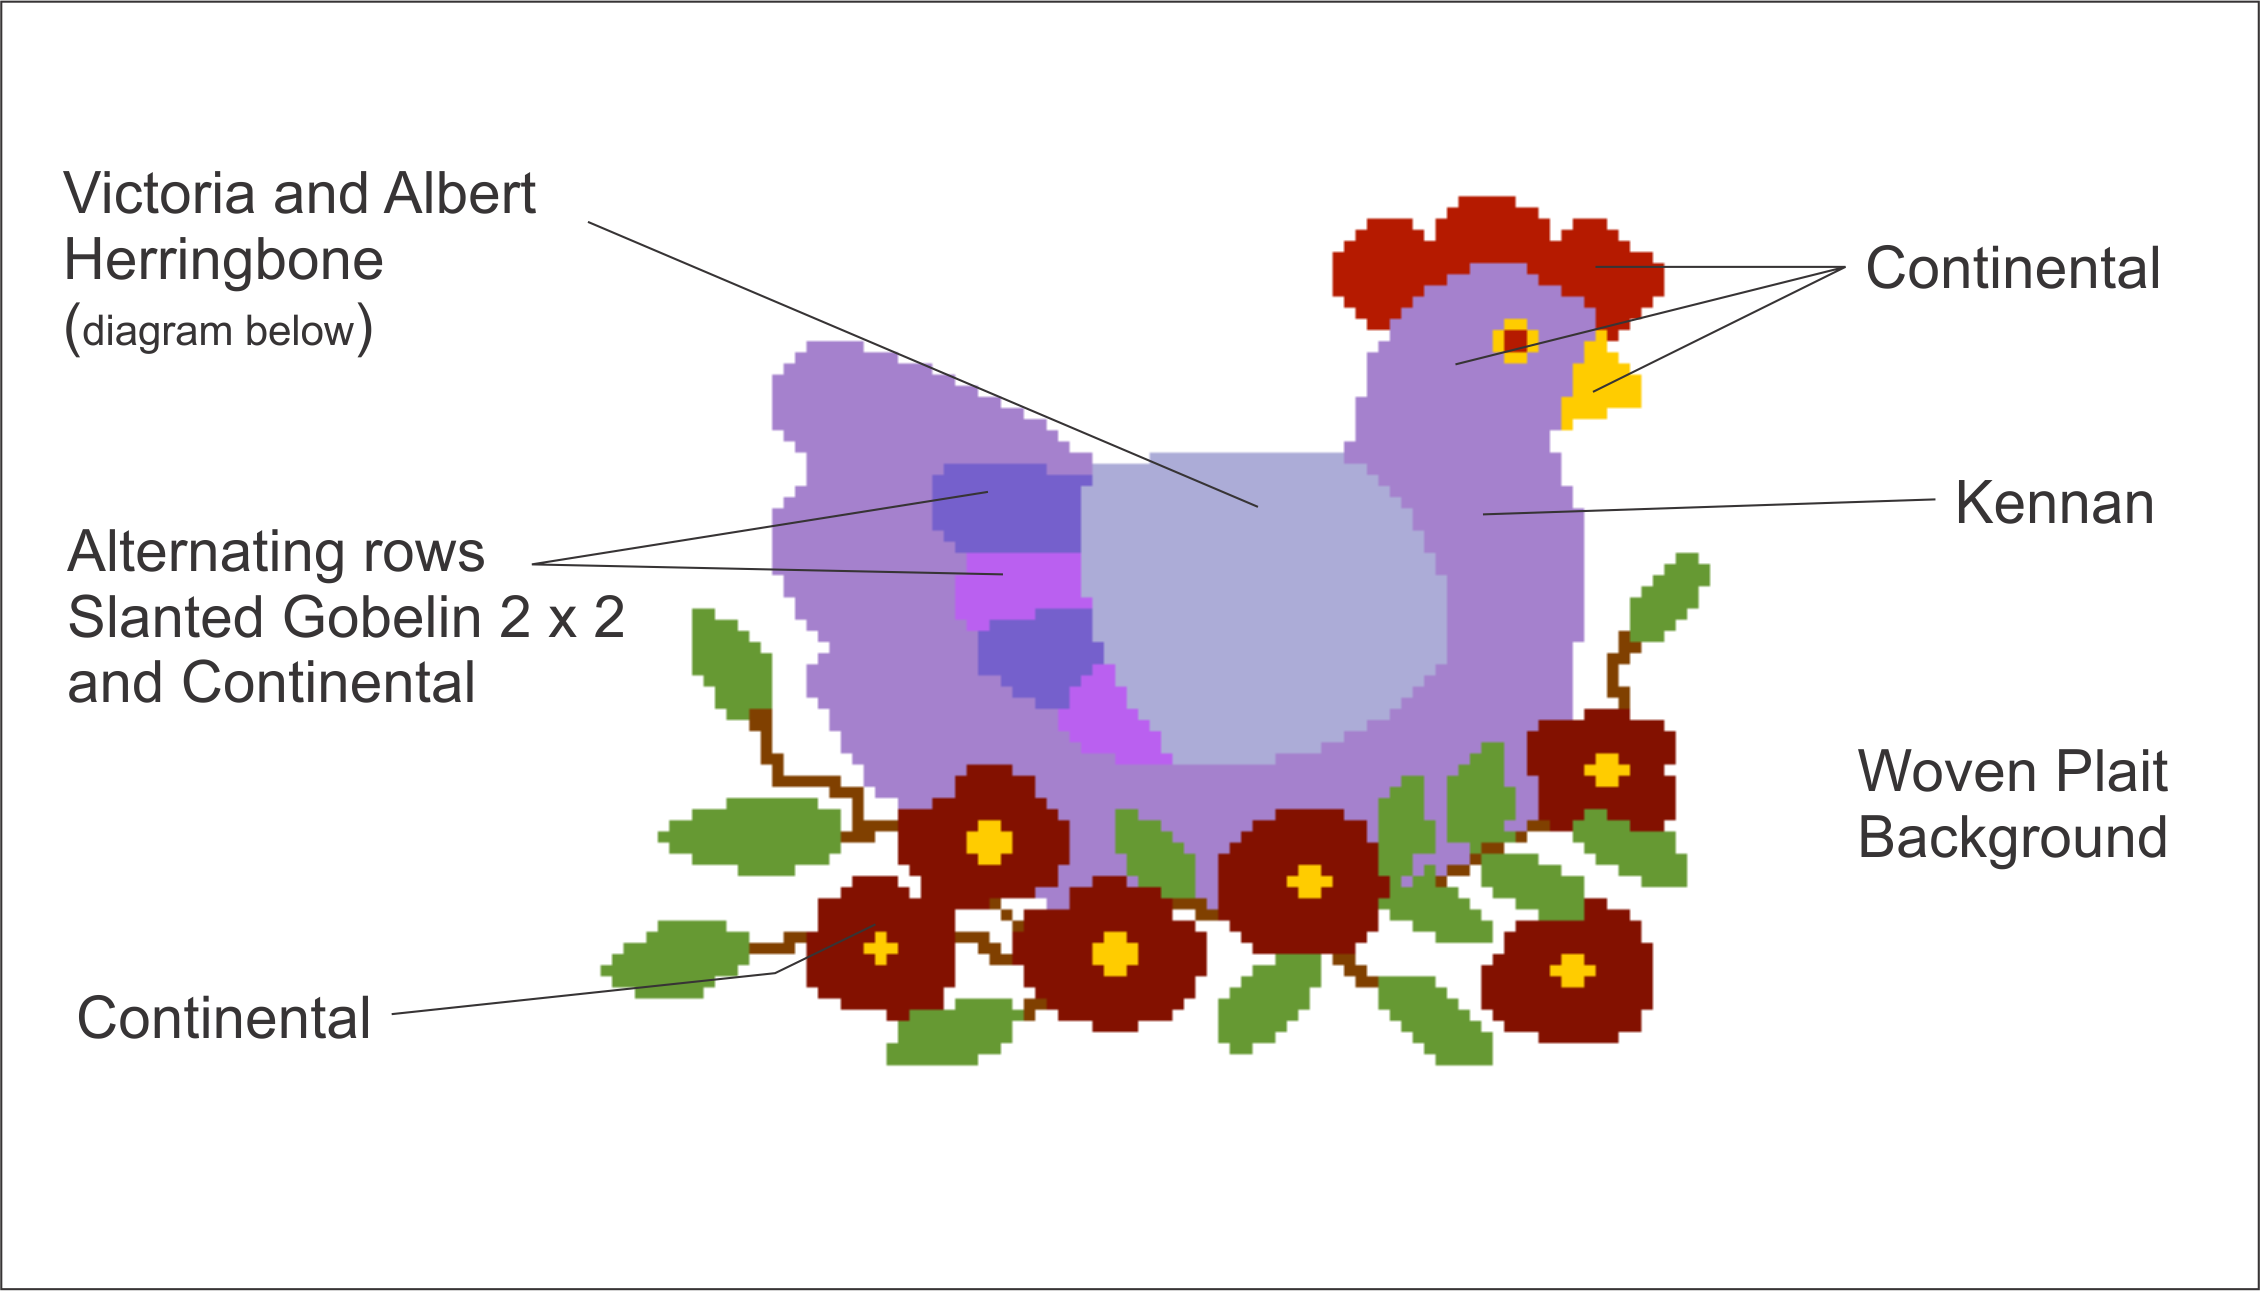
The head of our lonesome hen is stitched in Continental as are her comb and beak. Her eye is a French Knot. Her breast and tail are Kennan and the wing tips are alternation rows of Slanted Gobelin 2 x 2 and Continetal worked slanted from top left to right.
Flowers are Continental with their centers done is varying numbers of French Knots to fill the canvas. The branches are Continental as well, and the leaves are done in variations of the leaf stitch.
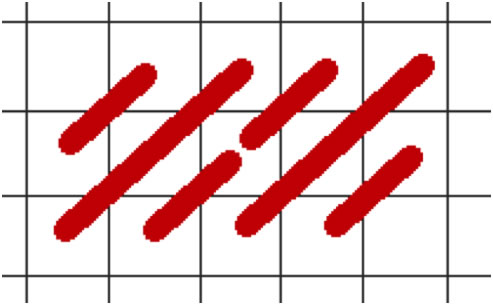
French Hen Needlepoint Stitch Guide
V and A Herringbone
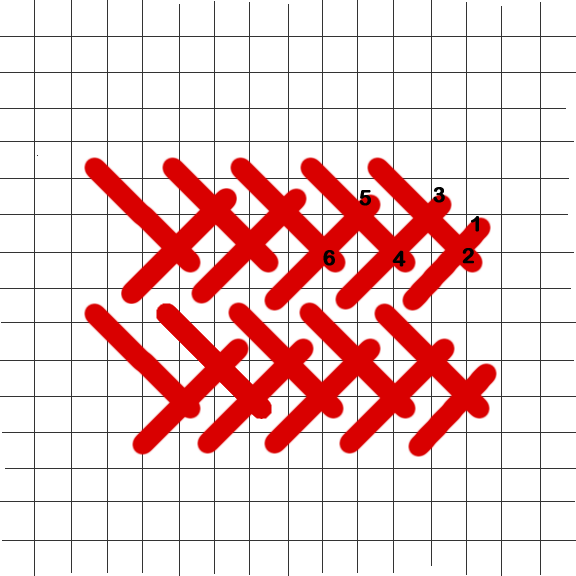
The hen’s wing is done in Victoria and Albert Herringbone, show below. It is a variation of the standard Herringbone was adapted from a Victory and Albert Museum Handbook of embroidery stitches by Sherlee Lanz.
Background is Woven Plait which is similar to and simpler than the Victoria Albert Herringbone. The Woven Plait is a quick background stitch that has texture.
Day 4, Four Calling Birds Needlepoint
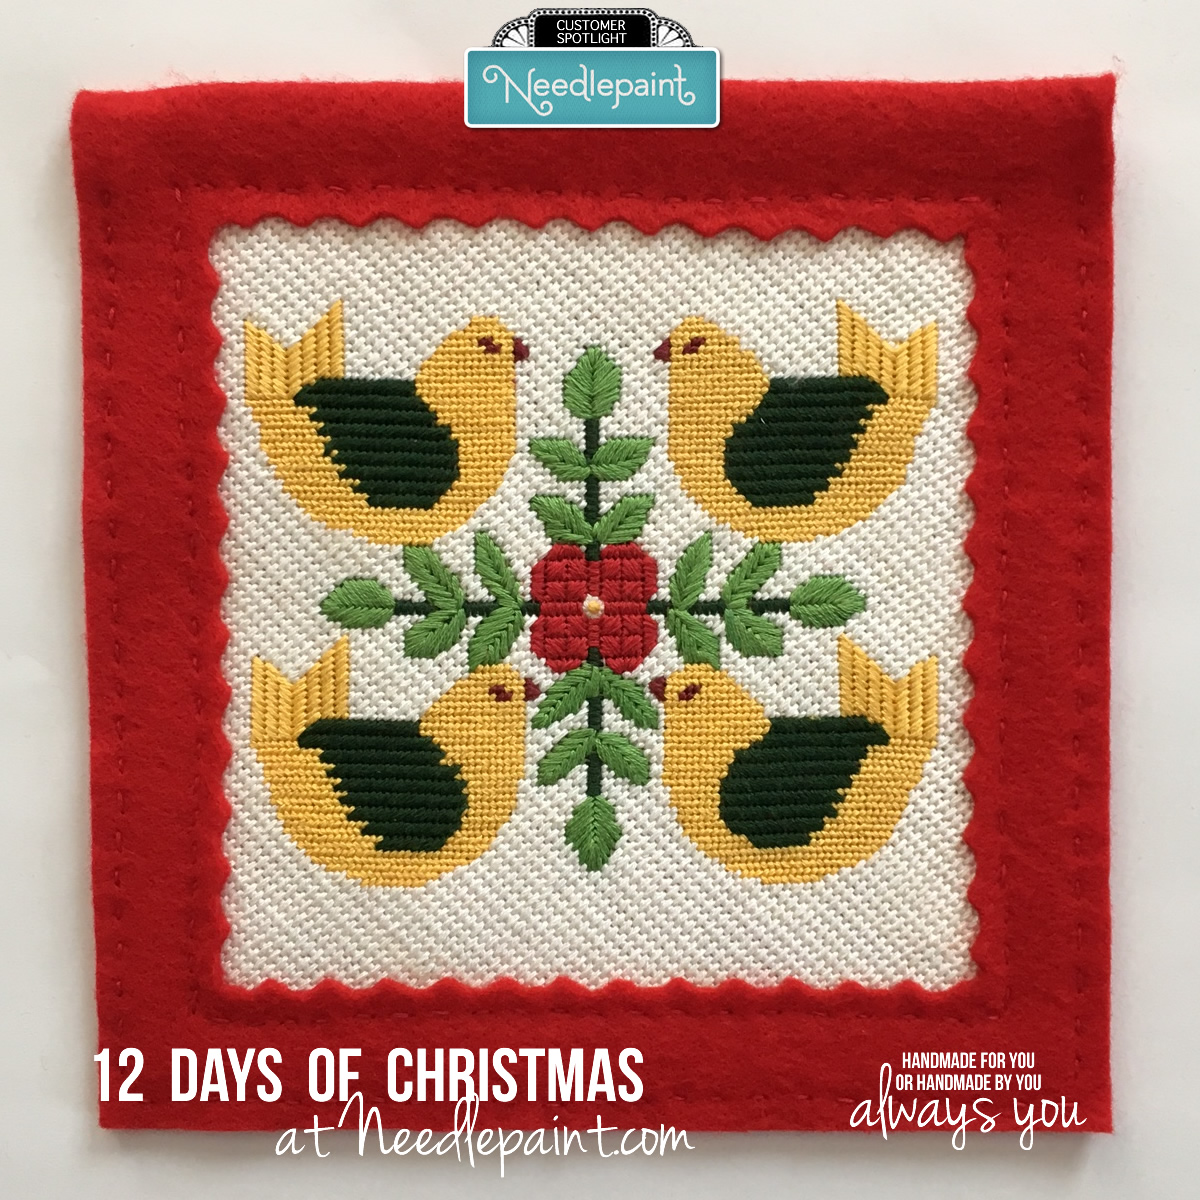
Four Calling Birds Needlepoint Kit
The Four Calling Birds block is the other symmetrically designed block.
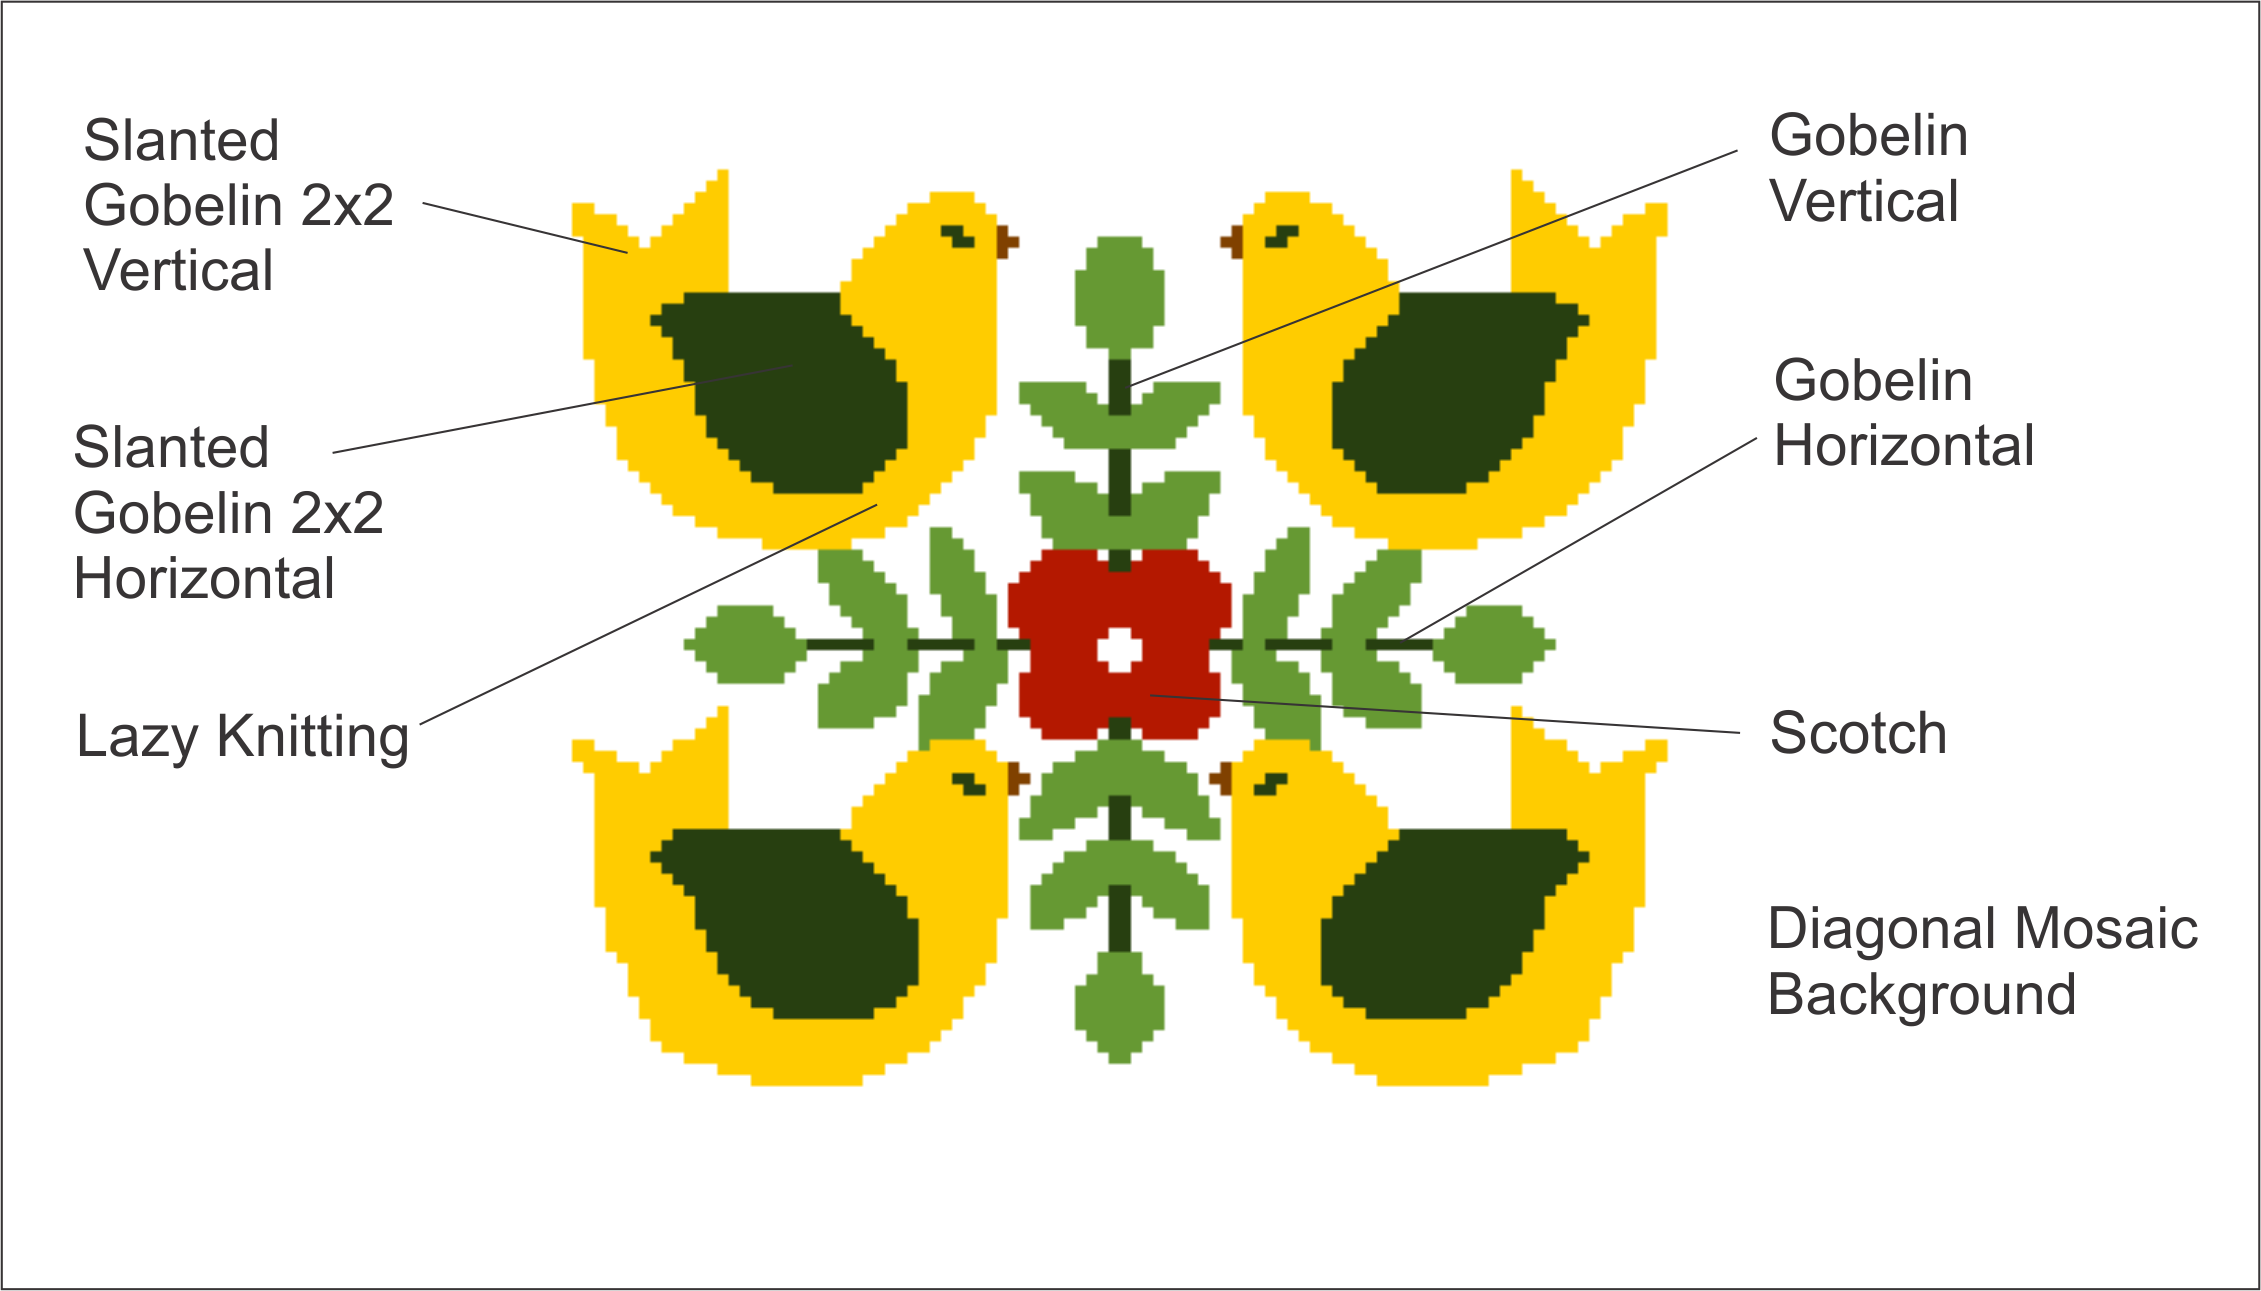
The yellow of the birds is done in Lazy Knitting, worked left to right on the left half and right to left on the right. The same is true for the Slanted Gobelin 2×2 of the tails and the green Slanted Gobelin 2×2 of the wing. Lazy Knitting is one of the more tedious stitches, but contrasting texture to the Slanted Gobelin makes it worth the effort.
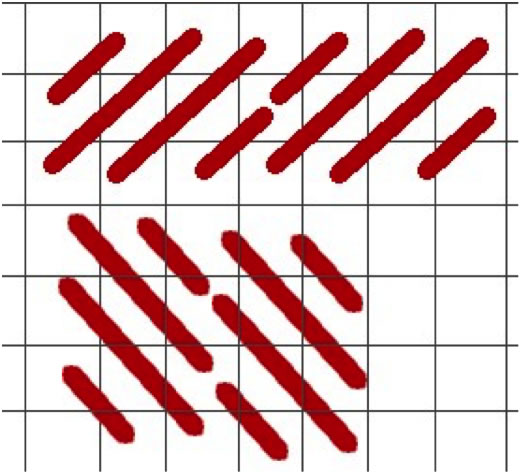
Four Calling Birds Needlepoint Guide
The flower is done with 4 Scotch squares on each petal. It is edged in Satin to round out each petal. The flower center can be stitched in white Continental, or yellow French Knots or maybe some beads? There are possibilities on all or the blocks to add some flare with beads and/or sequins. Flower centers and eyes are obvious choices for these types of embellishments.
The leaves are variations of the Leaf stitch and branches are vertical or horizontal Gobelin. (The traditional Gobelin is a straight stitch over 2 threads of the canvas. It can be stitched horizontally or vertically. And, as used for the birds, it can be stitch on diagonally, i.e. over 2 strands horizontally and vertically making it twice the size one of the Tent stitches – Continental, Half Cross, or Basketweave.)
The background is the Diagonal Mosaic, not to be confused with the Mosaic stitched diagonally. Unlike the background of the Two Turtle symmetrical block, this background is worked continuously across the entire block. That is not stitched in opposite directions on each half.
Coming up a break from birds…. Five Golden Rings, the most complex of the 12 blocks!


Recent Comments