Official blog of www.NeedlePaint.com
where you can design your own Needlepoint!

NeedlePoint Kits and Canvas Designs | Design your own Needlepoint Kit!

Archive for the ‘Three dimensional needlepoint’ Category

Needlepoint Treasure Trees

By Peggy Bond

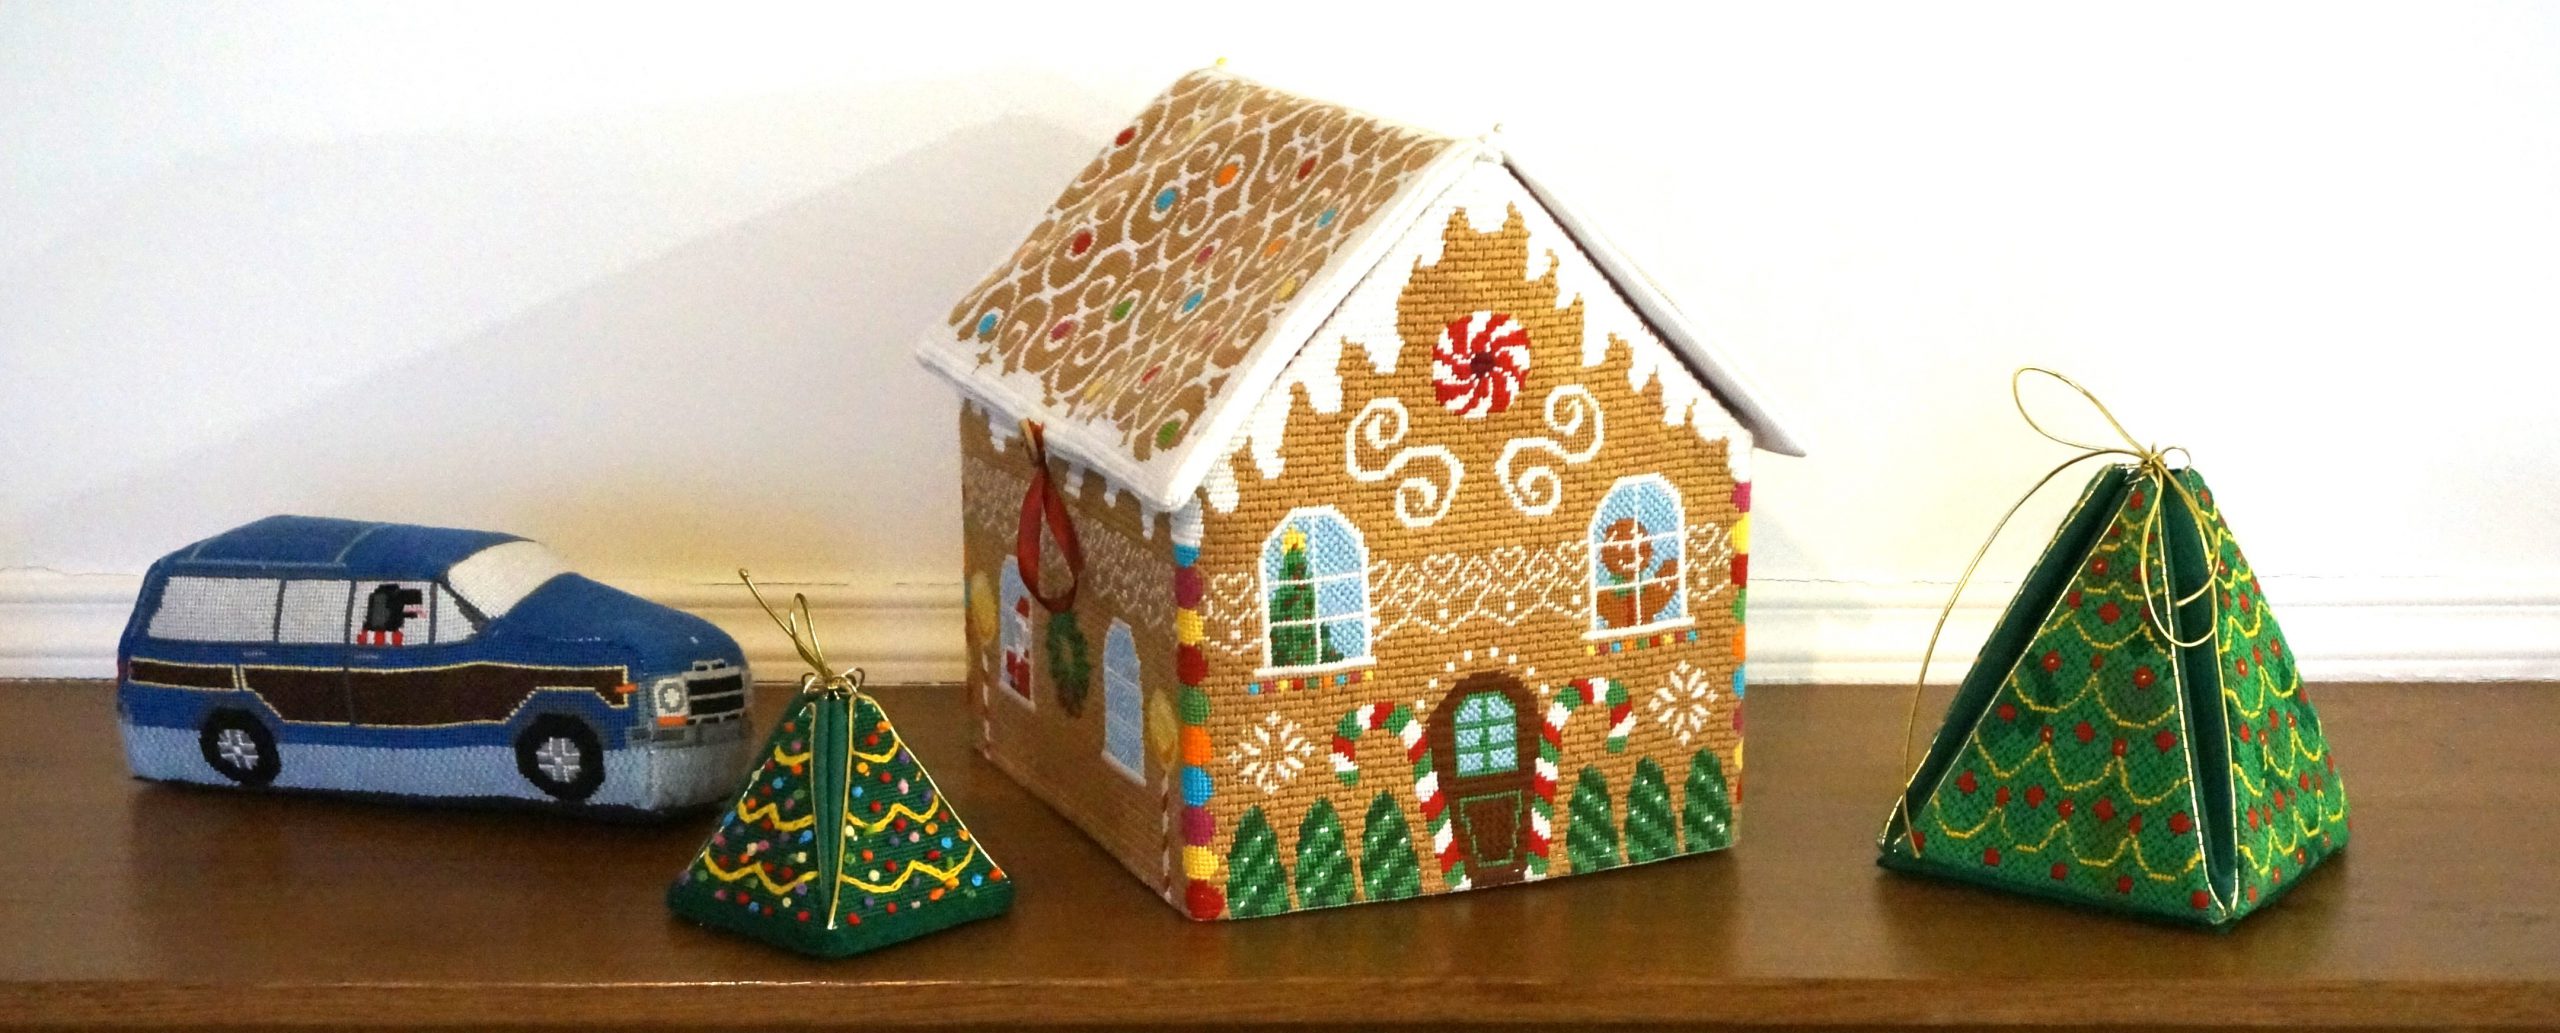
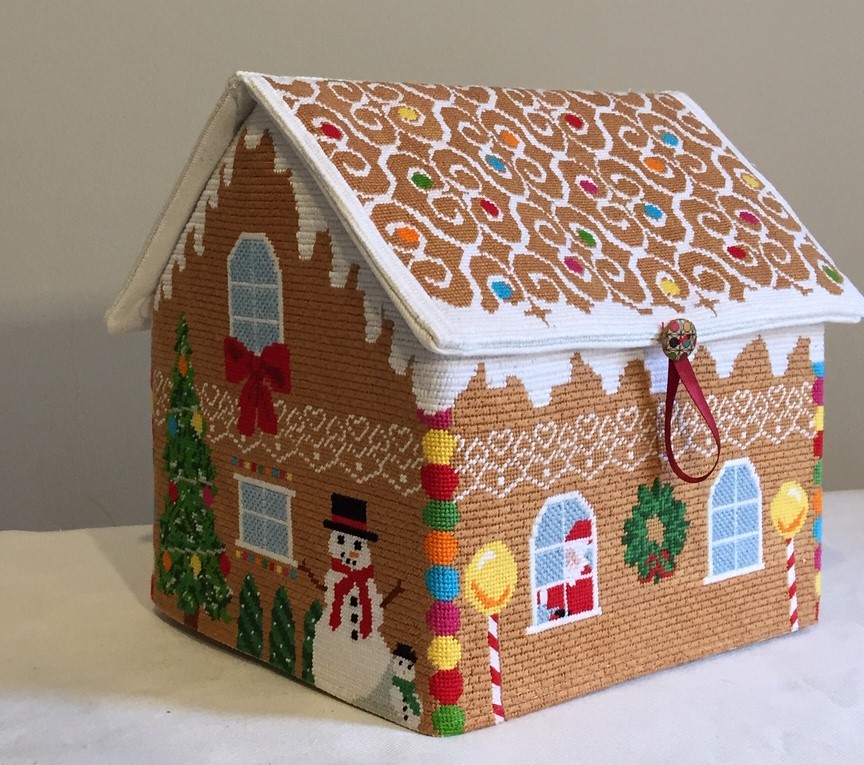
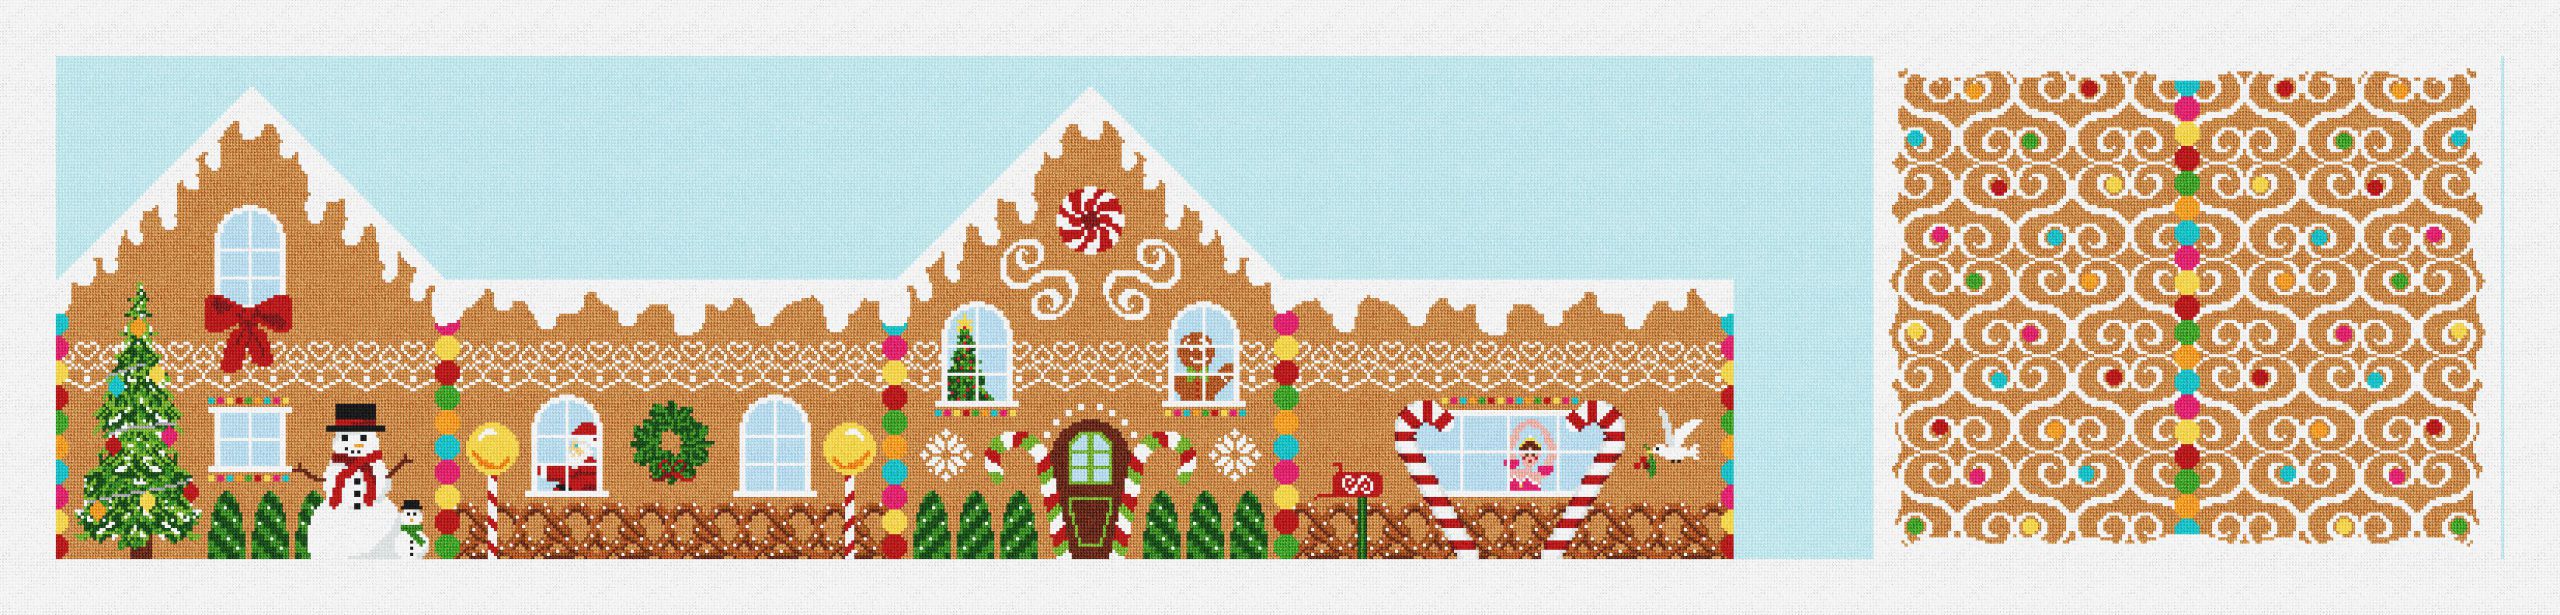
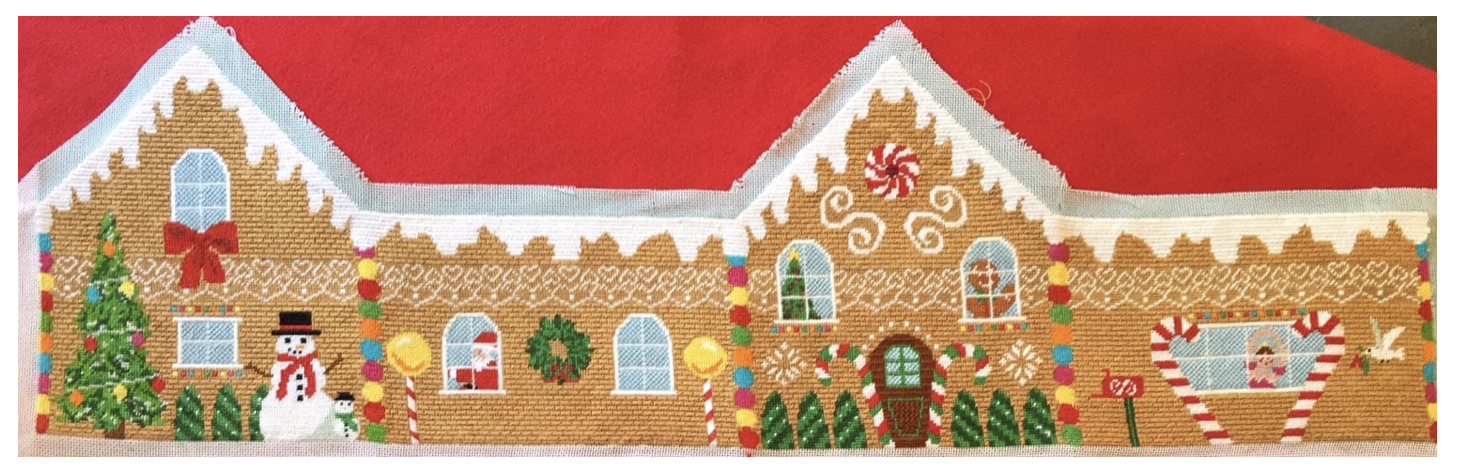
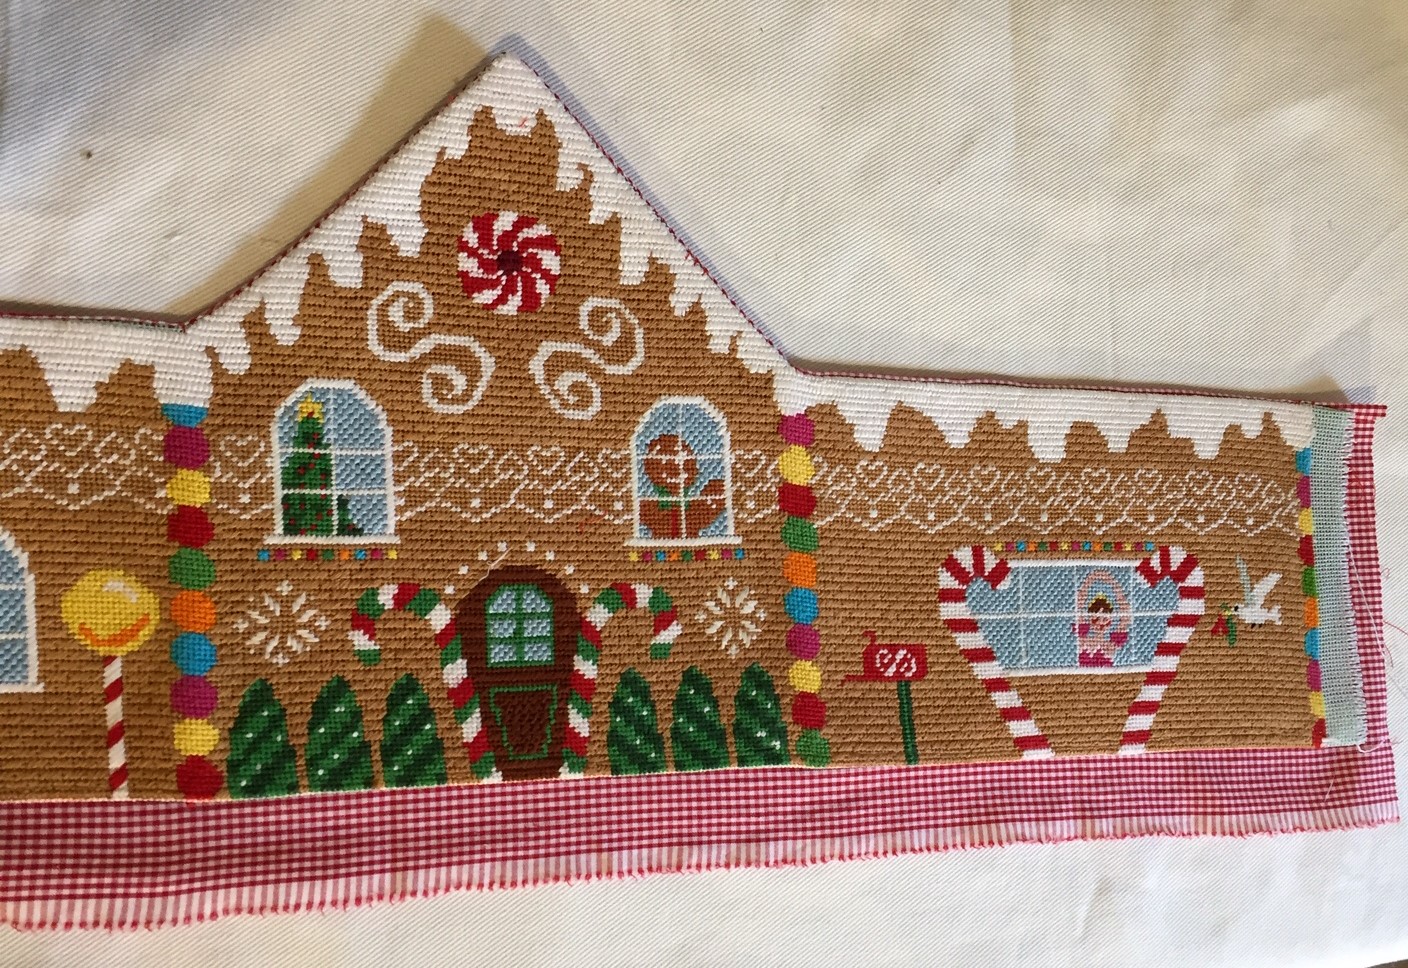
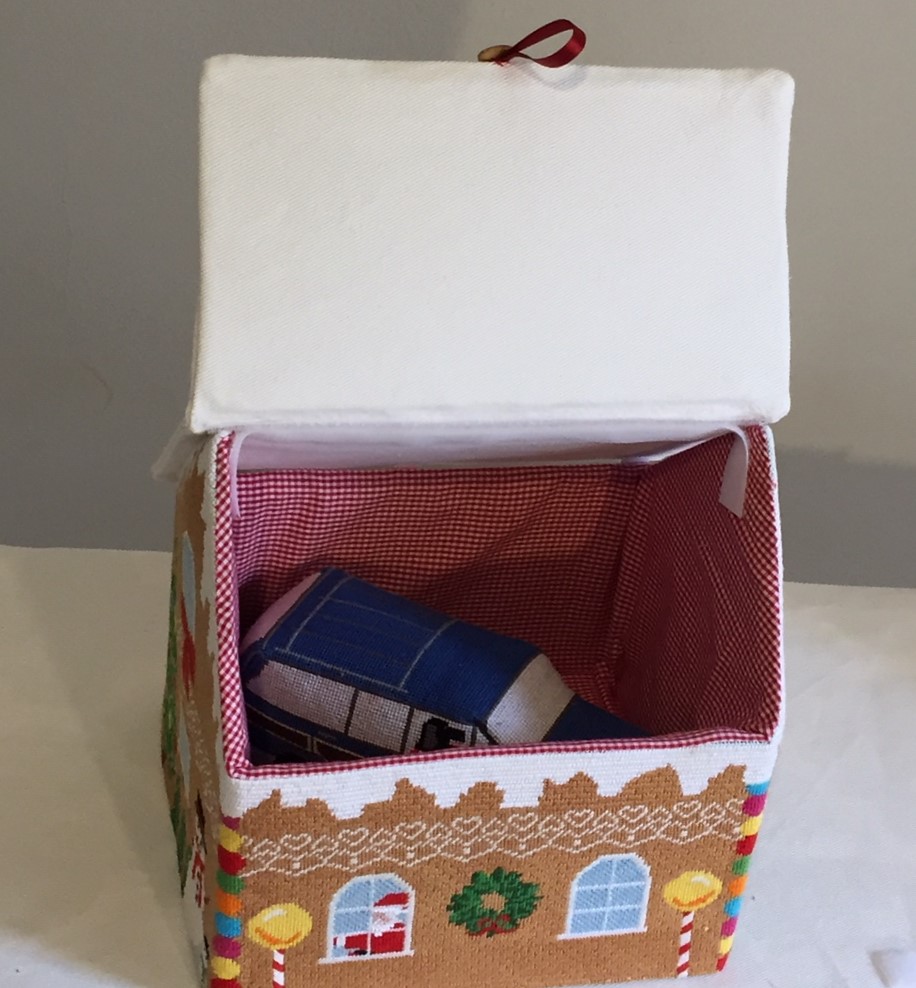
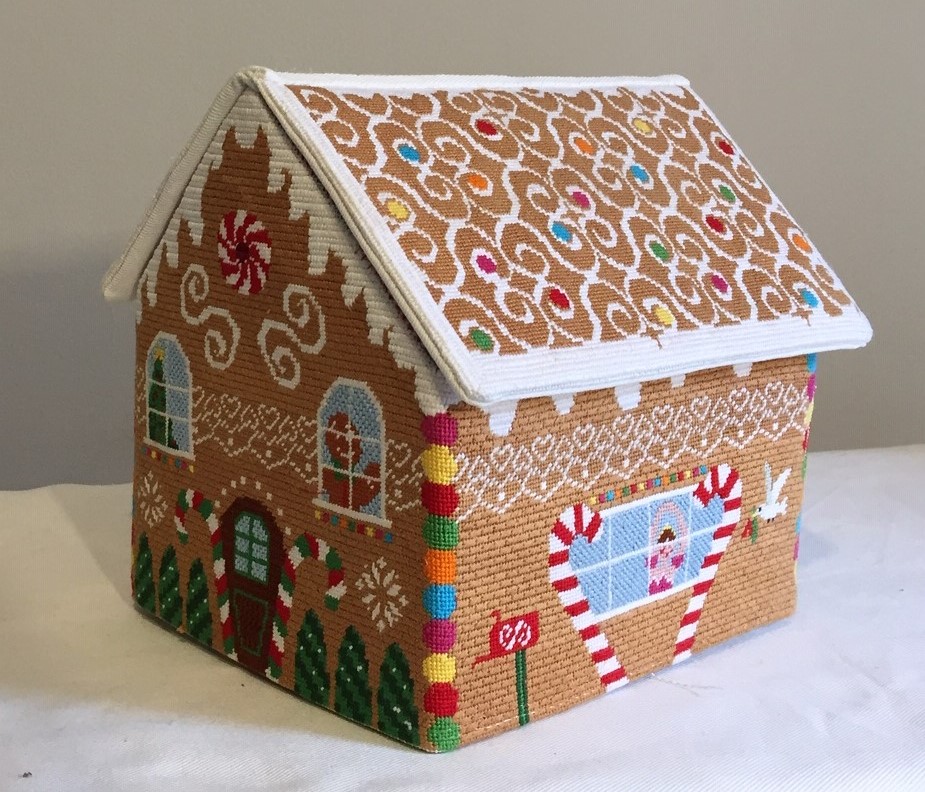
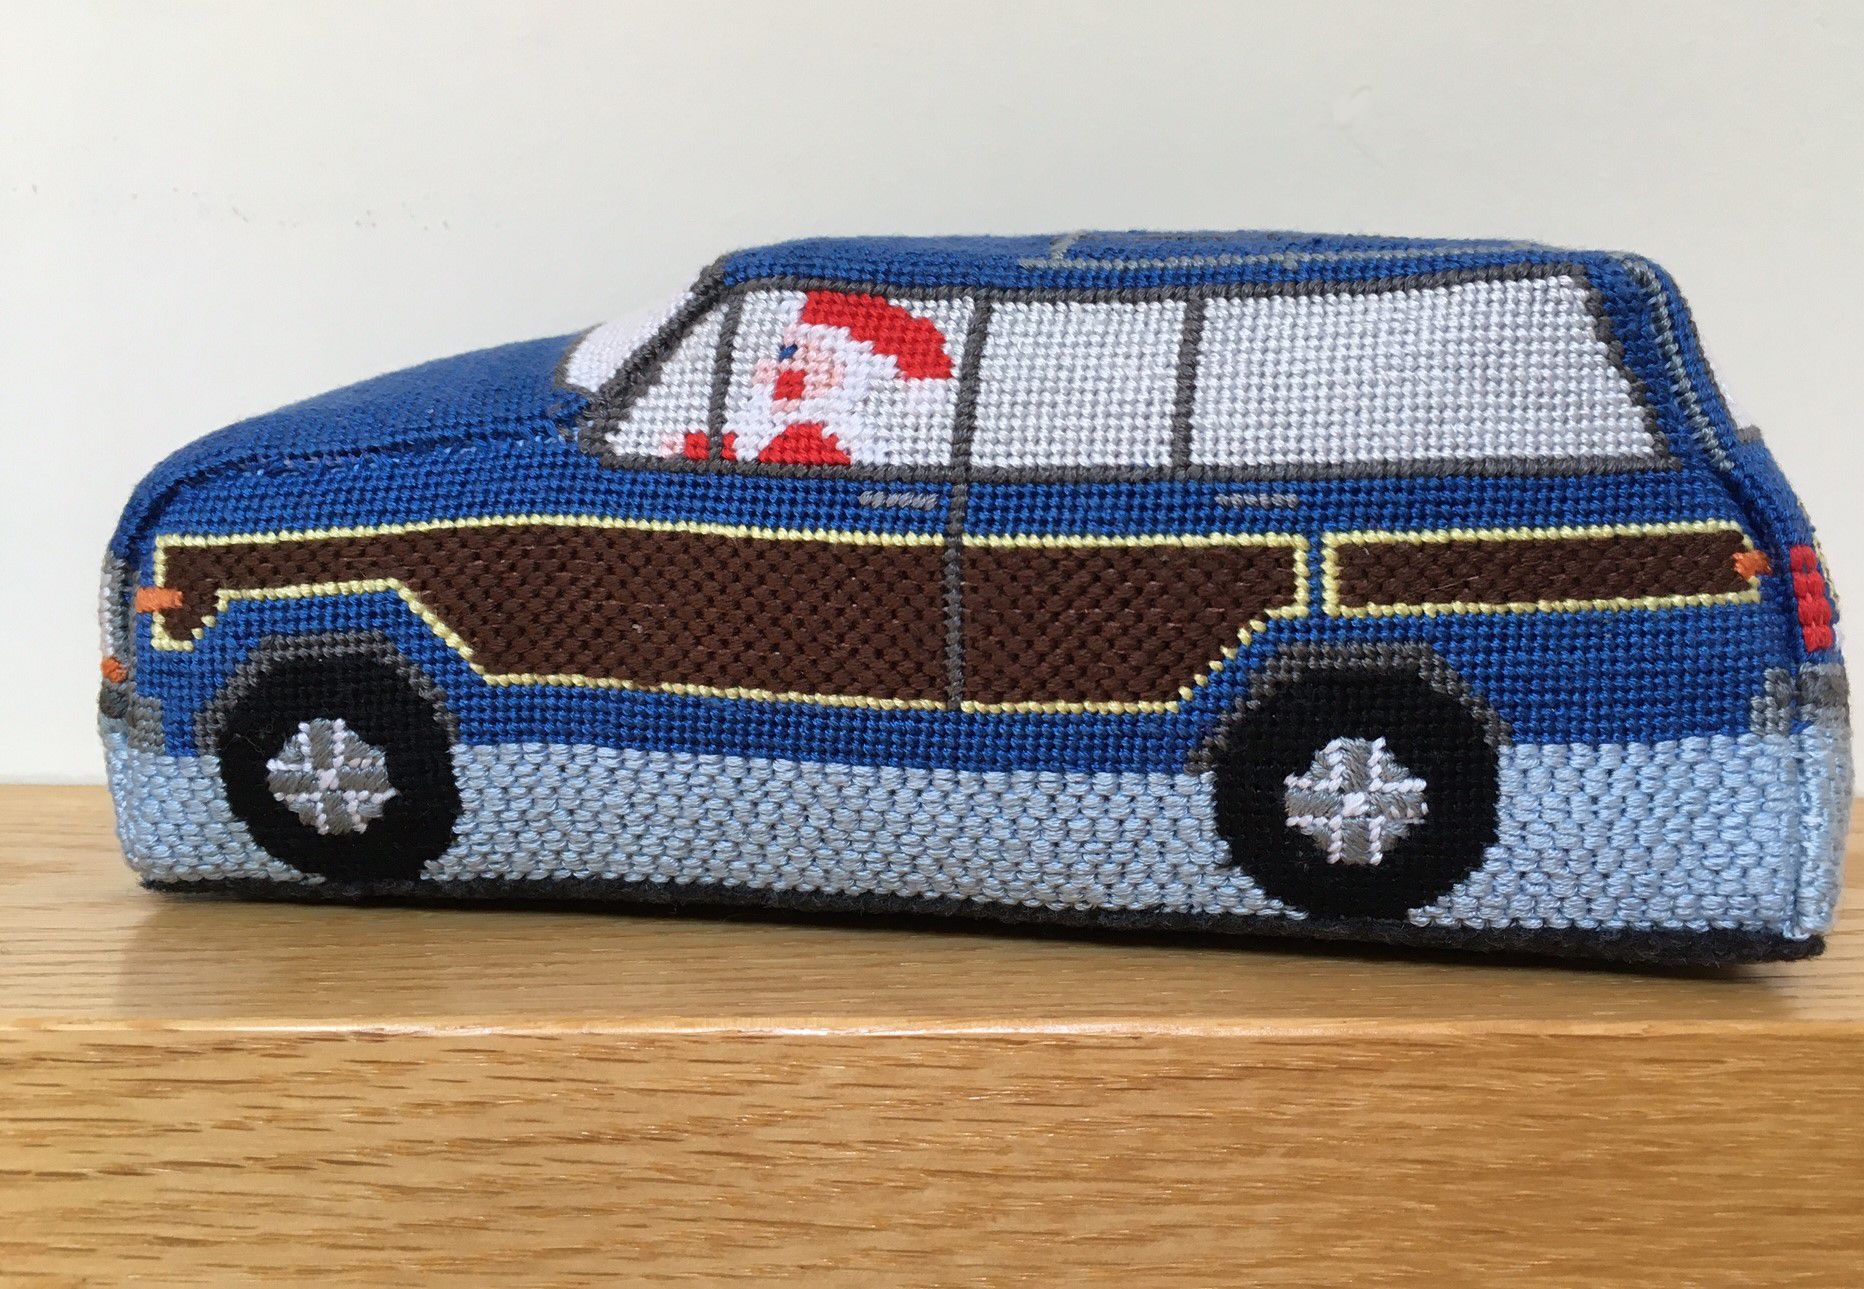
The Treasure Trees grew from my desire to add something to my Christmas gingerbread house display. I already had Santa’s New Ride, but the mantel had more room. Now we have three dimensional needlepoint kits, featuring our Small Treasure Trees in and Large Treasure Trees!

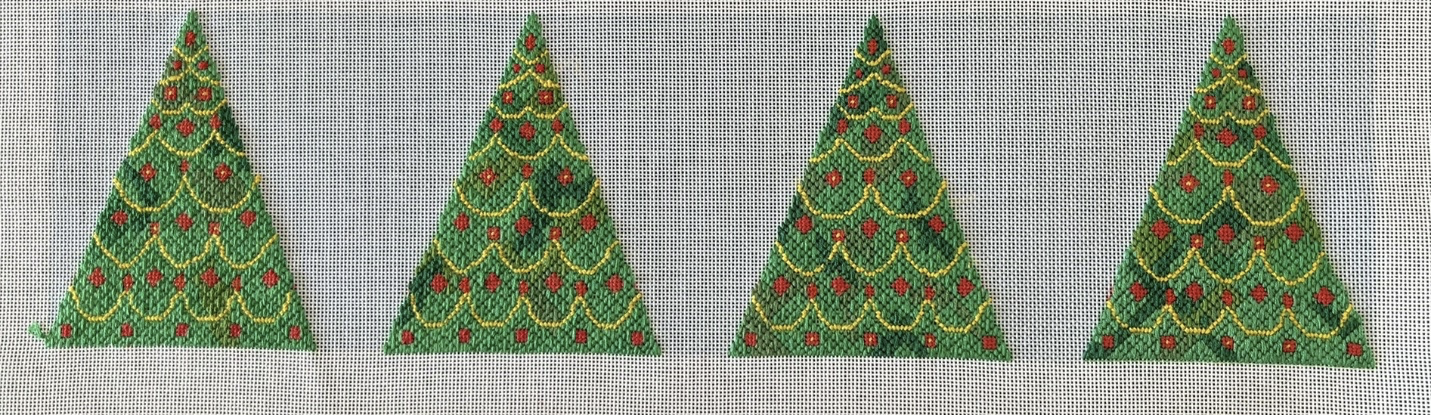
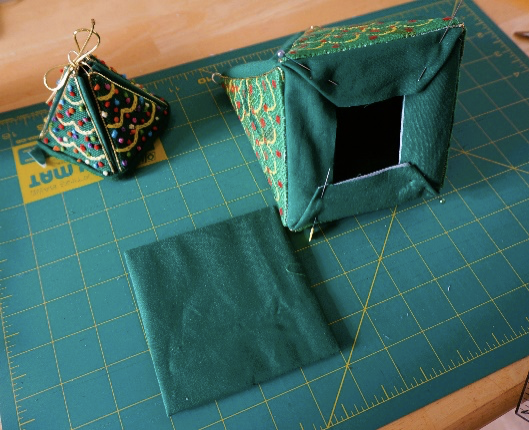
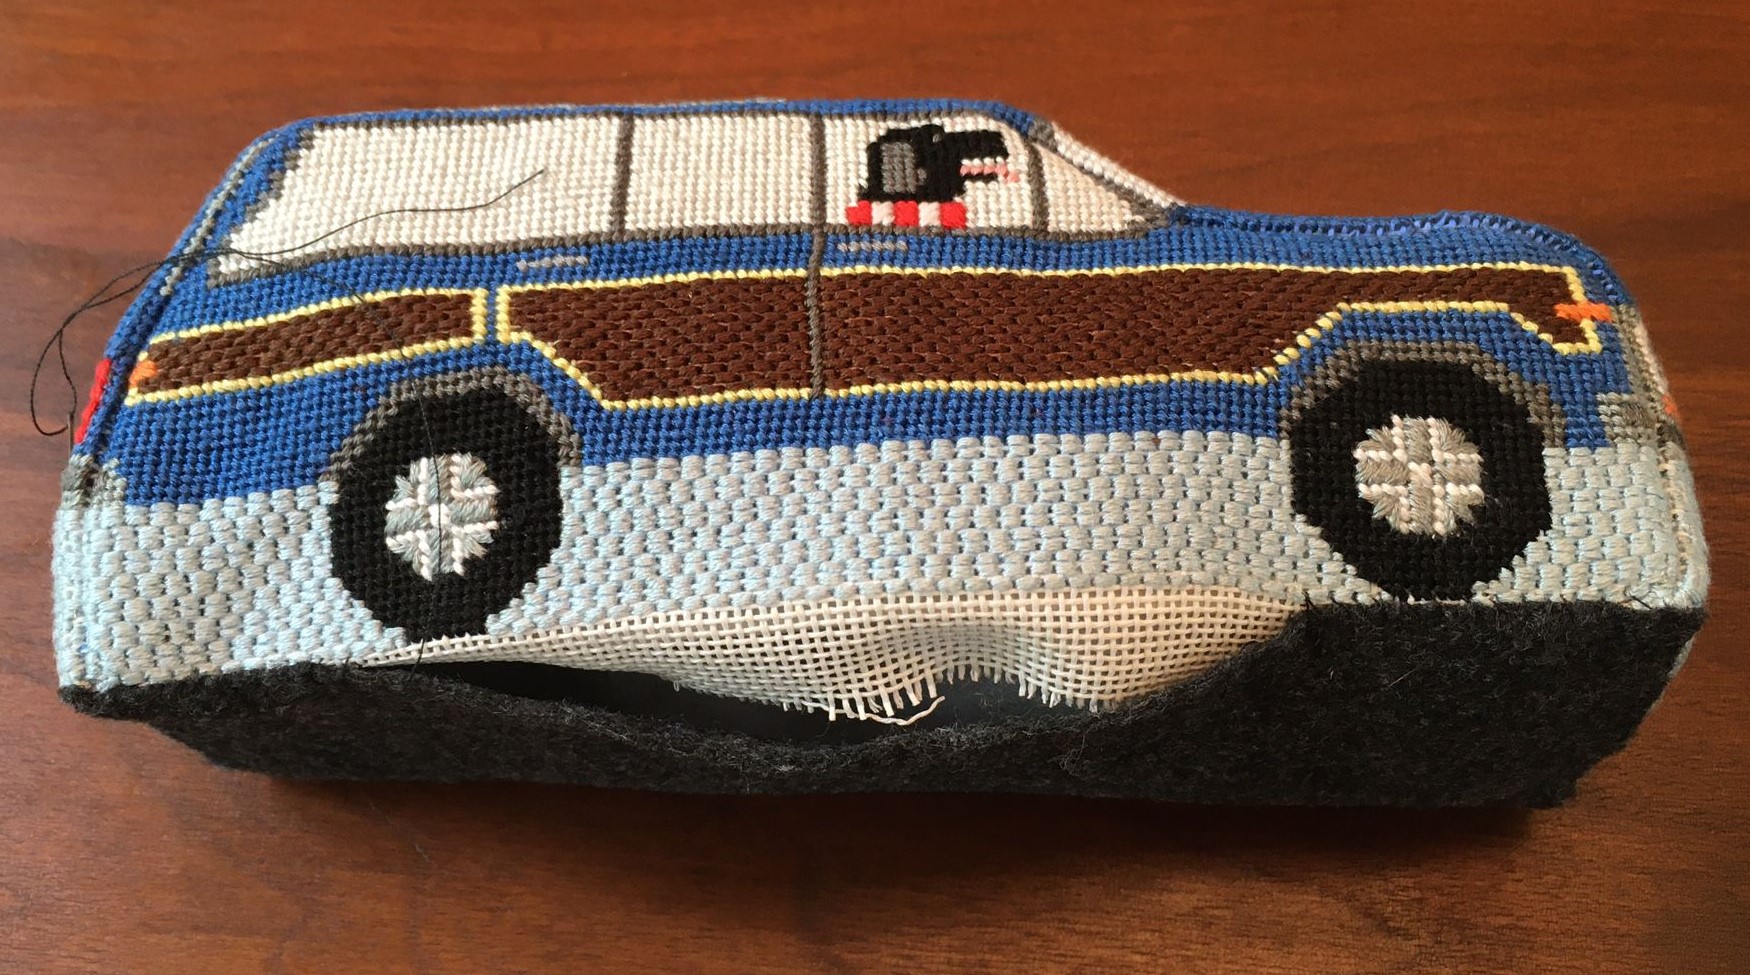
Trees are created using 4 needlepoint isosceles triangles that form a pyramid. A tree could be assembled by sewing the sides of the triangles together and filling with polyester stuffing in a manner similar to the construction of Santa’s New Ride, but I wanted the trees to be like the Gingerbread house, something that opened and could contain Christmas surprises – Treasure Trees.

Elements for assembly are:

  • Lightweight cardboard to keep the tree rigid – 4 triangles to match the needlepointed canvases and a square the size of the base of a triangle.
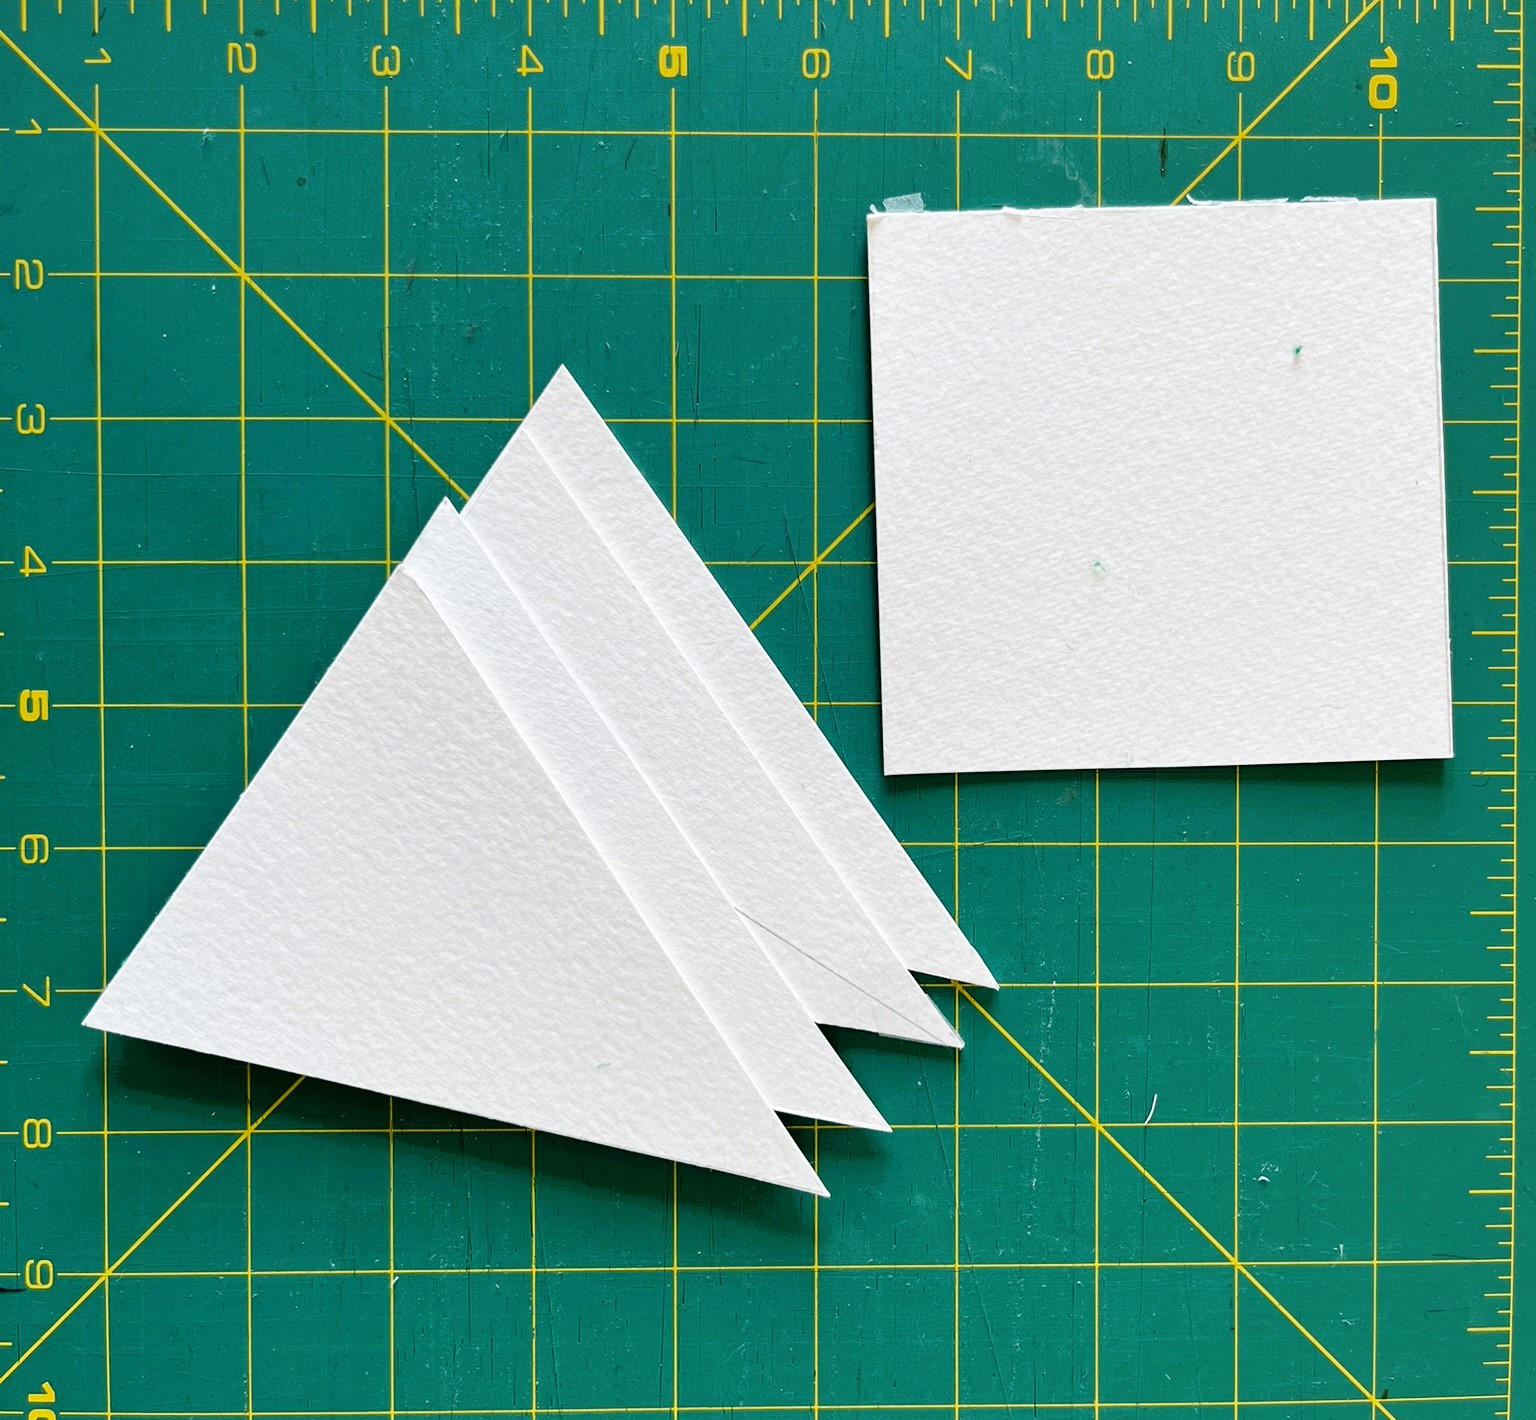
  • Lightweight cotton fabric: one piece (the lining) twice the height of the triangles plus 2 inches and 4 times the base of the triangle plus 2 inches and a second 1-1/2 inch larger than the cardboard square.
  • Felt or cork square the same sizes as the cardboard square for the base of the tree.
  • 4 rings and cording for the trim and tie.

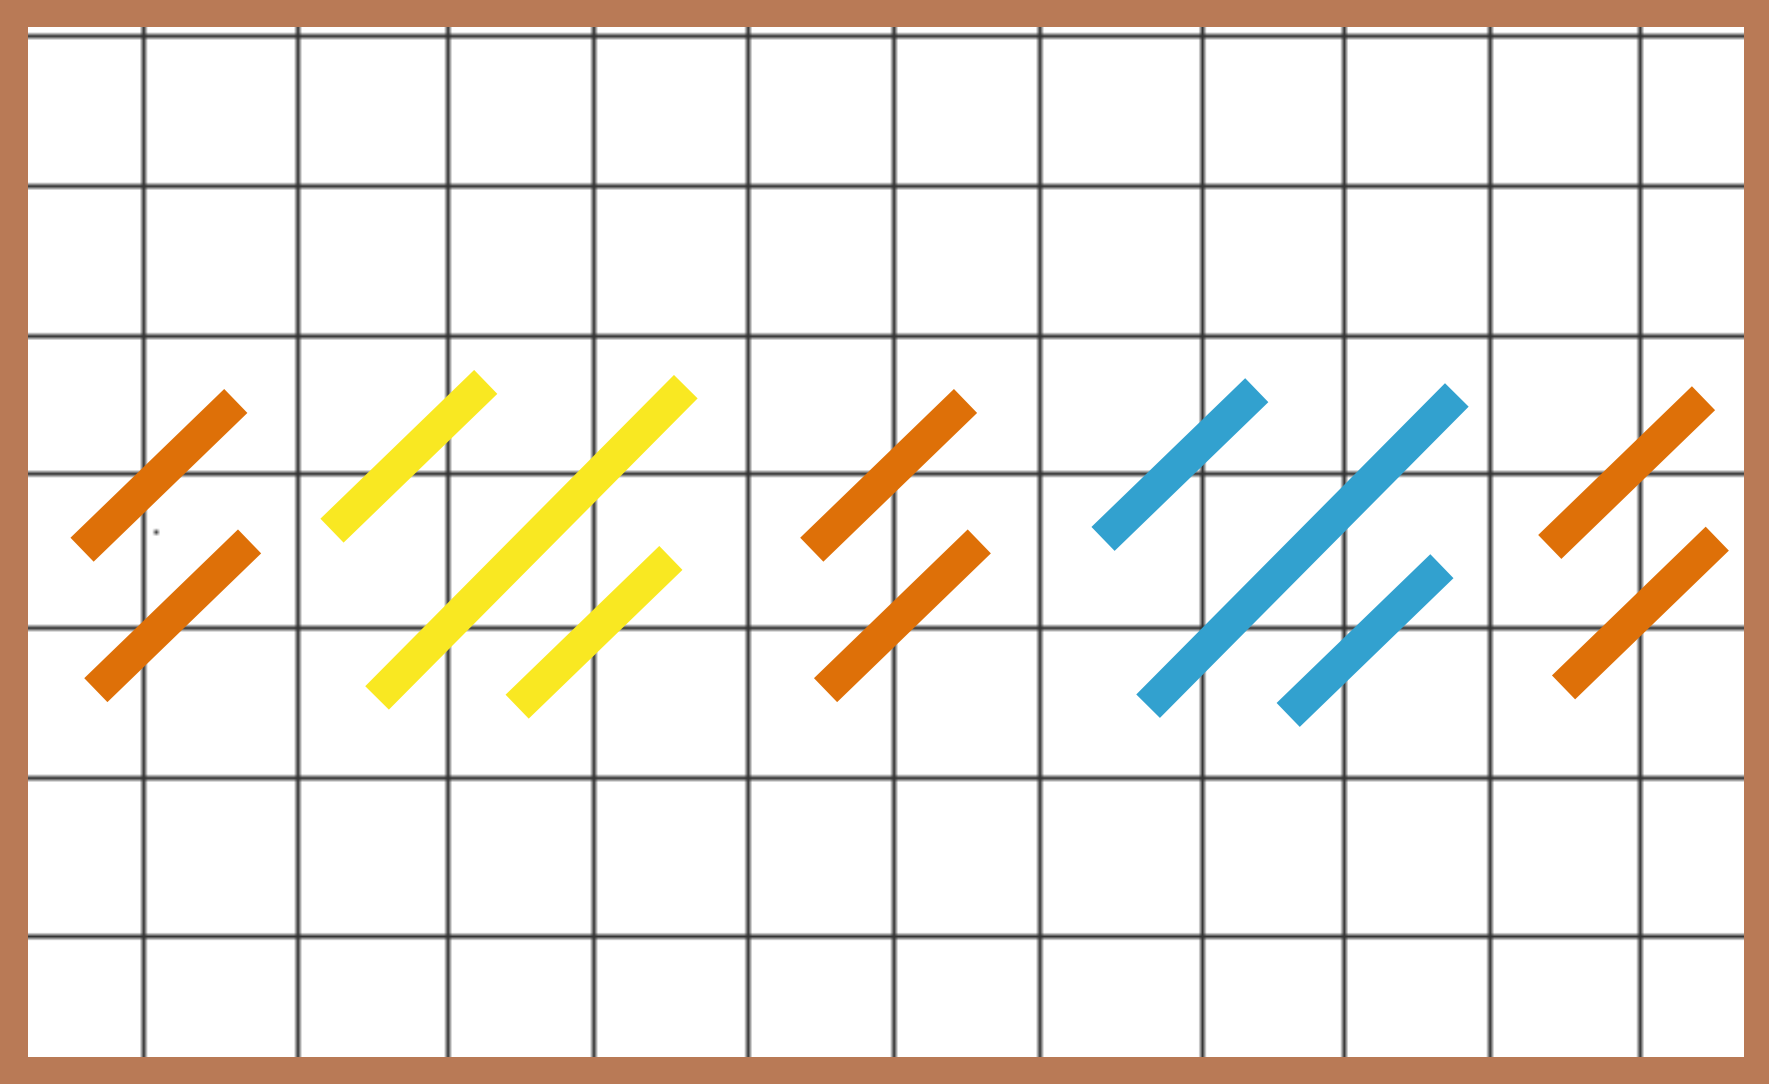
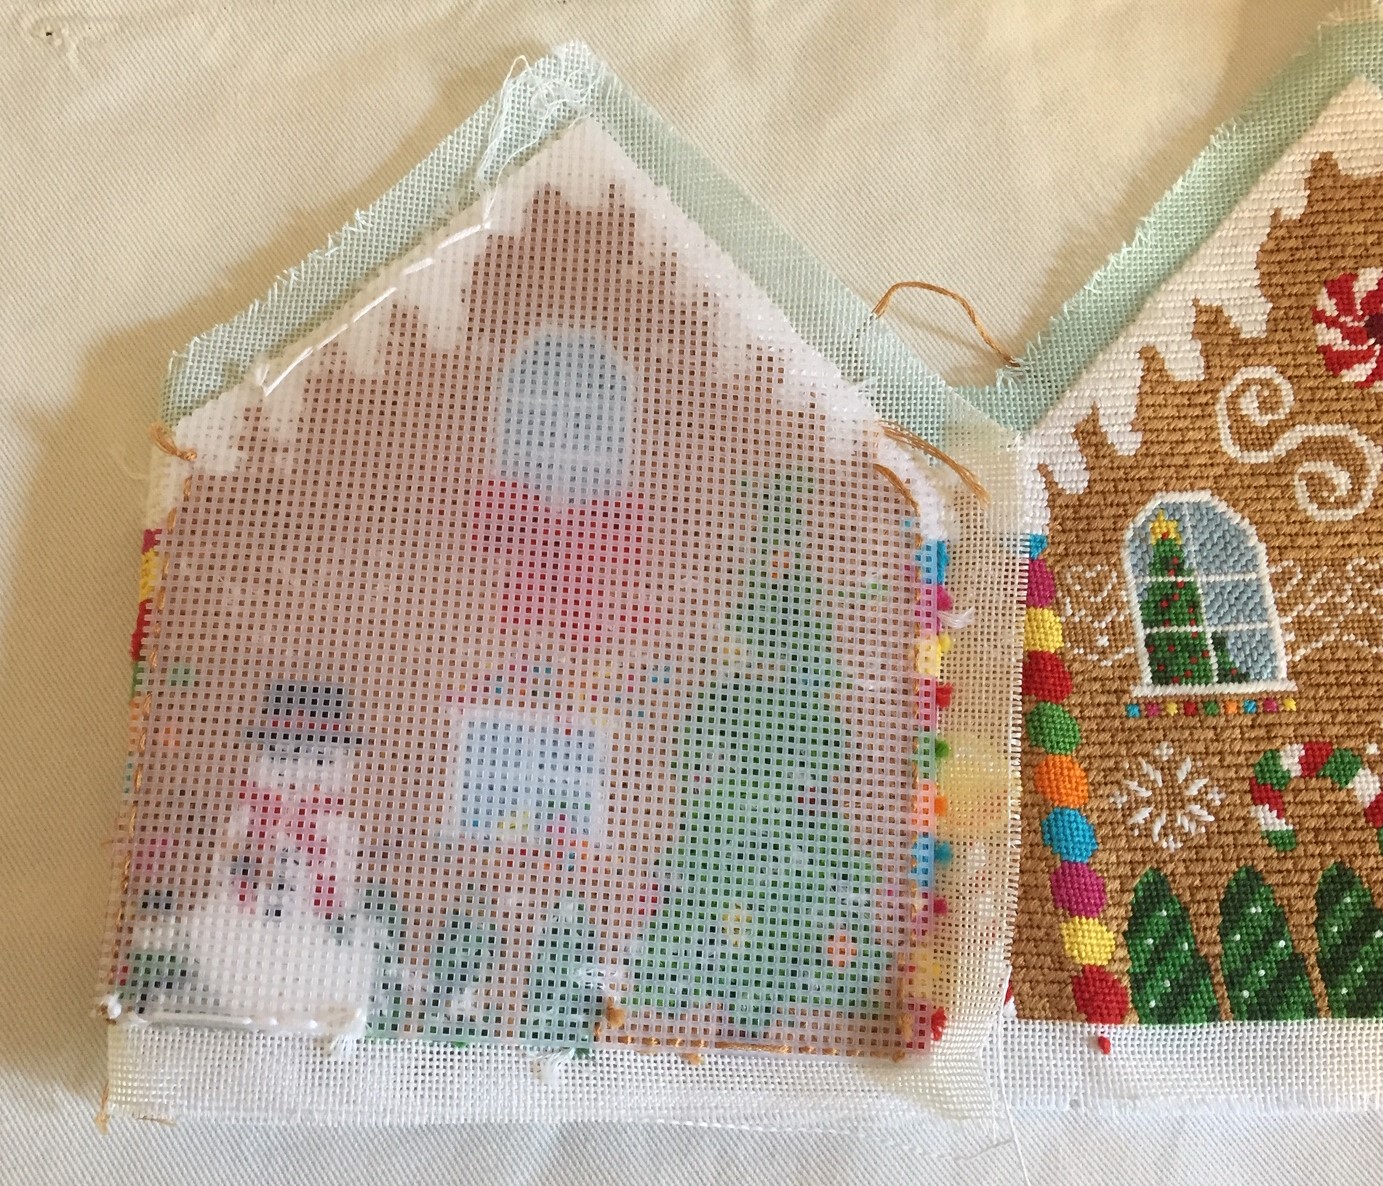
Trim the tree triangle leaving 3/8-inch edge which are turned under and steamed in place. Points will require additional trimming so that blank canvas is not visible. Fold the cotton lining piece in half along the length and press. Open the lining flat. Working from the center, position the tree on the lower half of the lining with tops at the fold crease. The bases of the trees should not overlap. Allow space for the cording trim as well. 

Sew by hand or machine the cording and trees in place through only one layer of the lining. Fold the lining to sew the edges together, making sure the bases of the two outer tree triangles match. Trim the seam to ¼ inch and press open. There will be a tube. Turn over the half tube that does have the triangles so that the raw edges match. Trees will be inside with their tips with slip rings reaching above the fold. 

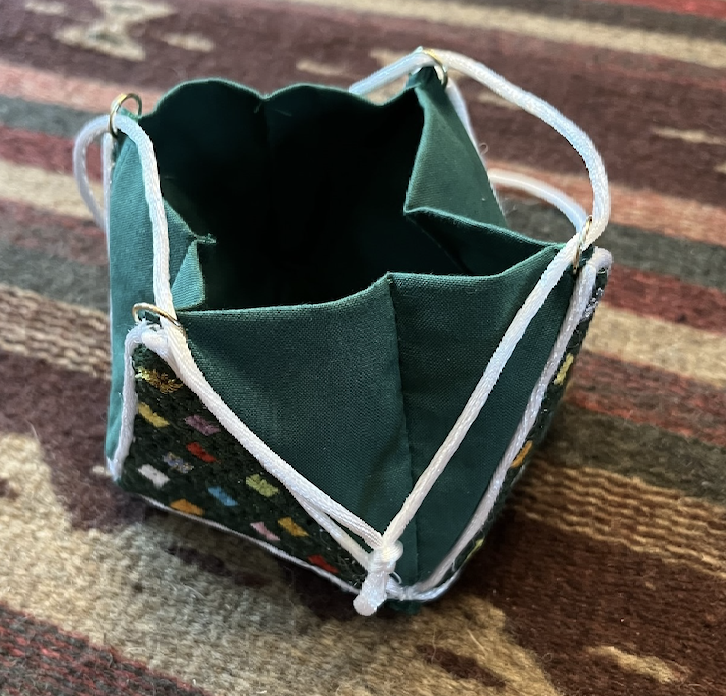
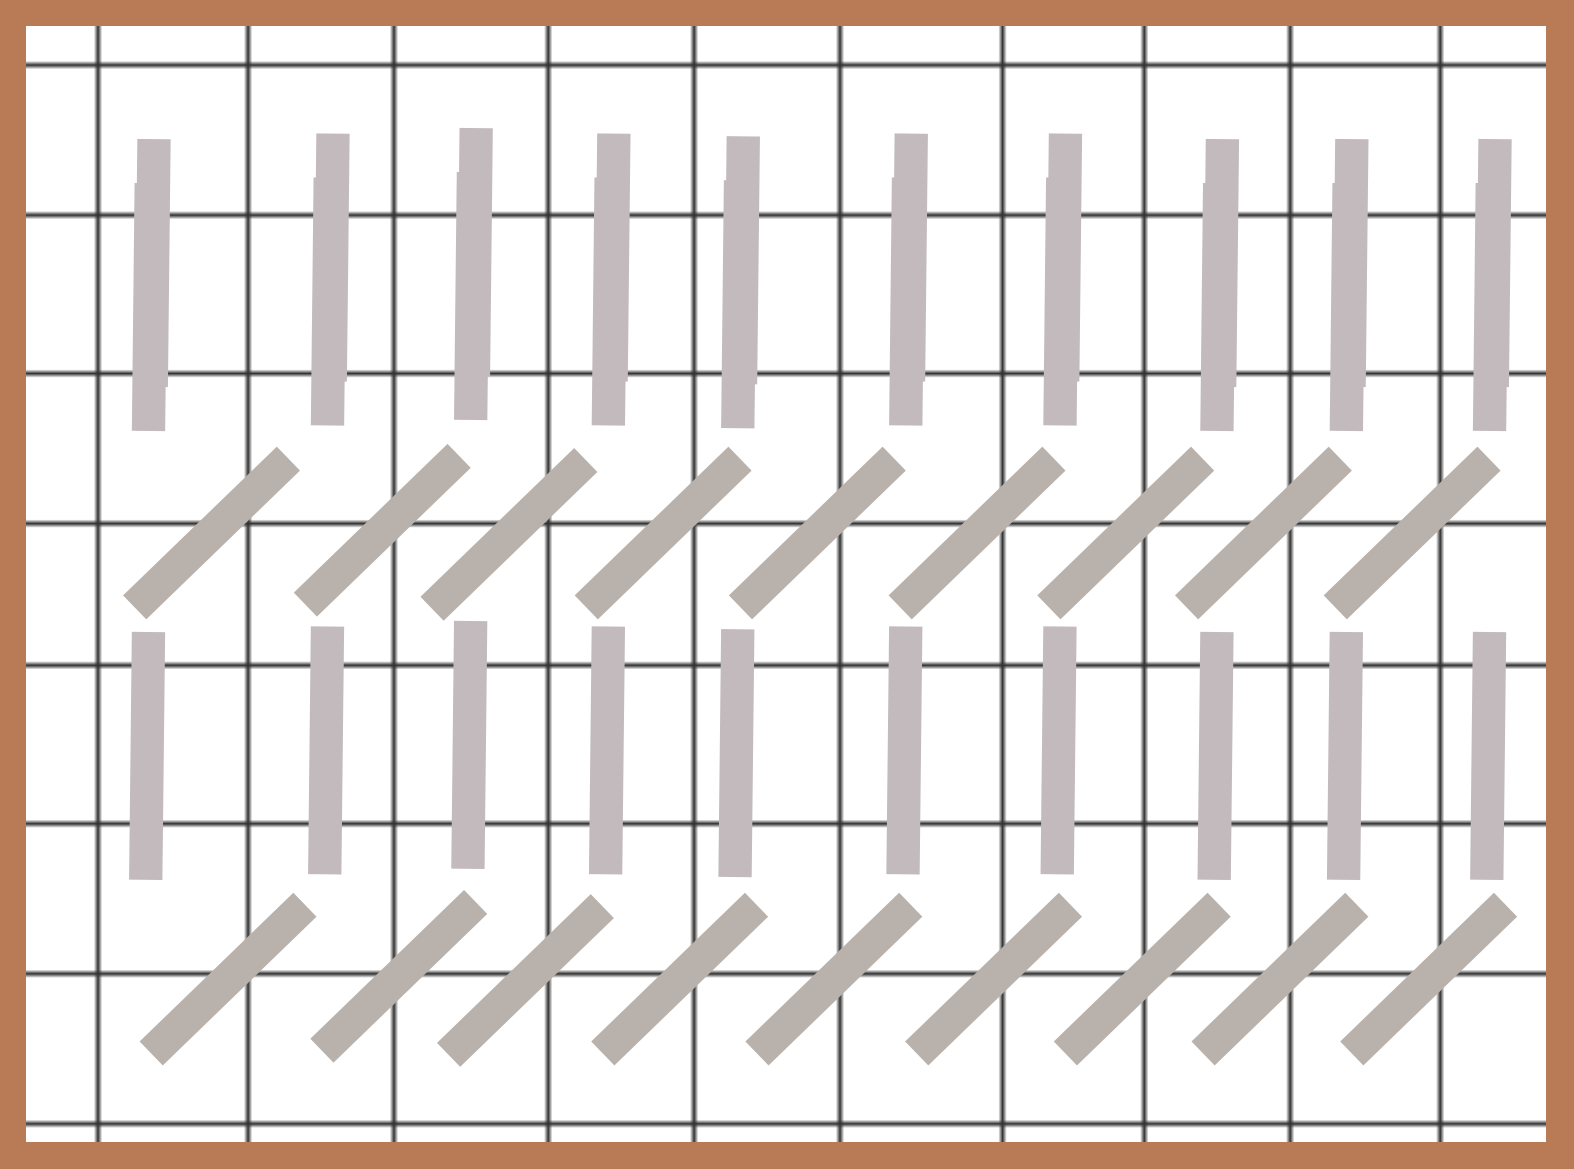
Top view of edge stitching

Cover the cardboard square with cotton square gluing or lacing the raw edges on the backside. This will be the inside base of the tree. Miter folds at the base of triangles to form a box and whip stitch. Insert the covered cardboard square. Glue a square of felt or cork to the base of the tree and string cord through rings. 

Your Treasure Tree is done!

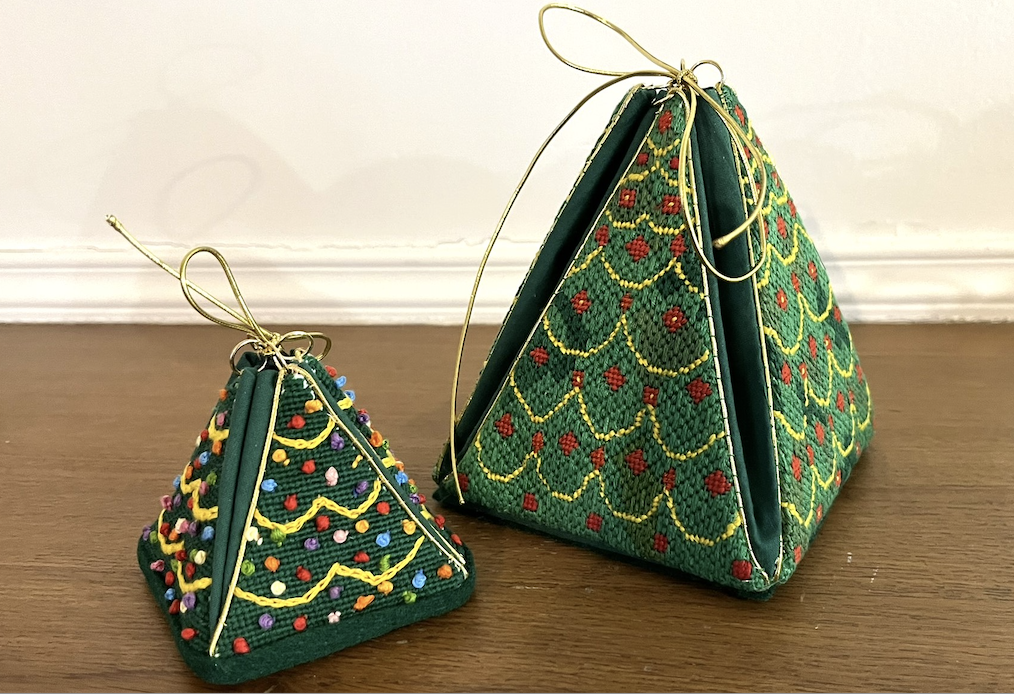
Treasure Trees can come in any size. Shown in the photos here are the small 2-1/2 inch tree which could hold very special surprise and hang on the Christmas tree and a larger 5 inch tree is much more a mantle decoration and can hold surprises and/or candy treats.

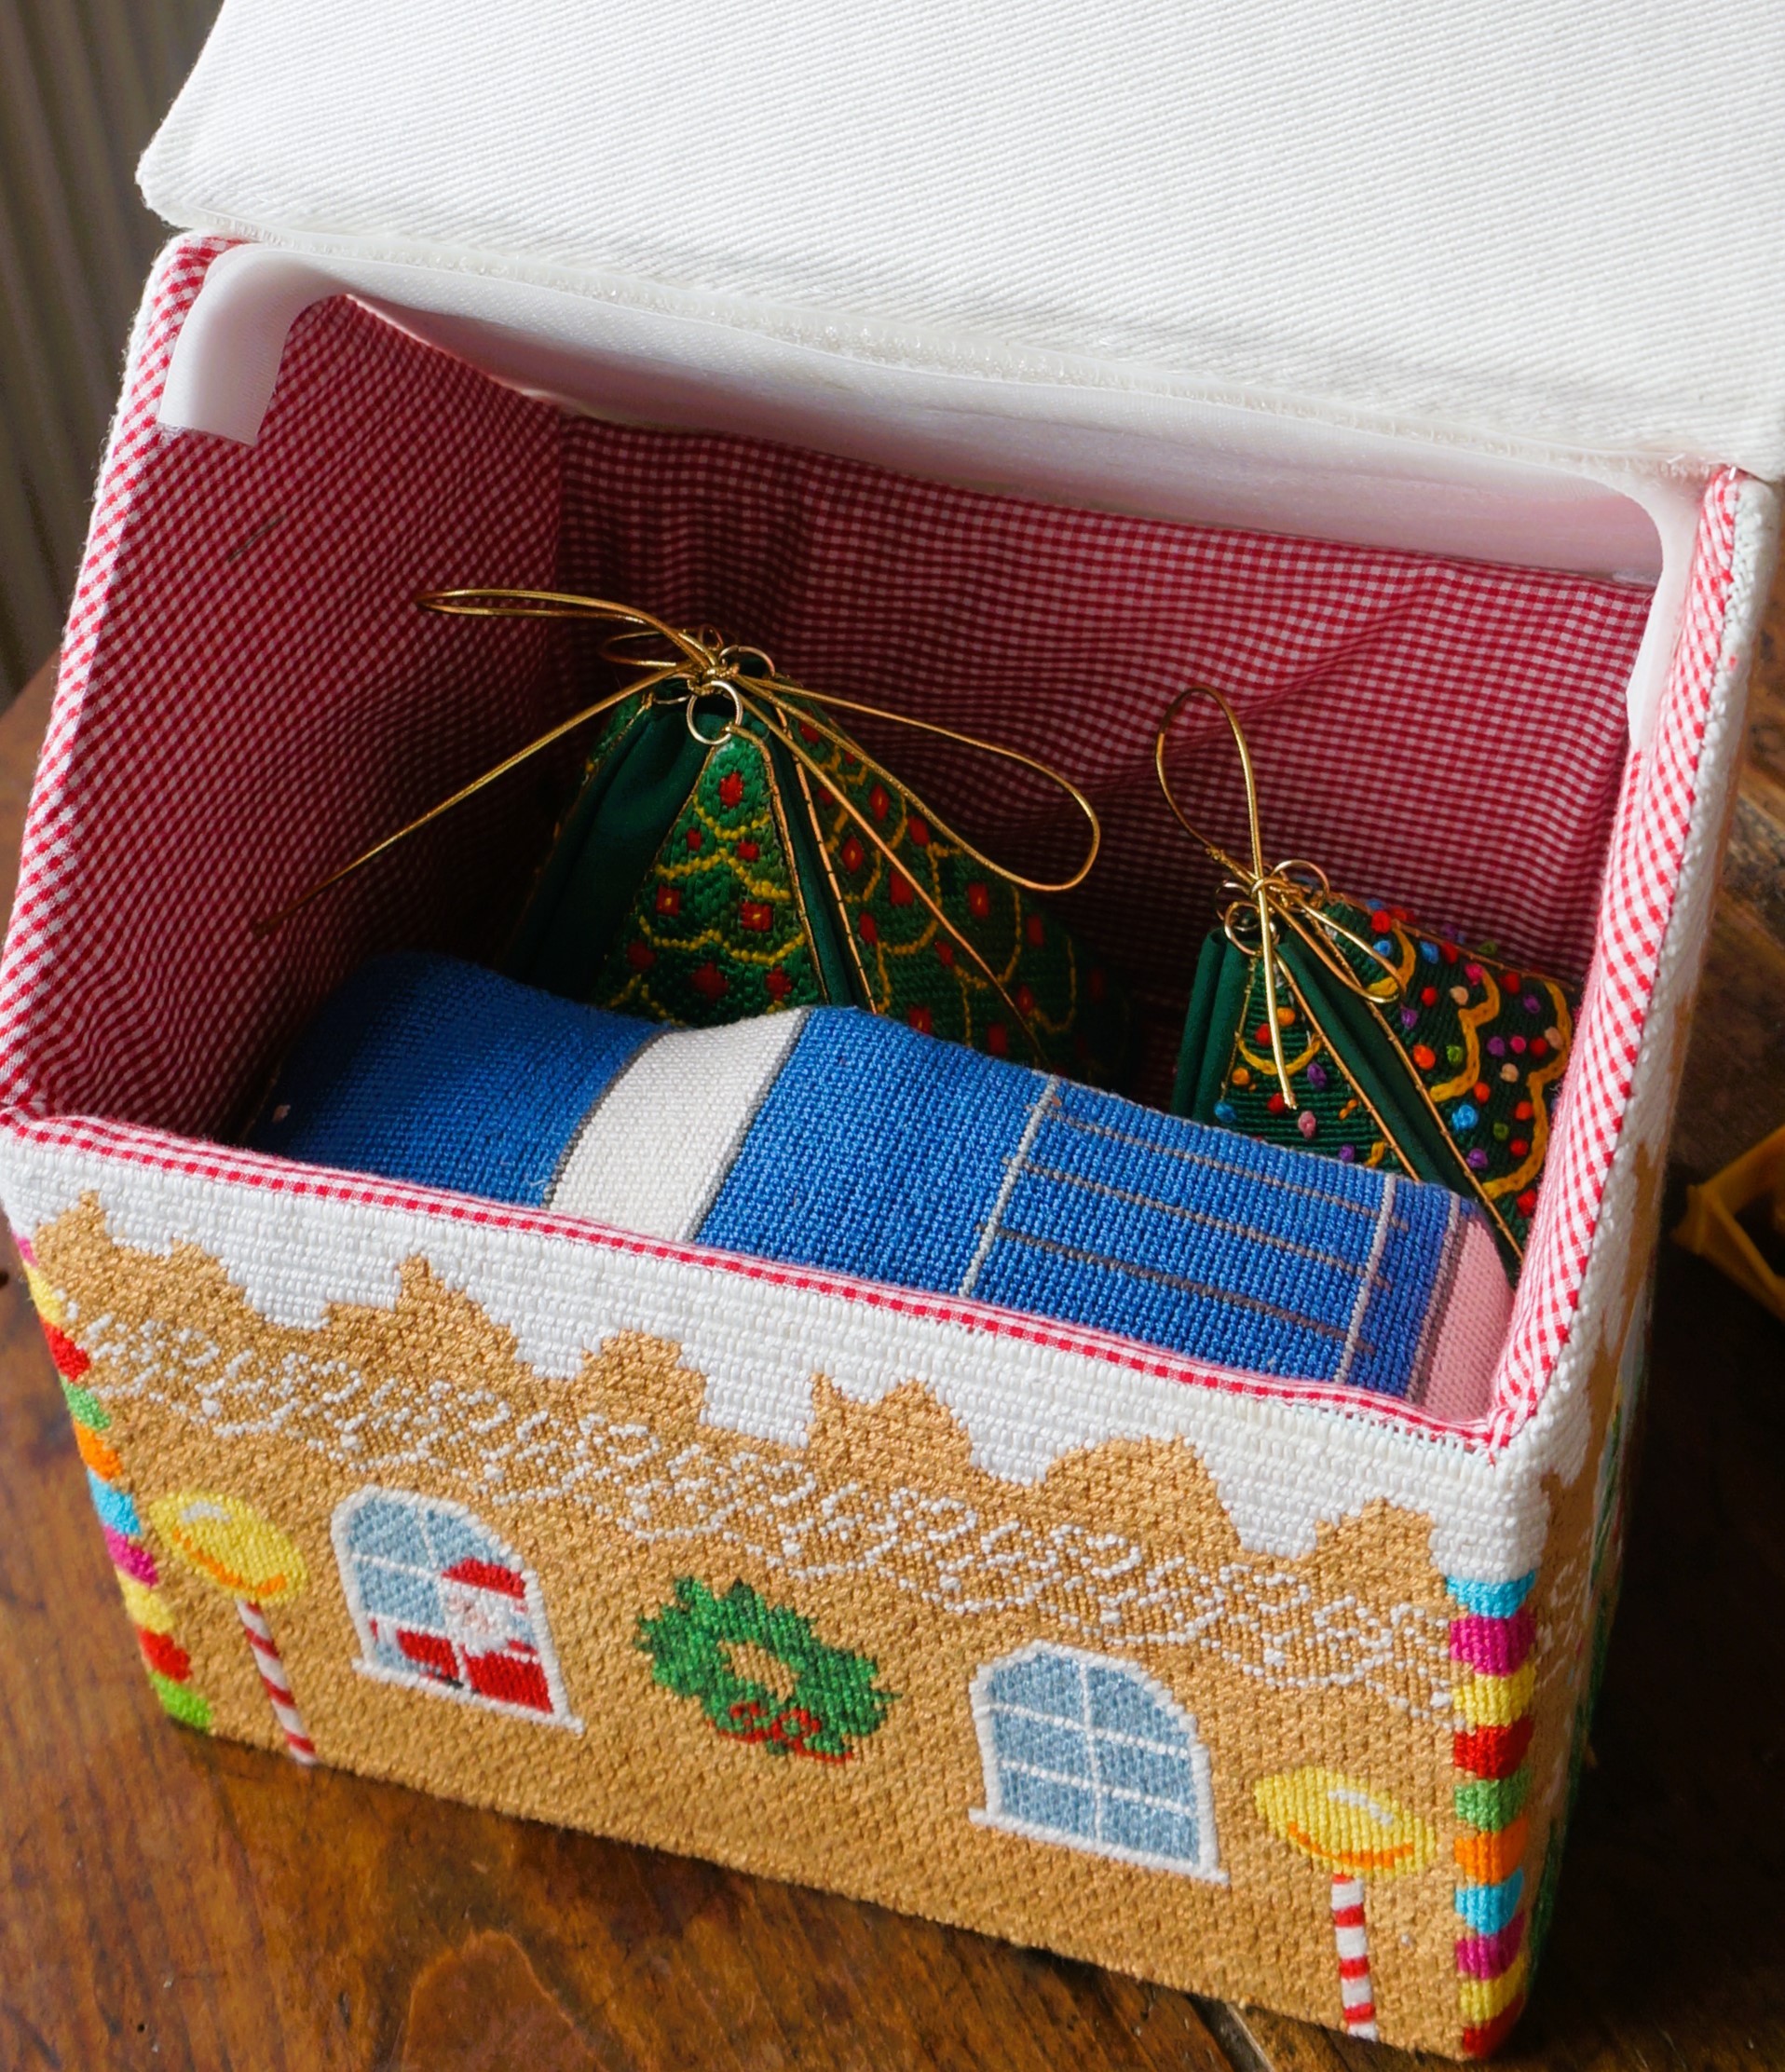
When Christmas is over, they can stack together like nested Russian doll or hop into the Gingerbread house with Santa for safe keeping.

Stitch something unique this holiday season!

A Sweet New Gingerbread House Needlepoint Kit!

Written by Peggy Bond

I had never baked a Gingerbread House nor did I want to. But then I got inspired by Santa’s New Ride needlepoint car canvas. Why not make a needlepoint Gingerbread House that has a roof that opens for the wrapped candies and treats that can be eaten? NeedlePaint’s designer Krystal Duffy designed the canvas and the house became a reality.

Gingerbread House Dimensional Needlepoint Kit Two
(available with an attached or detached roof)

The house is 8 x 6 ¾  x 9 inches, a scale that matches Santa’s needlepoint car, and I used a variety of stitches for the project. A staggered, elongated, horizontal cashmere stitch for the gingerbread gives the house the appearance of being made of bricks. 

Stitch Detail

Elongated Cashmere Bricks

Mosaic Window Trim

Continental – Gobelin Snow

The snow alternating rows of the continental stitch and straight Gobelin worked over 2 strands. Window frames are the slanted 2 x 2 Gobelin over 2 strands and dots above and the below the windows are the mosaic stitch. he windows are a staggered strait Gobelin over 2 stitched. There are lots of places to try new and different stitches. It was fun! 

As I stitched along, my mind worried away at “how are you going to put this all together”? Sure, it was going to a rectangular house with a roof with overhangs. How was it going to be stabilized since I wasn’t going to stuff it. (Stuffing the Gingerbread House is certainly an option.)

Initially, I cut plastic needlepoint canvas 1/8″ smaller than each side and the roofs, and stitched them to the canvas. The house could stand on its own but it wasn’t going to be rigid enough to be a container. 

Plastic Canvas Backings

While browsing through a crafter’s catalog, I found 8-inch square boxes which could be cutdown to make a 8 x 6 ¾ inch rectangle. This would give the base a solid frame and the sides could be cut down to size and shaped for the roof.  It worked! Below is a mock up of the box frame. The final was glued and the peak supports were cut from acid-free art board.

Mock up of House Frame

The base of the house is lined with a lightweight cotton fabric. Lining is sewn as shown below along only the upper edge of the stitching. The two roof segments are lined with a sturdier white fabric, leaving the top of each segment open to be sewn together later. (I probably could have used a lighter weight fabric but thought that extra weight would make a better hinge for the roof.) Turning the lining was not easy with the canvas backed by the plastic canvas, but the results were better than I had expected. There was one seam to stitch along the side of the base and it could be slipped onto the box frame. Acid-free art board was cut fit inside roofing pieces.

Also, piece of acid-free art board cut to the inside dimensions of the box is covered with the lining material and slid down to hold the lining of the sides in place.

The lined roof is stitched together at its peak with the back sides together, and the outside seam trimmed and covered with a bias strip. Self-adhesive Velcro dots along the sides and a strip at the peak affix one side of the roof and a button-ribbon tab is sewn to the opening-side of the roof.

There are certainly other ways to assemble the house. My granddaughters are all eyeing the Gingerbread House and maybe I will have to make more so please let me know if anyone has assembly suggestions.

We would love to help with all of your needlepoint needs.
Please contact us with any questions that you may have at:
info@needlepaint.com

  Stitch a little something sweet for the holidays!

New 3-Dimensional Needlepoint Kits!

Written by Peggy Bond

Santa Claus is Coming To Town And He Has New Wheels!
Santa’s reindeer refused to work in the summer heat, so Santa Claus had to find new wheels. NeedlePaint came to his rescue with their newly designed 3-D needlepoint station wagon, stitched on 18 mesh canvas with DMC thread. After Santa is done using it for warm weather transport, it will make an unforgettable stocking stuffer toy or Christmas mantle decoration.

Stitched car canvas: 
The main body of the car and window were stitched with only four strands of the DMC thread, so that it will be less bulky to sew together. Santa, his dog, and the remainder of the car were stitched with all six strands of the DMC thread which makes them stand out from the background. The brick stitch is used for the wood panel on the car, and the double brick stitch is used for the light blue underbody of the car.

Inside-out: 
Finishing the car was a bit more challenging than finishing a brick door stop, because there was not a solid frame and the car has curves. I trimmed the canvas closer to the stitching, leaving at least a ¾ inch of blank canvas. Folding the stitched portion of the canvas with right sides together to join the hood and trunk to the sides, is a delicate operation requiring that the curves are the same for each side. It took me a couple of tries to get that right. The stitching was done with thread of the same color as the sections being joined. For example, the front window was joined with dark grey, the hood and side with blue, and the underbody with light blue. There were a lot of tiny stitches and knots!

Sew car inside-out:
To prepare the car form before stuffing, I pressed the seams open and tacked down the corners as shown.

Addition of Pellon stiffeners:
I inserted 3 pieces of heavyweight Pellon interfacing to give the car some rigidity. It is not necessary, but I found this gives the car sharper edges. More rigid inserts would give even sharper edges. It is a matter of taste!

Stuffing in progress:
I used heavy felt for the bottom of the car, similar to the finishing technique I used for the needlepoint brick covers. I stitch most of the bottom in place, leaving a four inch opening on one side before stuffing the car.

Stuffed and sewn up!
I gave Santa and the car another steaming to crispen up the edges of the roof and seams. He says that his new wheels and helpful dog will guarantee a Merry Christmas to All!

Santa’s New Ride Three Dimensional Needlepoint Kit

Red Truck Three Dimensional Needlepoint Kit

We would love to help you with all of your holiday decorations!
Please feel free to contact us with any questions you may have at: info@needlepaint.com

Stitch up some magic this holiday season!