A Sweet New Gingerbread House Needlepoint Kit!
Written by Peggy Bond
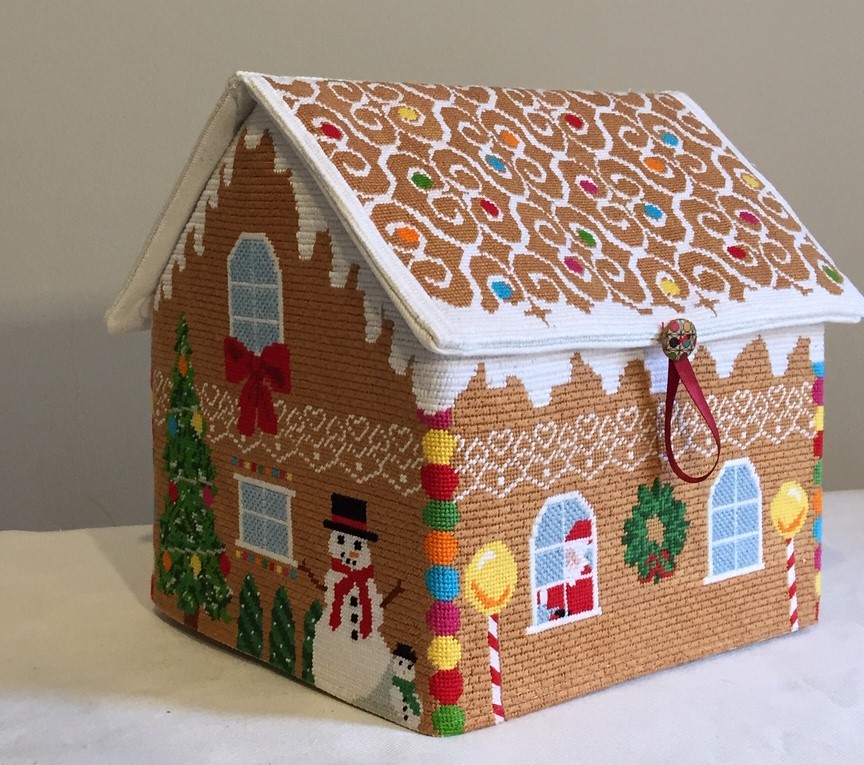
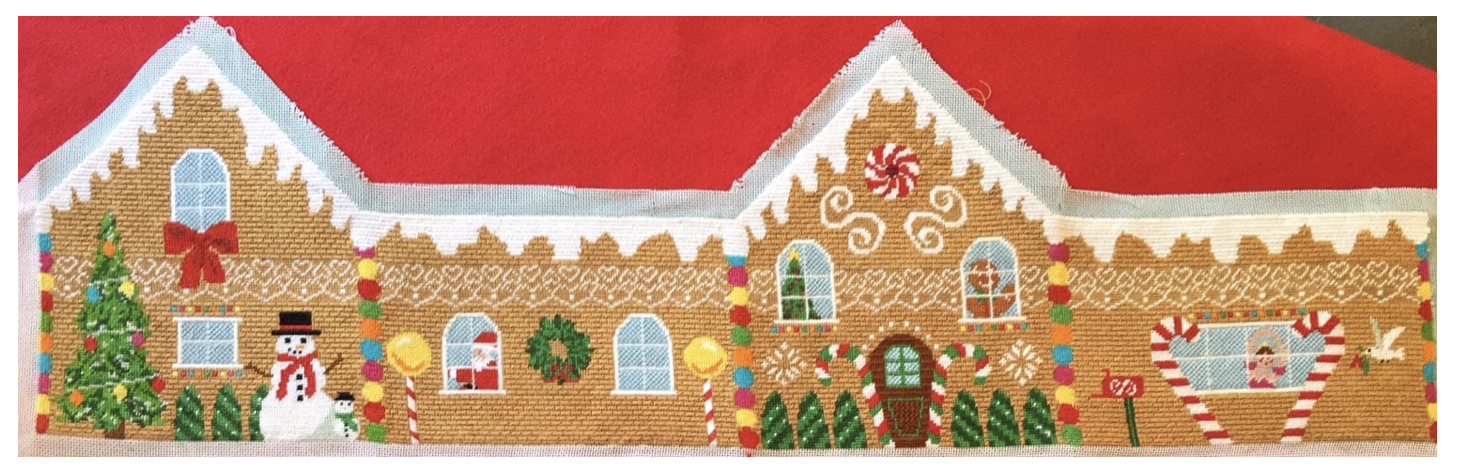
I had never baked a Gingerbread House nor did I want to. But then I got inspired by Santa’s New Ride needlepoint car canvas. Why not make a needlepoint Gingerbread House that has a roof that opens for the wrapped candies and treats that can be eaten? NeedlePaint’s designer Krystal Duffy designed the canvas and the house became a reality.
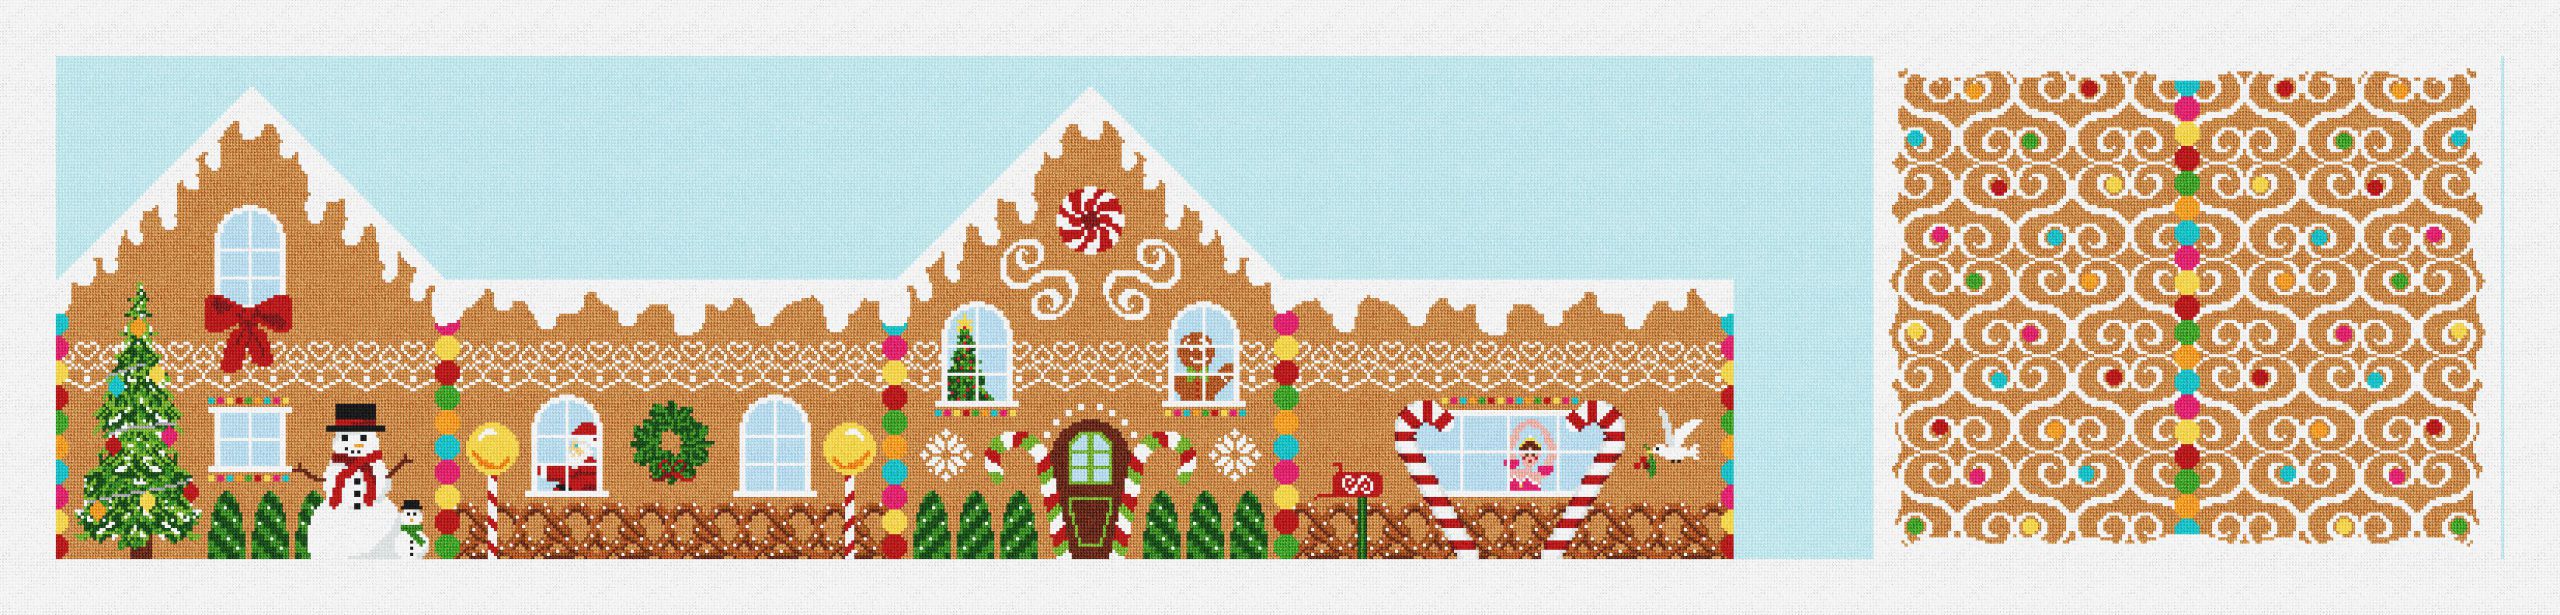
Gingerbread House Dimensional Needlepoint Kit Two
(available with an attached or detached roof)
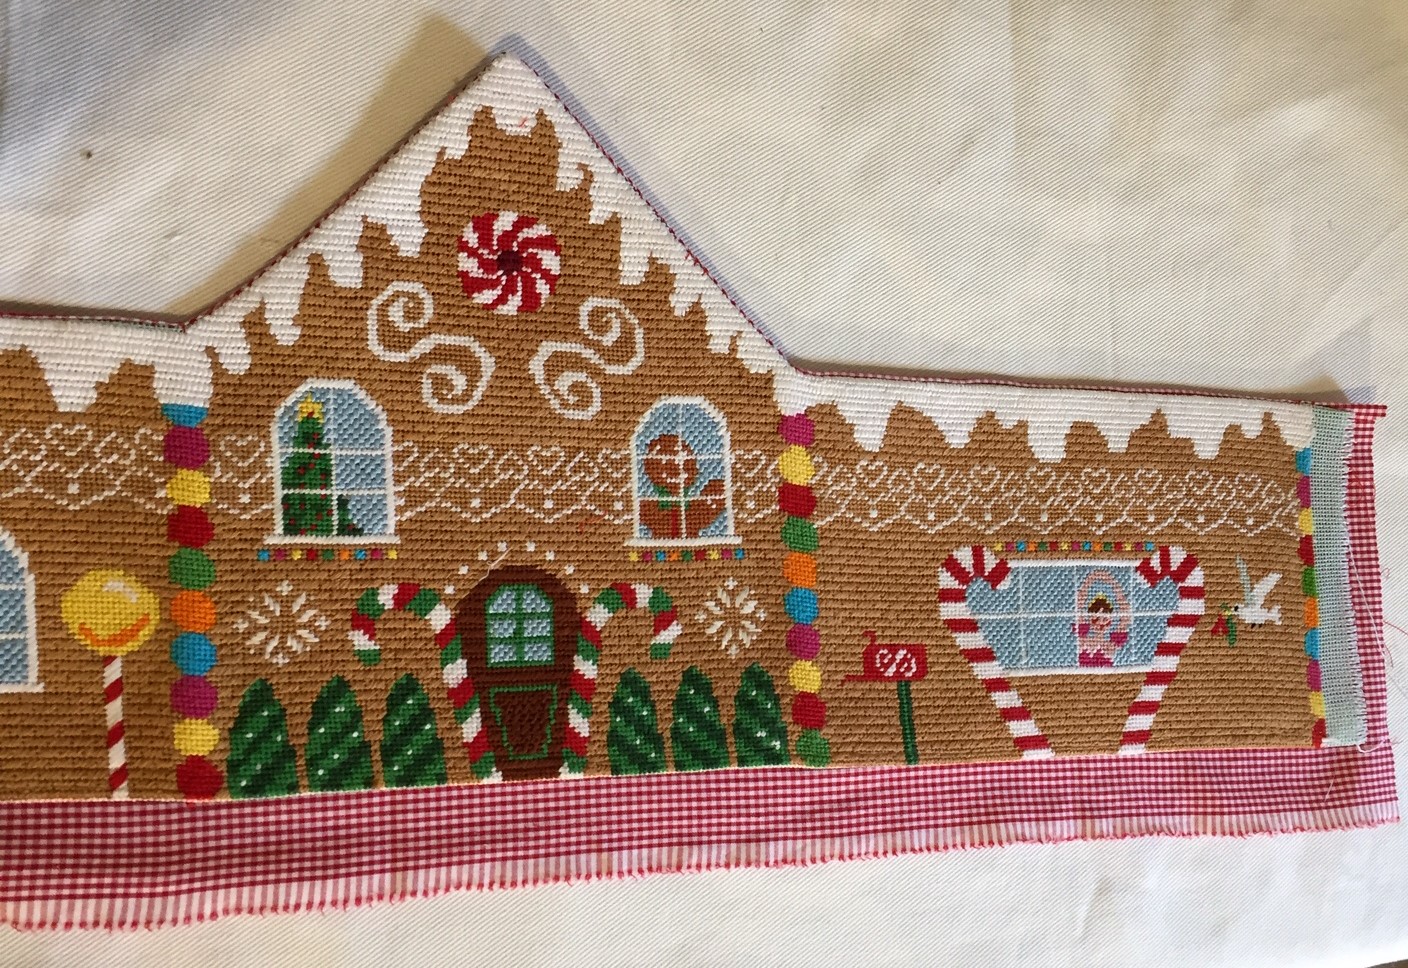
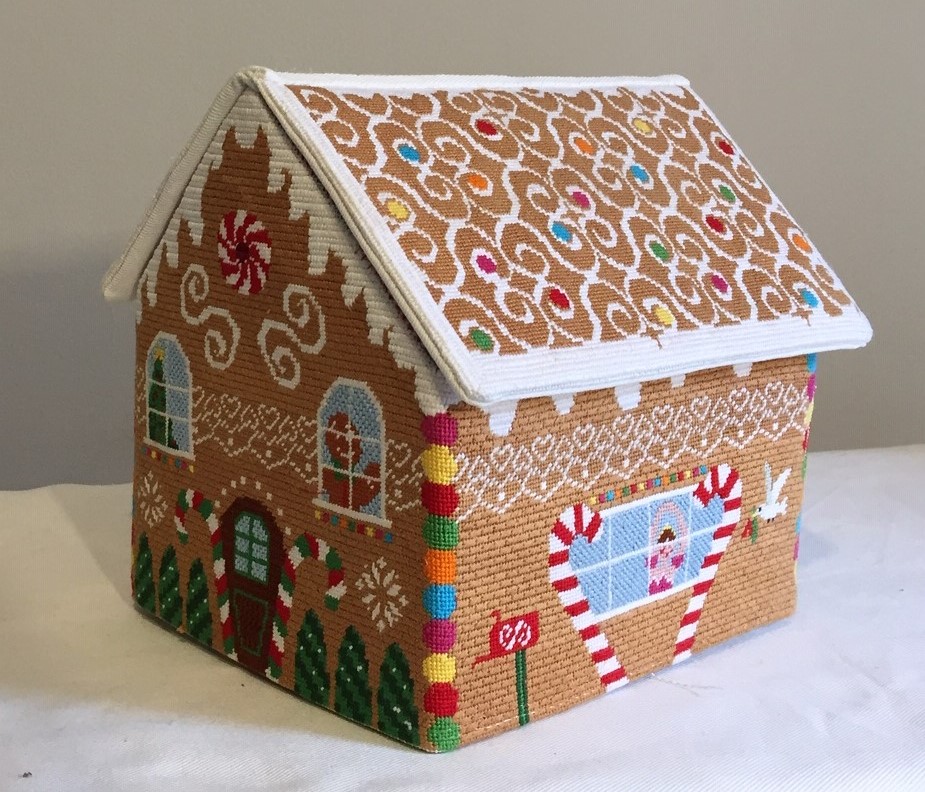
The house is 8 x 6 ¾ x 9 inches, a scale that matches Santa’s needlepoint car, and I used a variety of stitches for the project. A staggered, elongated, horizontal cashmere stitch for the gingerbread gives the house the appearance of being made of bricks.
Stitch Detail

Elongated Cashmere Bricks
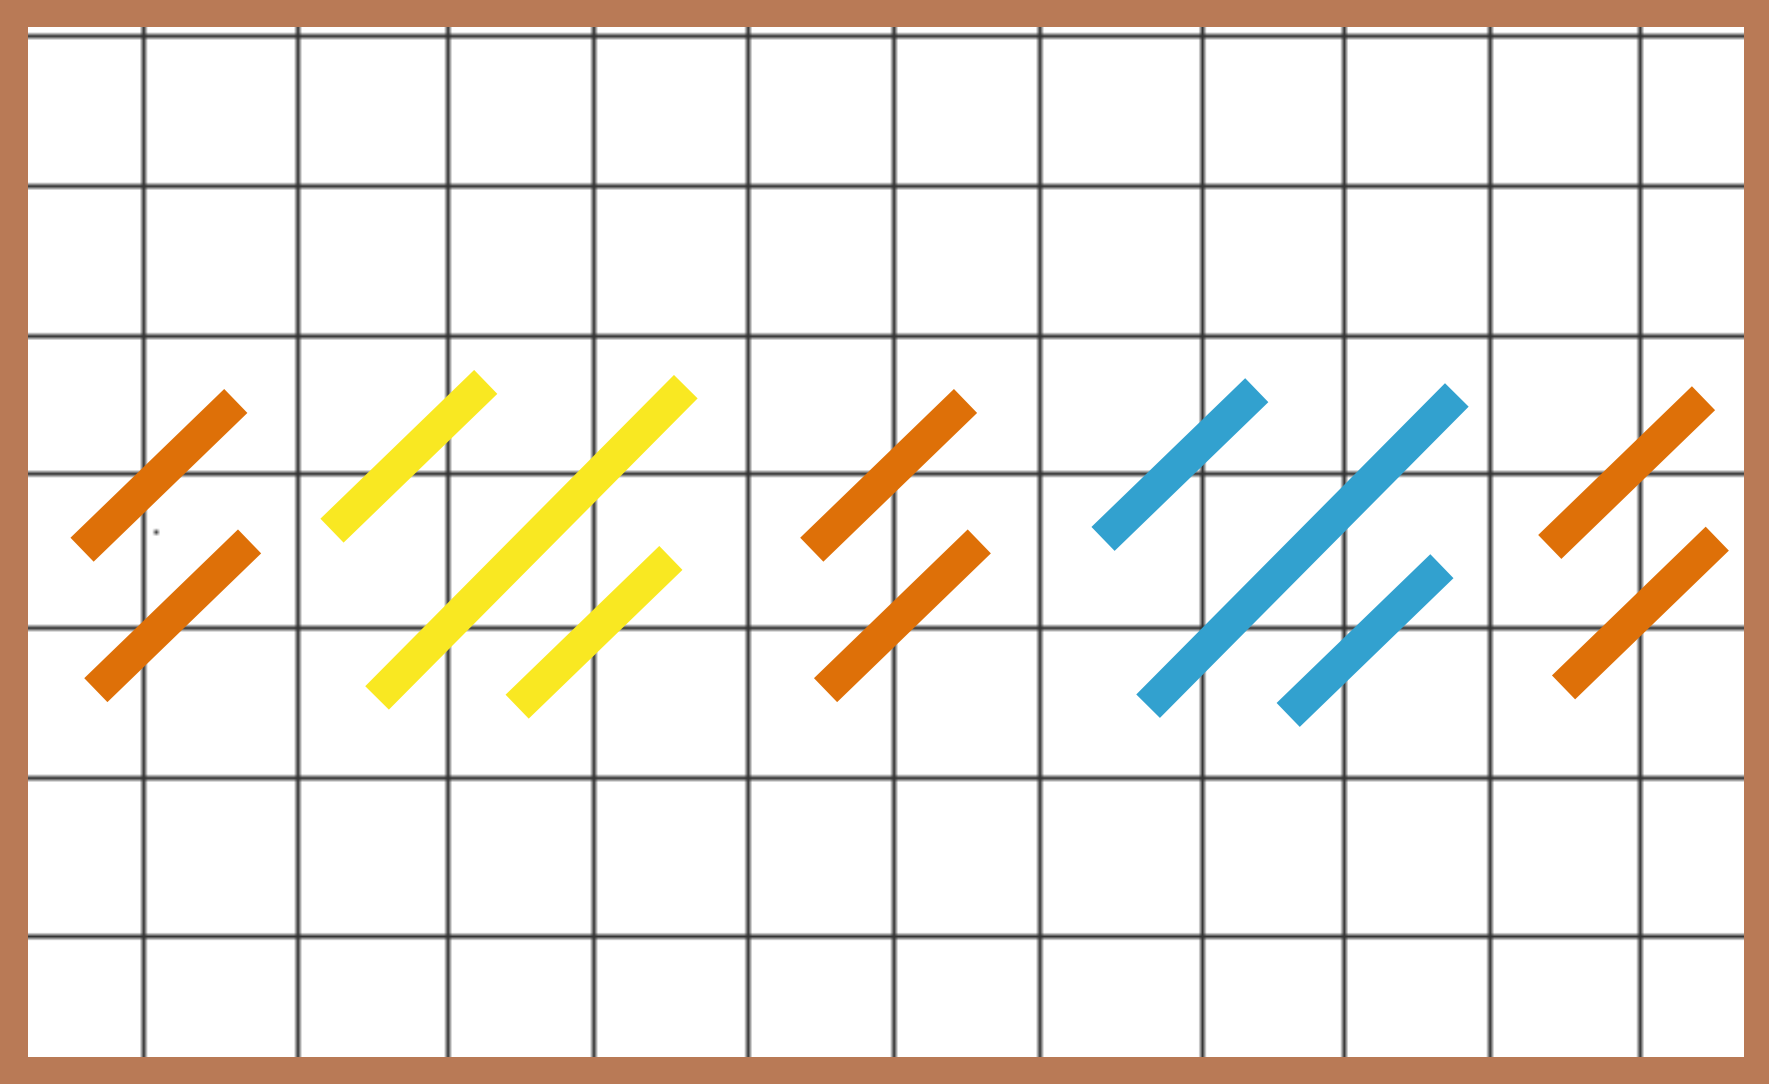
Mosaic Window Trim
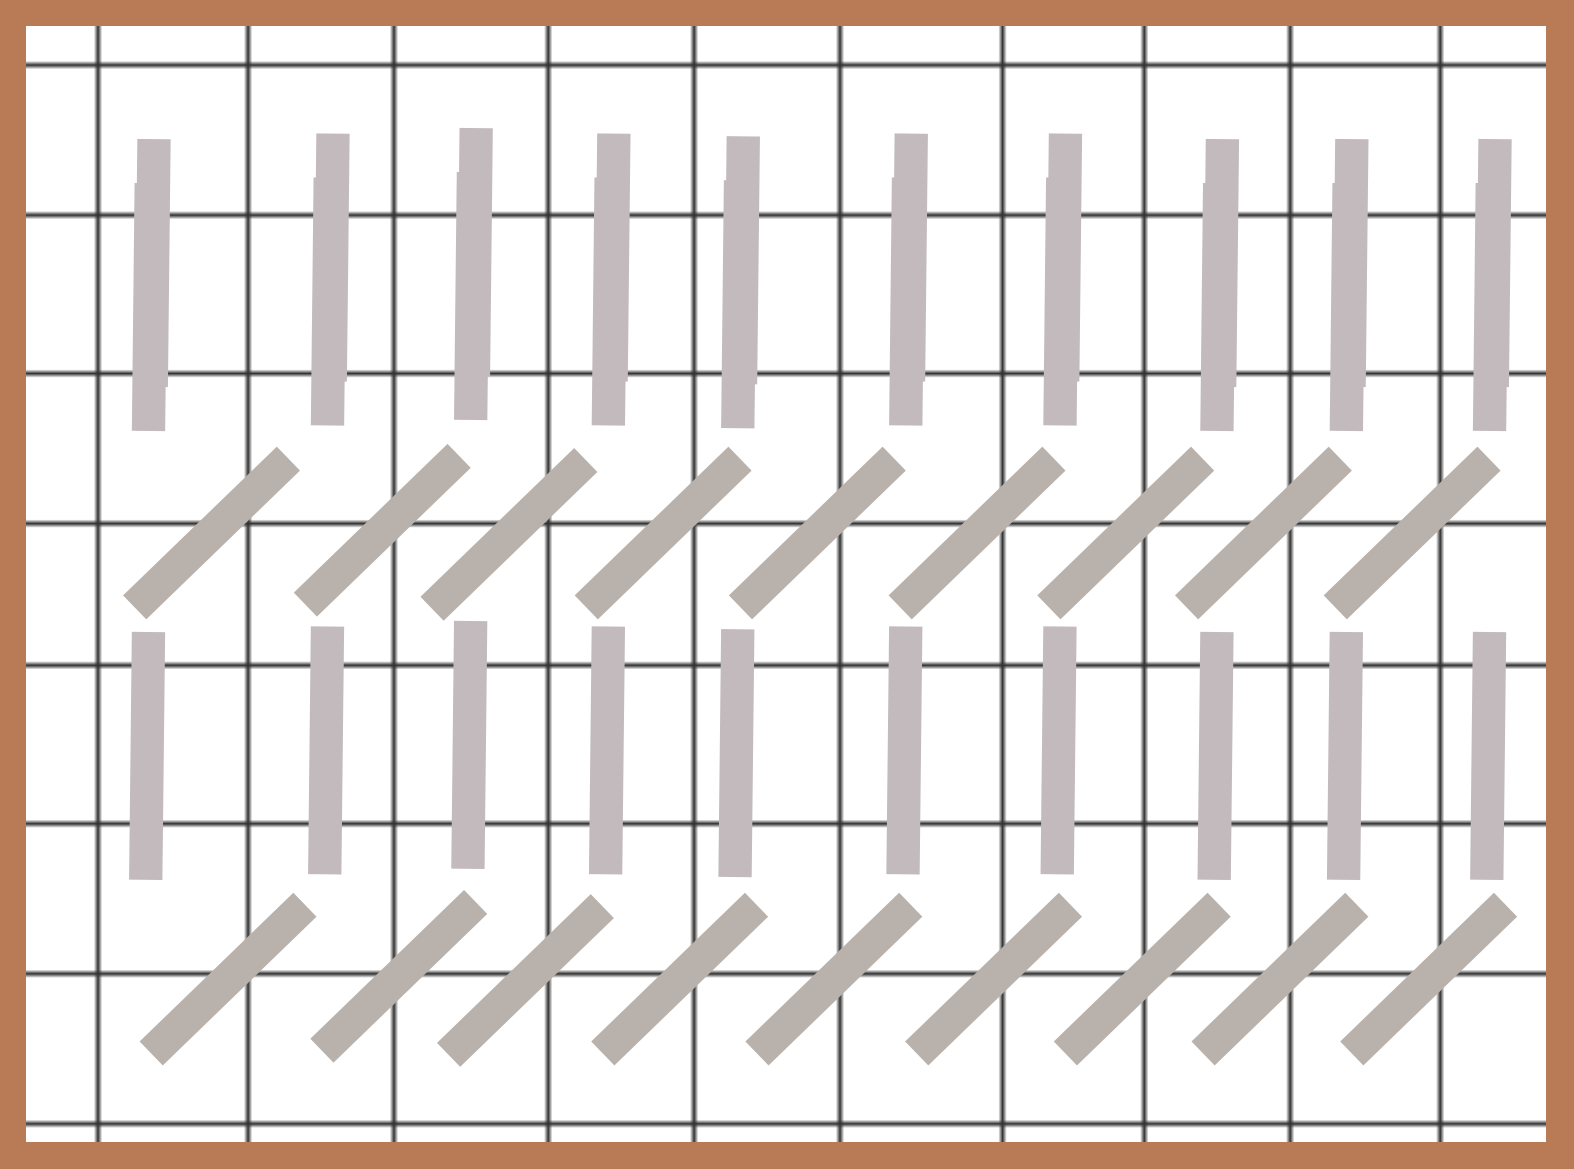
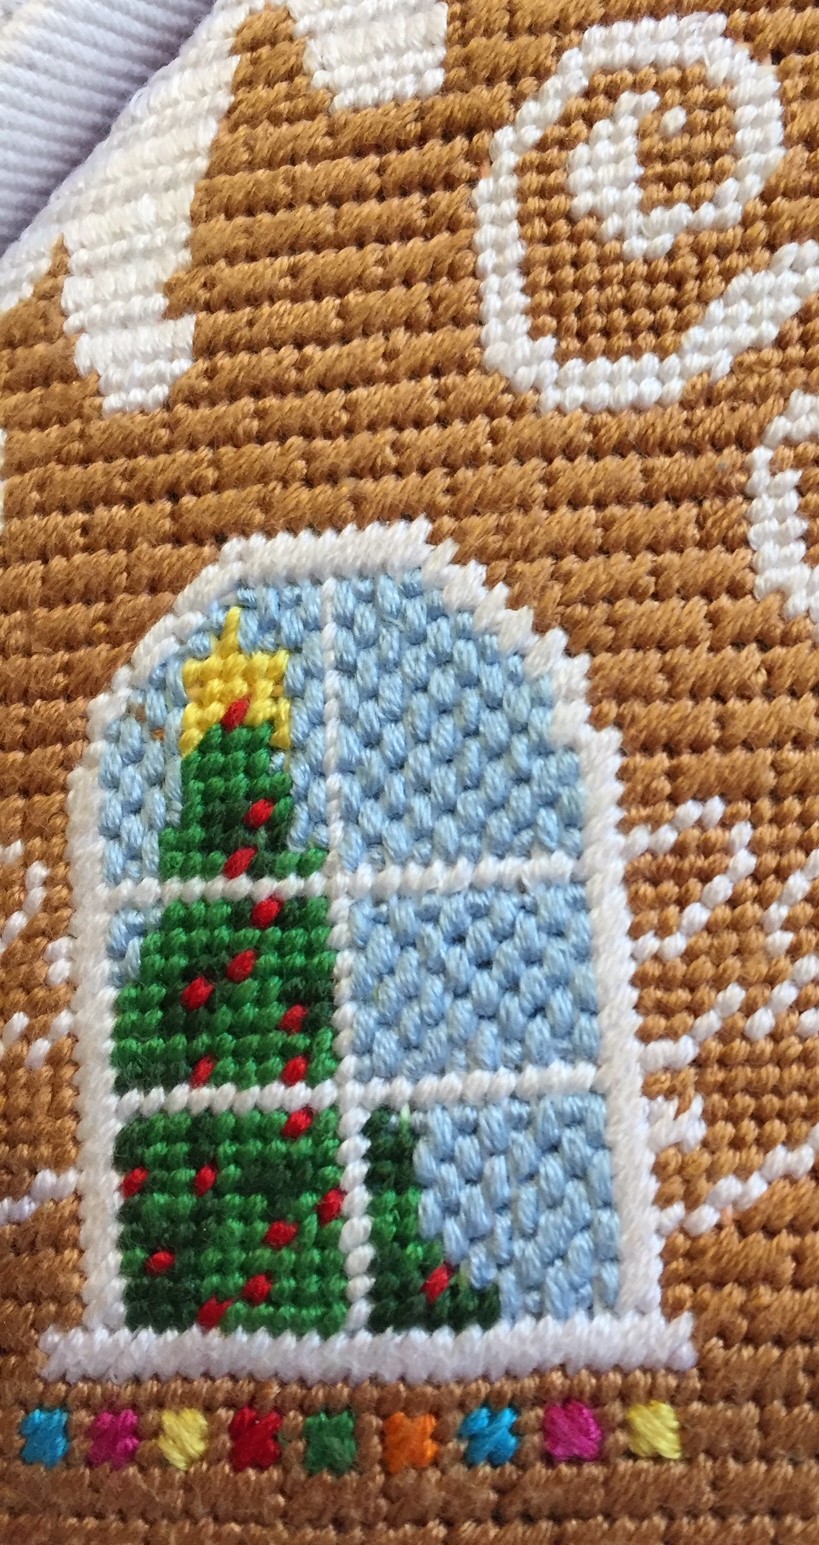
Continental – Gobelin Snow
The snow alternating rows of the continental stitch and straight Gobelin worked over 2 strands. Window frames are the slanted 2 x 2 Gobelin over 2 strands and dots above and the below the windows are the mosaic stitch. he windows are a staggered strait Gobelin over 2 stitched. There are lots of places to try new and different stitches. It was fun!
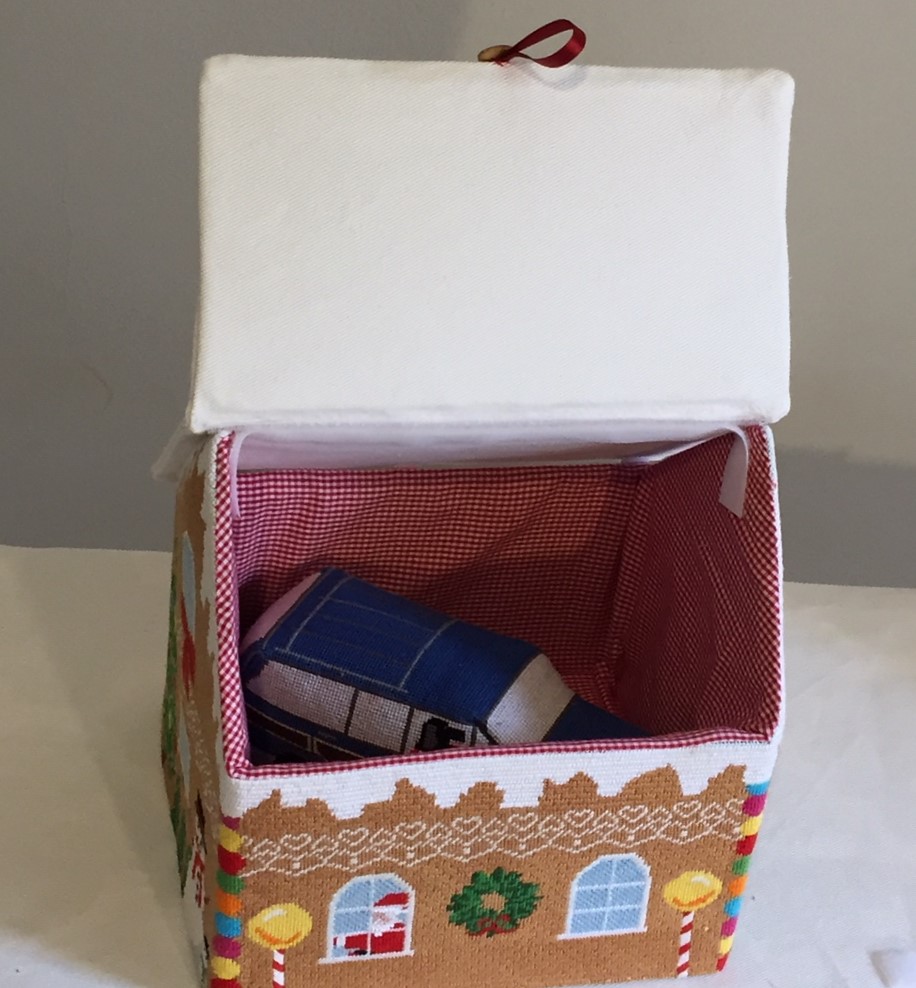
As I stitched along, my mind worried away at “how are you going to put this all together”? Sure, it was going to a rectangular house with a roof with overhangs. How was it going to be stabilized since I wasn’t going to stuff it. (Stuffing the Gingerbread House is certainly an option.)
Initially, I cut plastic needlepoint canvas 1/8″ smaller than each side and the roofs, and stitched them to the canvas. The house could stand on its own but it wasn’t going to be rigid enough to be a container.
Plastic Canvas Backings
While browsing through a crafter’s catalog, I found 8-inch square boxes which could be cutdown to make a 8 x 6 ¾ inch rectangle. This would give the base a solid frame and the sides could be cut down to size and shaped for the roof. It worked! Below is a mock up of the box frame. The final was glued and the peak supports were cut from acid-free art board.
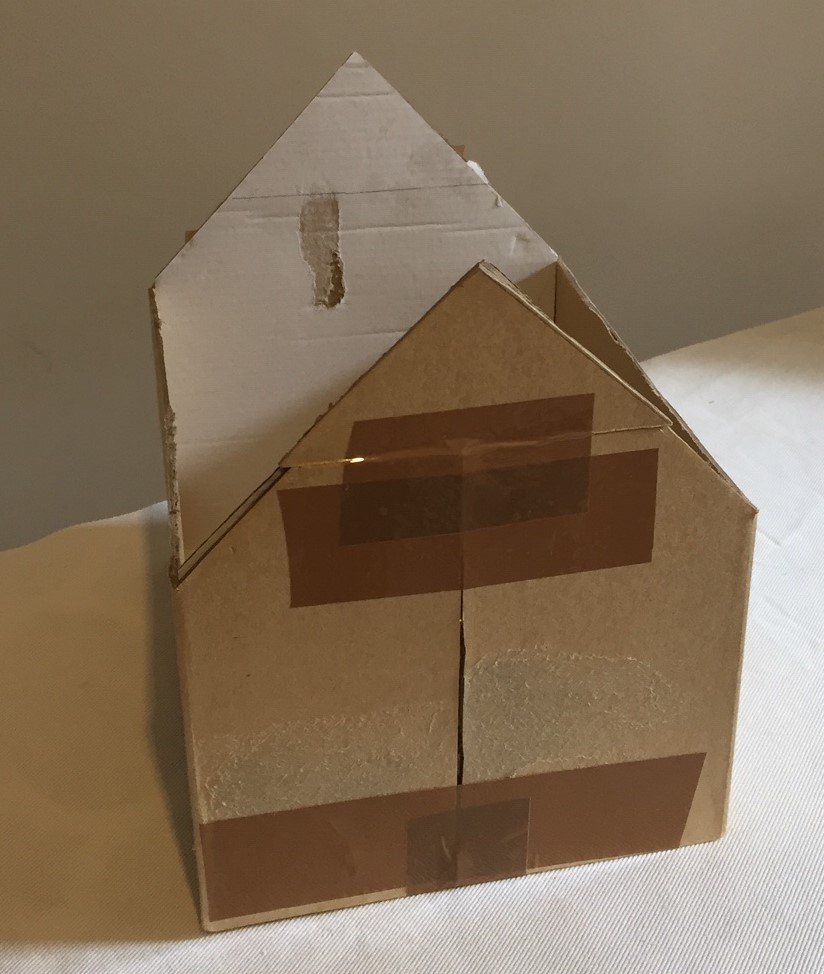
Mock up of House Frame
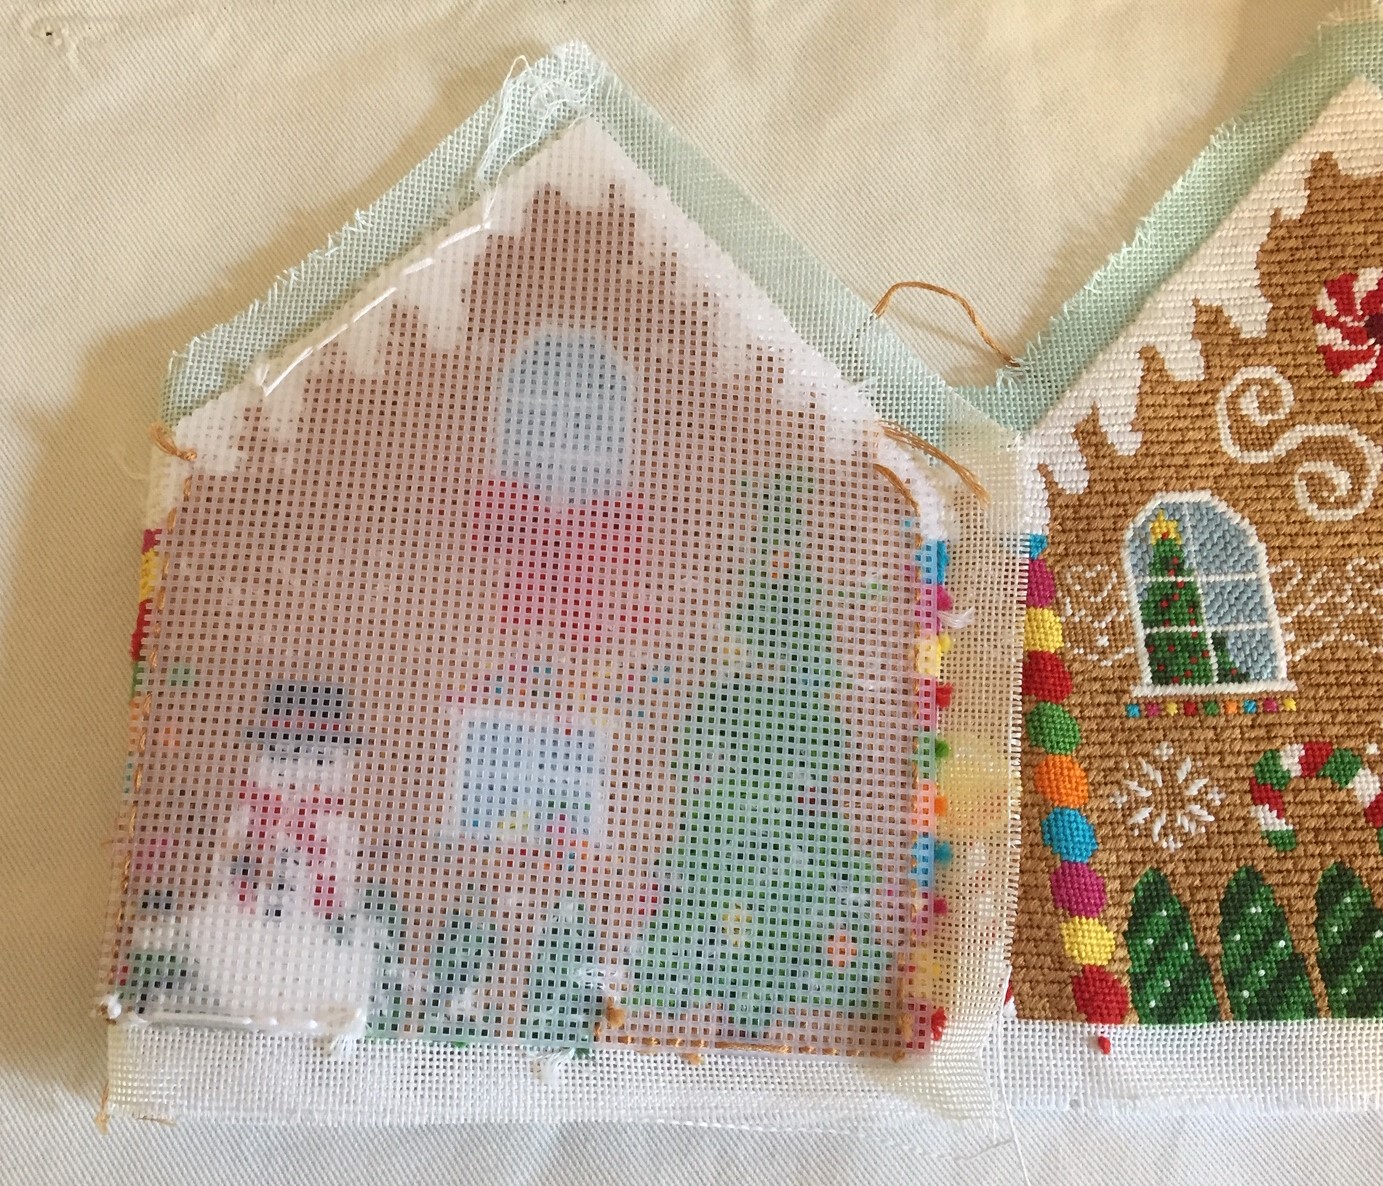
The base of the house is lined with a lightweight cotton fabric. Lining is sewn as shown below along only the upper edge of the stitching. The two roof segments are lined with a sturdier white fabric, leaving the top of each segment open to be sewn together later. (I probably could have used a lighter weight fabric but thought that extra weight would make a better hinge for the roof.) Turning the lining was not easy with the canvas backed by the plastic canvas, but the results were better than I had expected. There was one seam to stitch along the side of the base and it could be slipped onto the box frame. Acid-free art board was cut fit inside roofing pieces.
Also, piece of acid-free art board cut to the inside dimensions of the box is covered with the lining material and slid down to hold the lining of the sides in place.
The lined roof is stitched together at its peak with the back sides together, and the outside seam trimmed and covered with a bias strip. Self-adhesive Velcro dots along the sides and a strip at the peak affix one side of the roof and a button-ribbon tab is sewn to the opening-side of the roof.
There are certainly other ways to assemble the house. My granddaughters are all eyeing the Gingerbread House and maybe I will have to make more so please let me know if anyone has assembly suggestions.
We would love to help with all of your needlepoint needs.
Please contact us with any questions that you may have at:
info@needlepaint.com
Stitch a little something sweet for the holidays!

Recent Comments