Official blog of www.NeedlePaint.com
where you can design your own Needlepoint!

NeedlePoint Kits and Canvas Designs | Design your own Needlepoint Kit!

Archive for the ‘needlepoint stitches’ Category

Pulled Yarn Stitches with a Silver Lining

Written by Peggy Bond

After my first foray into pulled yarn stitching, I was anxious to try one with color. Using the combination of the pulled yarn star and traditional reversed scotch stitches, I created a two-colored background that lets the silver lining of the I Love Mom ornament shine through.

I stitched the heart, “I Mom”, and background between the letters and image with the continental stitch before starting the pulled yarn star/reversed scotch background. 

Stitched Canvas

Each reversed scotch block and pulled yarn star is 8 horizontal by 8 vertical threads. The reversed scotch blocks should be completed before the pulled yarn stars, particularly if the canvas is not on a stretcher.

By starting the reserved scotch blocks at the center top of the canvas and working diagonally downward as shown above the location of a diagonal row of stars is created. For this ornament, the stars alternate with the scotch blocks, but they can also be randomly positioned. It is important that the stars be worked from the center outward. Since the stars are a different color than the scotch block, each was work independently and ends tied off and hidden so that they are not seen.

Reversed scotch block

So now the background lining! The ornament has only three colors. I did not like the idea of using black. Nether white nor red would show off the holes for the pulled yarn stars. Maybe gold or silver? I tested a silver lining of aluminum foil. I liked how it looked. I went looking for fabric and found stretch satin silver fabric at my local fabric store.

Satin Silver Fabric

To finish the ornament, I used red felt for the backing, quilt batting for padding, a cardboard stiffener, and silver braid for trim and hanger.

Ornament elements

My two pulled yard projects have been done on 18-point canvases and now I am ready for something bigger and maybe better….

Please feel free to contact us with any questions you may have at: info@needlepaint.com

Happy Stitching!

Hippity Hoppity Easter’s On Its Way!

Written by Caroline

When our designer, Gwynn, created NeedlePaint’s Beatrix Potter Collection, I could not wait to stitch something. This collection is the epitome of sweet and classic, and the perfect homage to Beatrix Potter’s outstanding work. 

After burning out with several larger projects recently, I wanted something smaller with different finishing potential, so I picked out the Peter Rabbit Stand Up Kit. I requested to have the design printed on 14-count canvas—something we are always happy to do!—which changed the overall size to 5.2″ x 10”. In addition, when I received the canvas, I drew a rounded top.

I knew I wanted to focus on texture and keep my stitches simple,
so I headed to my local needlepoint shop (Stitch in Louisville, KY)
and they assisted me in pulling lots of different fibers based on the canvas:

Peter’s fur: Petite Very Velvet

Peter’s jacket: Silk & Ivory

Face details: DMC Perle Cotton #3

Grass: DMC Perle Cotton #3

Background: Vineyard Wool

I completed the foreground entirely in the basketweave stitch, but I am
impressed with how different each section appears in person because of the fiber type. 

I used my favorite old faithful background stitch: diagonal mosaic!
I love this stitch for its full coverage, but also its simplicity and quickness to stitch.

While NeedlePaint does not (yet!) offer stand-up finishing,
I was able to finish it through my local needlepoint shop,
and will treasure this for years to come —

especially every Easter!

Give Pulled Yarn Stitching a Try

Written by Peggy Bond

Pulled yarn stitches are often overlooked for needlepointing canvases because they do not fully cover the canvas. However, they can be used with conventional stitches and have some advantages as backgrounds. Firstly, they can be worked up quickly and secondly, they are lacy allowing a differently colored backing to show through.   

This Be Mine Valentine needlepoint ornament kit finished as a door hanger, has a pink felt backing that gives the background behind the heart, the look of checked gingham.
Up close, this is not the case.

When working pulled yarn, it is important to keep consistent tension or pull. This is what creates the pattern. The best pulled yarn stitches have equilateral pull which minimizes distortion.

The 4-sided over 3 pattern shown here is a good example. Notice the direction of the stitches:

1 – left to right

2 – bottom left to top

3 – bottom right to top

4 – bottom left to right

The back will show a large cross stitch (X) as shown above.

My original idea for this project was to back the canvas the same felt as used for the frame. The red felt did not show through. However, the bright pink felt showed well and tied the red and pink of the heart together. Below is a photo of the four layers that used for the hanger.

This project was stitched with white thread on white canvas and had a hot pink backing. Alternatively, it could be done with red thread on the white canvas and a white or sparkling backing. There are many options, and the only caution would be not to try pulled yarn stitches on a printed background. Pulling the stitches will expose the white of the unprinted canvas.

Please feel free to contact us with any questions you may have at: info@needlepaint.com

Happy Stitching!

NeedlePaint’s New Christmas Stocking Cuffs!

Written by: Peggy Bond

Running late to get a Christmas stocking needlepointed? NeedlePaint suggests a Winter Wonderland Stocking Cuff. Needlepointing the cuff will take less than half the time of a full stocking. The bear and moose are perfect for my nephews who live in Maine,
and the chickadee will be prefect for Amos’ little sister who will be born in October.
It shouldn’t be difficult to get it finished in time for Christmas. 

Burly Black Bear Stocking Cuff Needlepoint Canvas

Woodland Moose Stocking Cuff Needlepoint Canvas

Joyful Chickadee Stocking Cuff Needlepoint Canvas

The bear and moose are finished and awaiting their big day. For texture and variety,
I used several different stitches on the large animals, sky, and snowy ground. 

The sky of the bear cuff is done with the vertical brick stitch done over 2 mesh.

The snowy ground is finished with the horizontal double brick stitch also done over 2 mesh.

For the bear, I wanted some color variation and texture.
His back is done using alternating continental with black and dark brown thread
while his under body and legs are all black and stitched with the continental. 

Alternating Continental Stitch

It’s winter and there must be snow falling sometimes, so the moose got the falling snow which was
created by using 3 strands of sky blue and 3 strands of light blue in the vertical brick stitch.
This created a random design that gives the sense of falling snow. 

The double twill stitch for the snow gives perception to the canvas,
accenting the varying size of the trees.

Diagonal chop sticks stitch: Mr. Moose took some searching for me to find the right stitch – one that I had never seen or used before. I found it in Susan Sturgeon Roberts’s book Needlepoint Dictionary of Stitches. It is called diagonal chop sticks. It is done in two shades of brown. 

I will post a the completed chickadee when I know the name of my niece.

We would love to help you with all of your needlepoint holiday decorations.
Please feel free to contact us with any questions you may have at: info@needlepaint.com

Happy Stitching!

Welcome to the NeedlePaint Family!

NeedlePaint would like to introduce, an experienced and knowledgable stitcher who joined our family last summer! She helps us out in so many ways: coordinating new projects, patiently answering all of your questions, and still has time in her day to stitch and create some amazing needlepoint projects.

W e l c o m e   C a r o l i n e !

By Caroline Dicken

My mom taught me to needlepoint when I was about 8 years old. She has been stitching since she was a young adult. My paternal grandfather also learned to needlepoint so he had something to do while his wife, my grandmother, was convalescing during her chronic terminal illness in the 1950s. Needless to say, there was a lot of needlepoint in our house growing up! I didn’t really appreciate it until my grandfather passed away—now we have all these handmade pieces to remember him by.

My first canvas was a butterfly… and then I am pretty sure I didn’t stitch again until high school! I was an art major in undergrad but as an adult who is not a professional artist, I have found that needlepoint is just the creative outlet I need to scratch that artistic itch.

Santa's X Mask Needlepoint Ornament Canvas

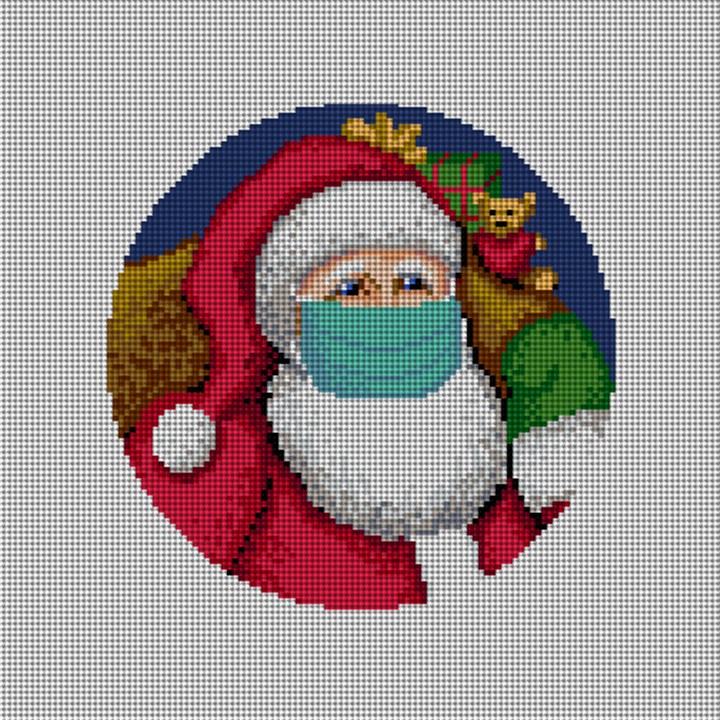
Santa’s X Mask Needlepoint Ornament Canvas

I love making ornaments to commemorate major life events, and what was more major than the crazy year we just had? I love the idea of the masked Santa as a nod to the weirdness that was 2020.

NeedlePaint Santa's X Mask Ornament.1

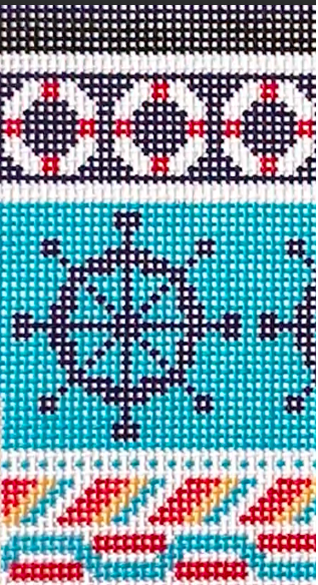
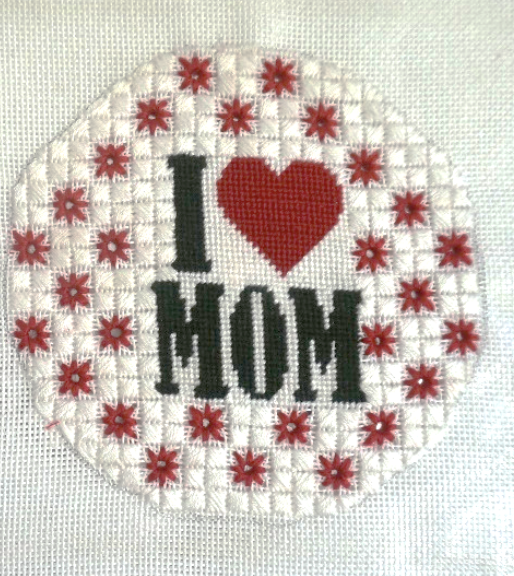
Ornaments are the perfect projects to play with stitches and fibers. Since they are not really touched and used like a pillow or a belt, the stitches can be longer and don’t need to be quite as durable. Plus, if you end up trying a stitch that you don’t love, it is not a huge area to stitch (or rip out)!

NeedlePaint Santa's X Mask Ornament.2

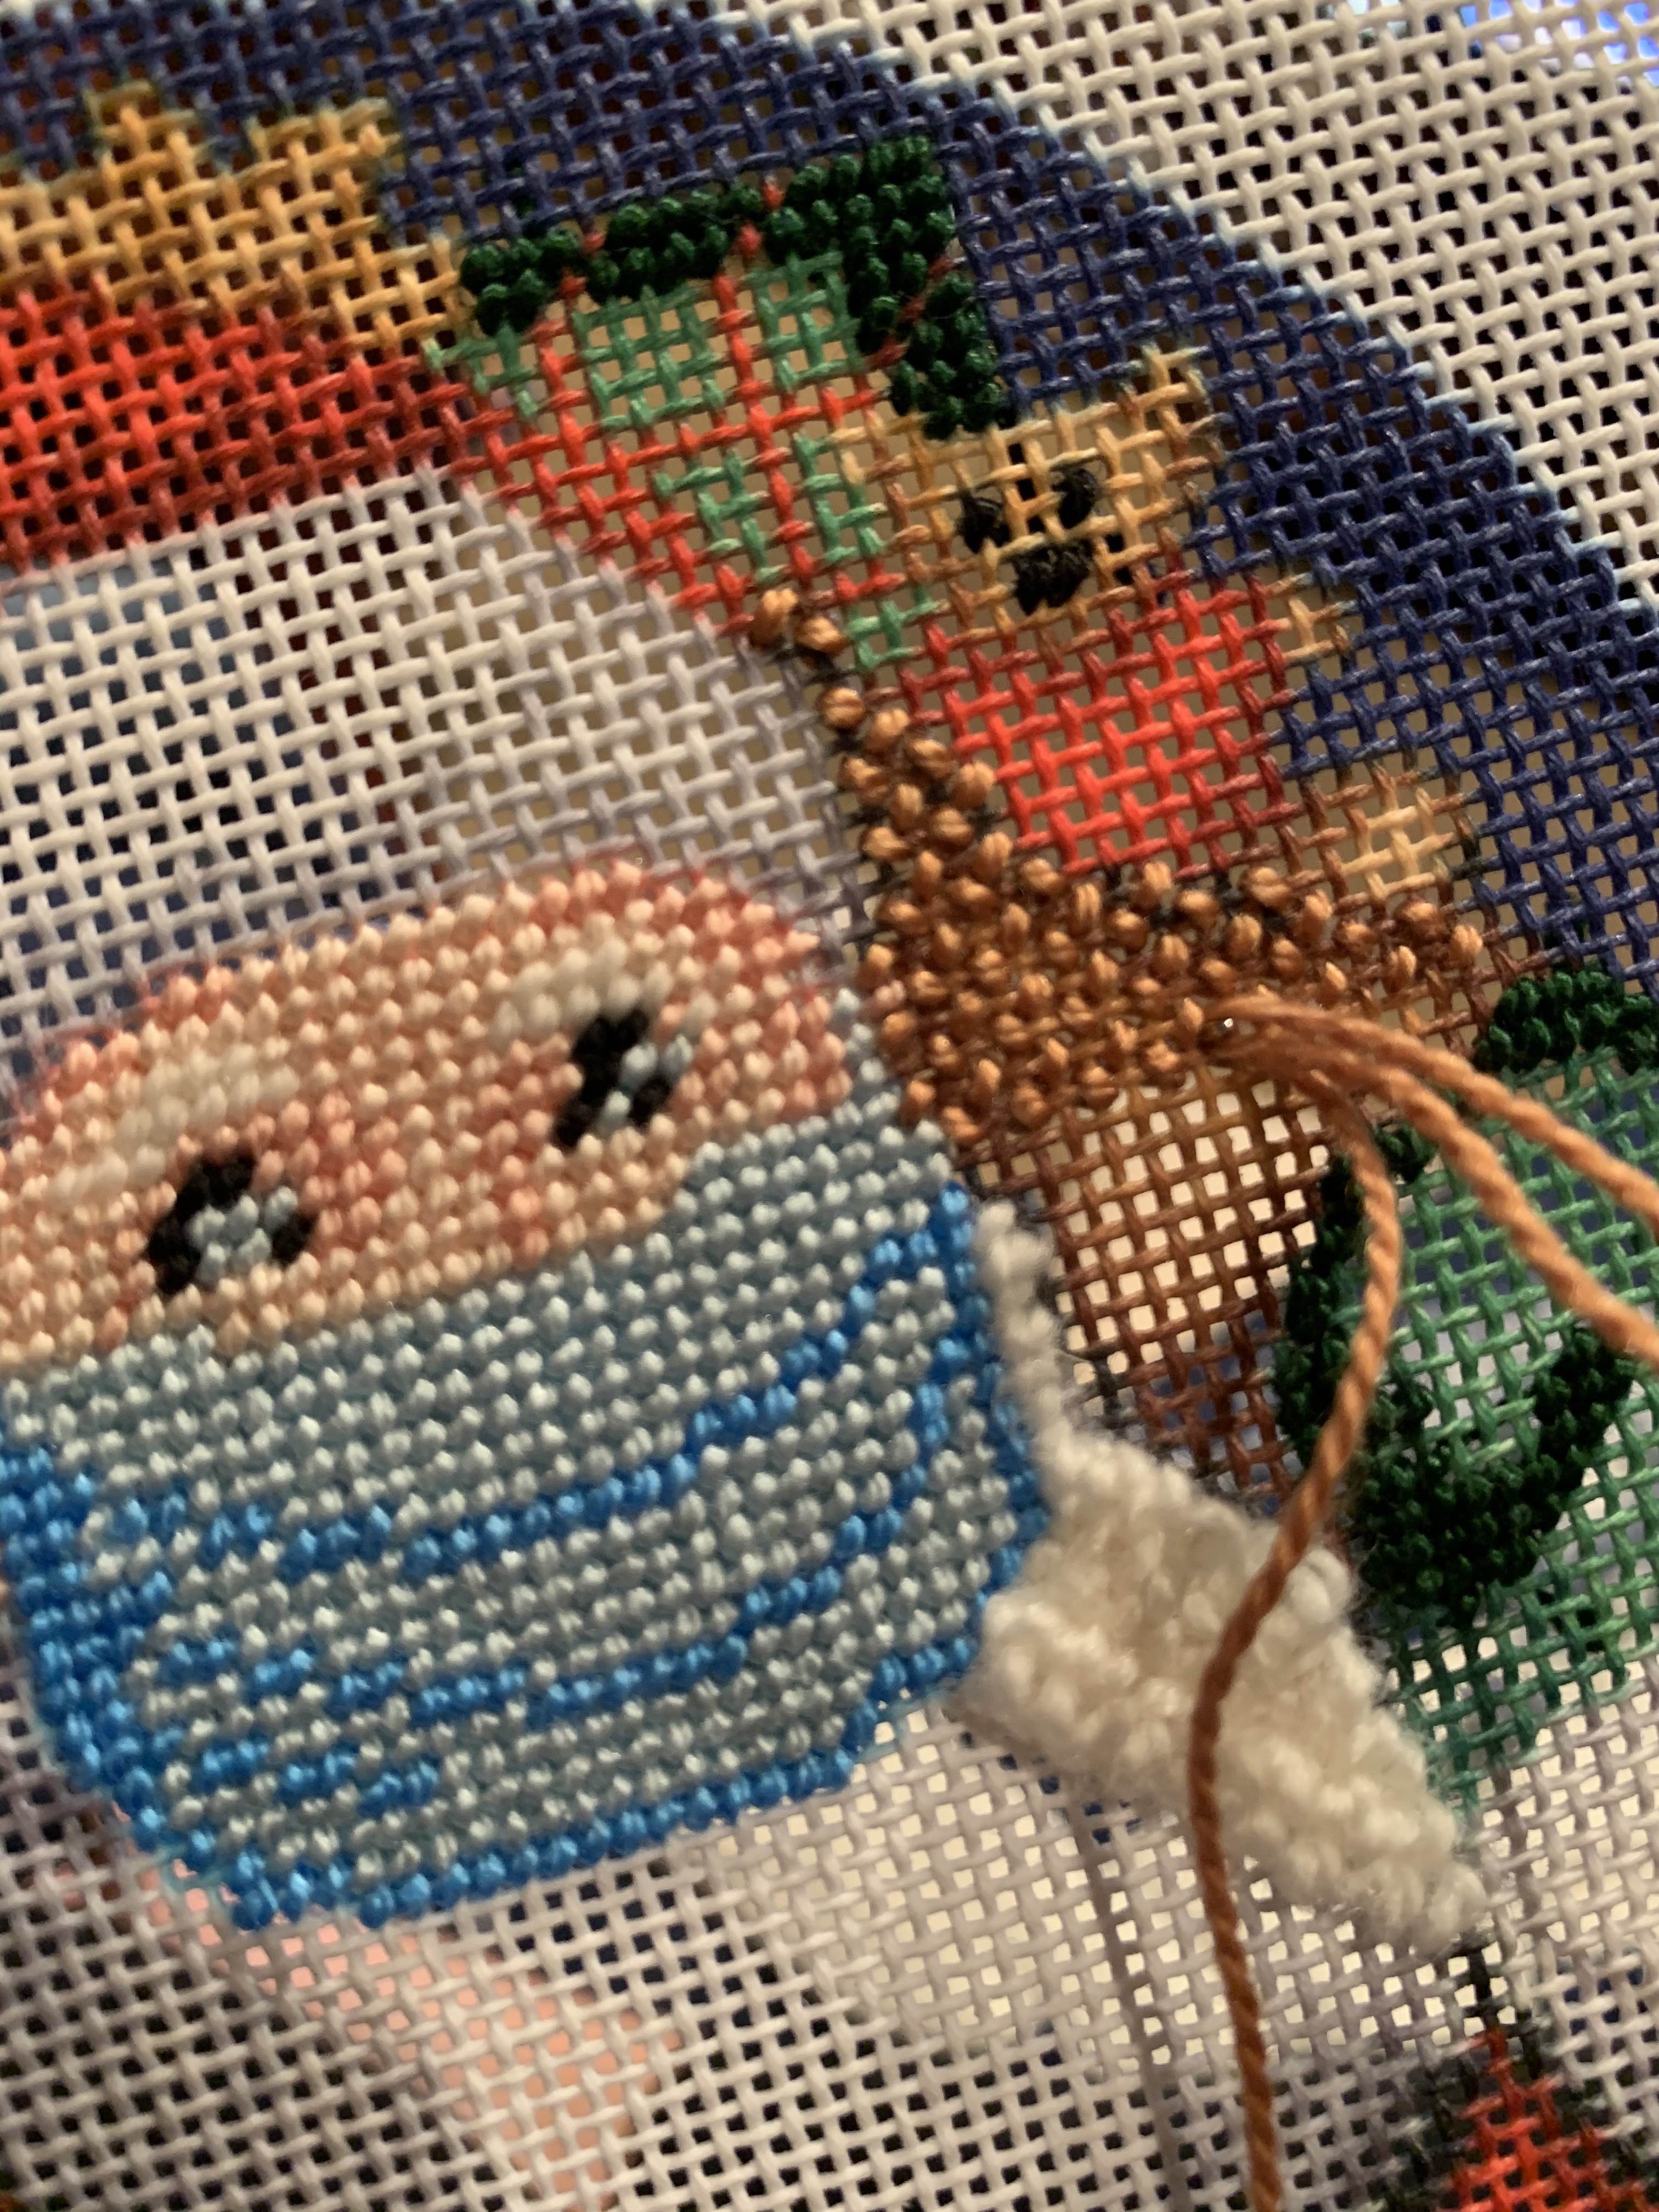
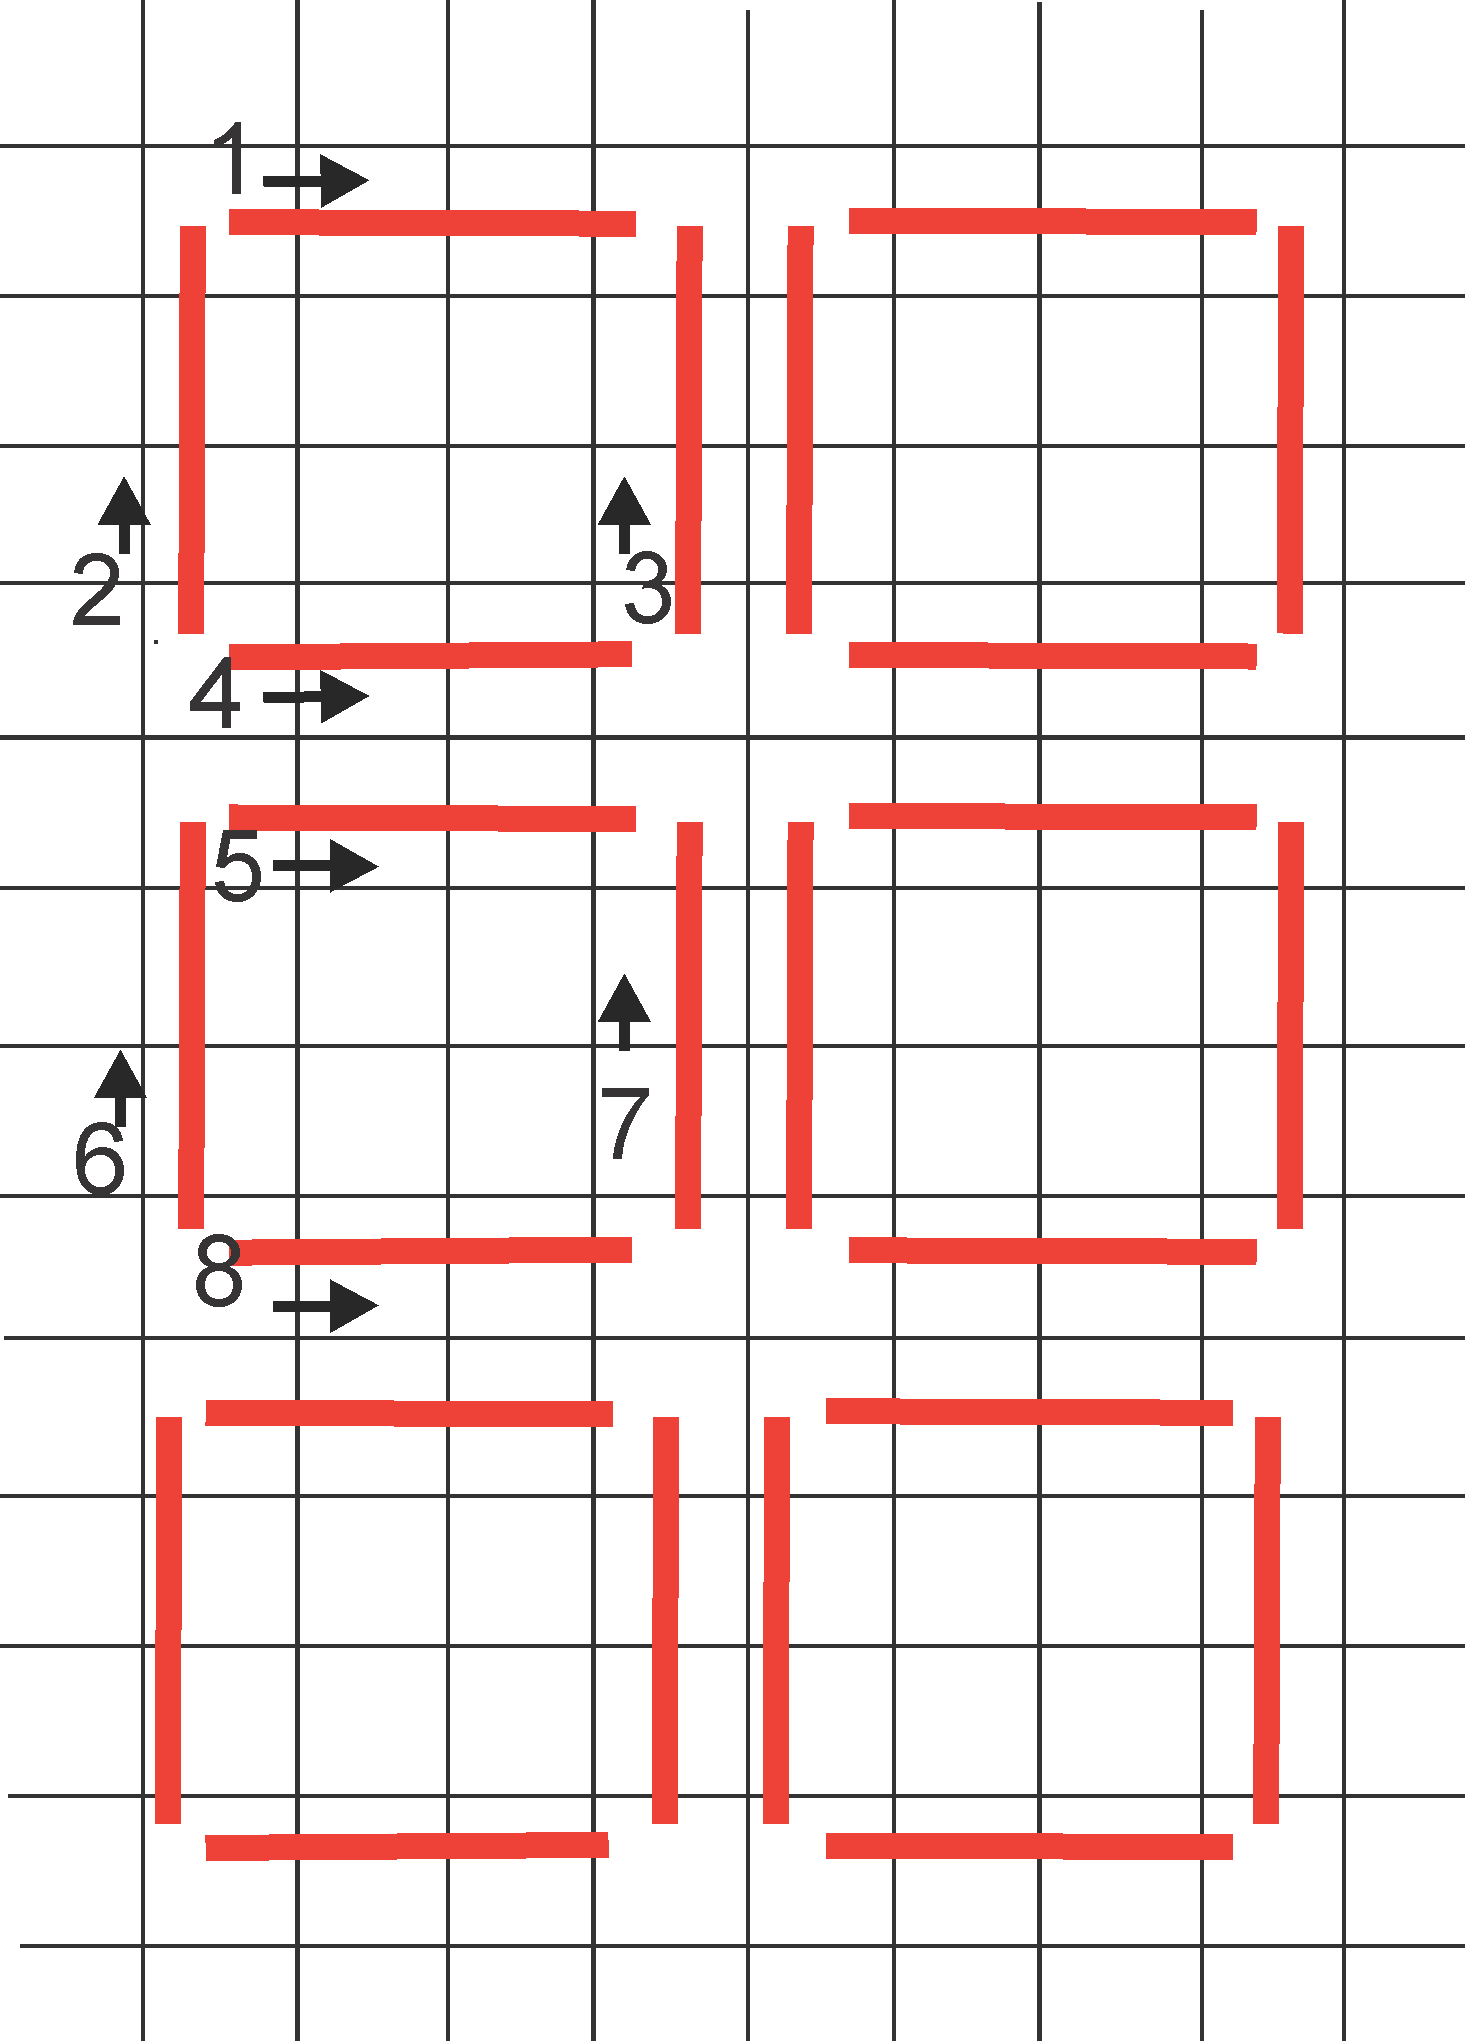
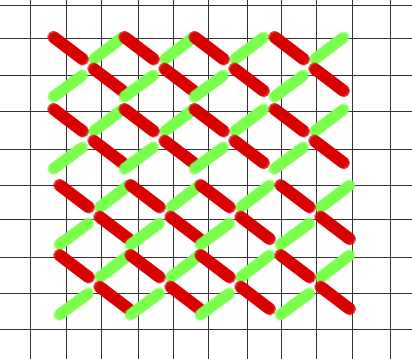
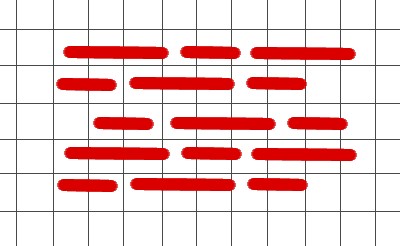
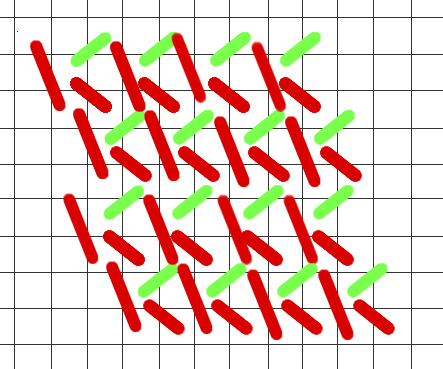
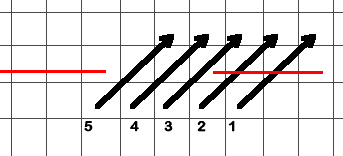
One of my favorite parts of this design was the shading that our designer Gwynn, included on Santa’s bag, as well as the numerous opportunities to incorporate fun fibers and stitches. On an area with great shading in the printed canvas, I love using an open stitch that allows that to show through. Alternating skip tent is one of my favorite open stitches that also gives a section of canvas texture.

NeedlePaint Santa's X Mask Ornament.3

For Santa’s beard, I wanted to give the field dimension but in a more controlled stitch than the turkey work on the hat’s pompom. By alternating every row with a stitch over a small bamboo skewer, I was able to achieve a fluffy beard worthy of the big guy.

NeedlePaint Santa's X Mask Ornament 4 copy

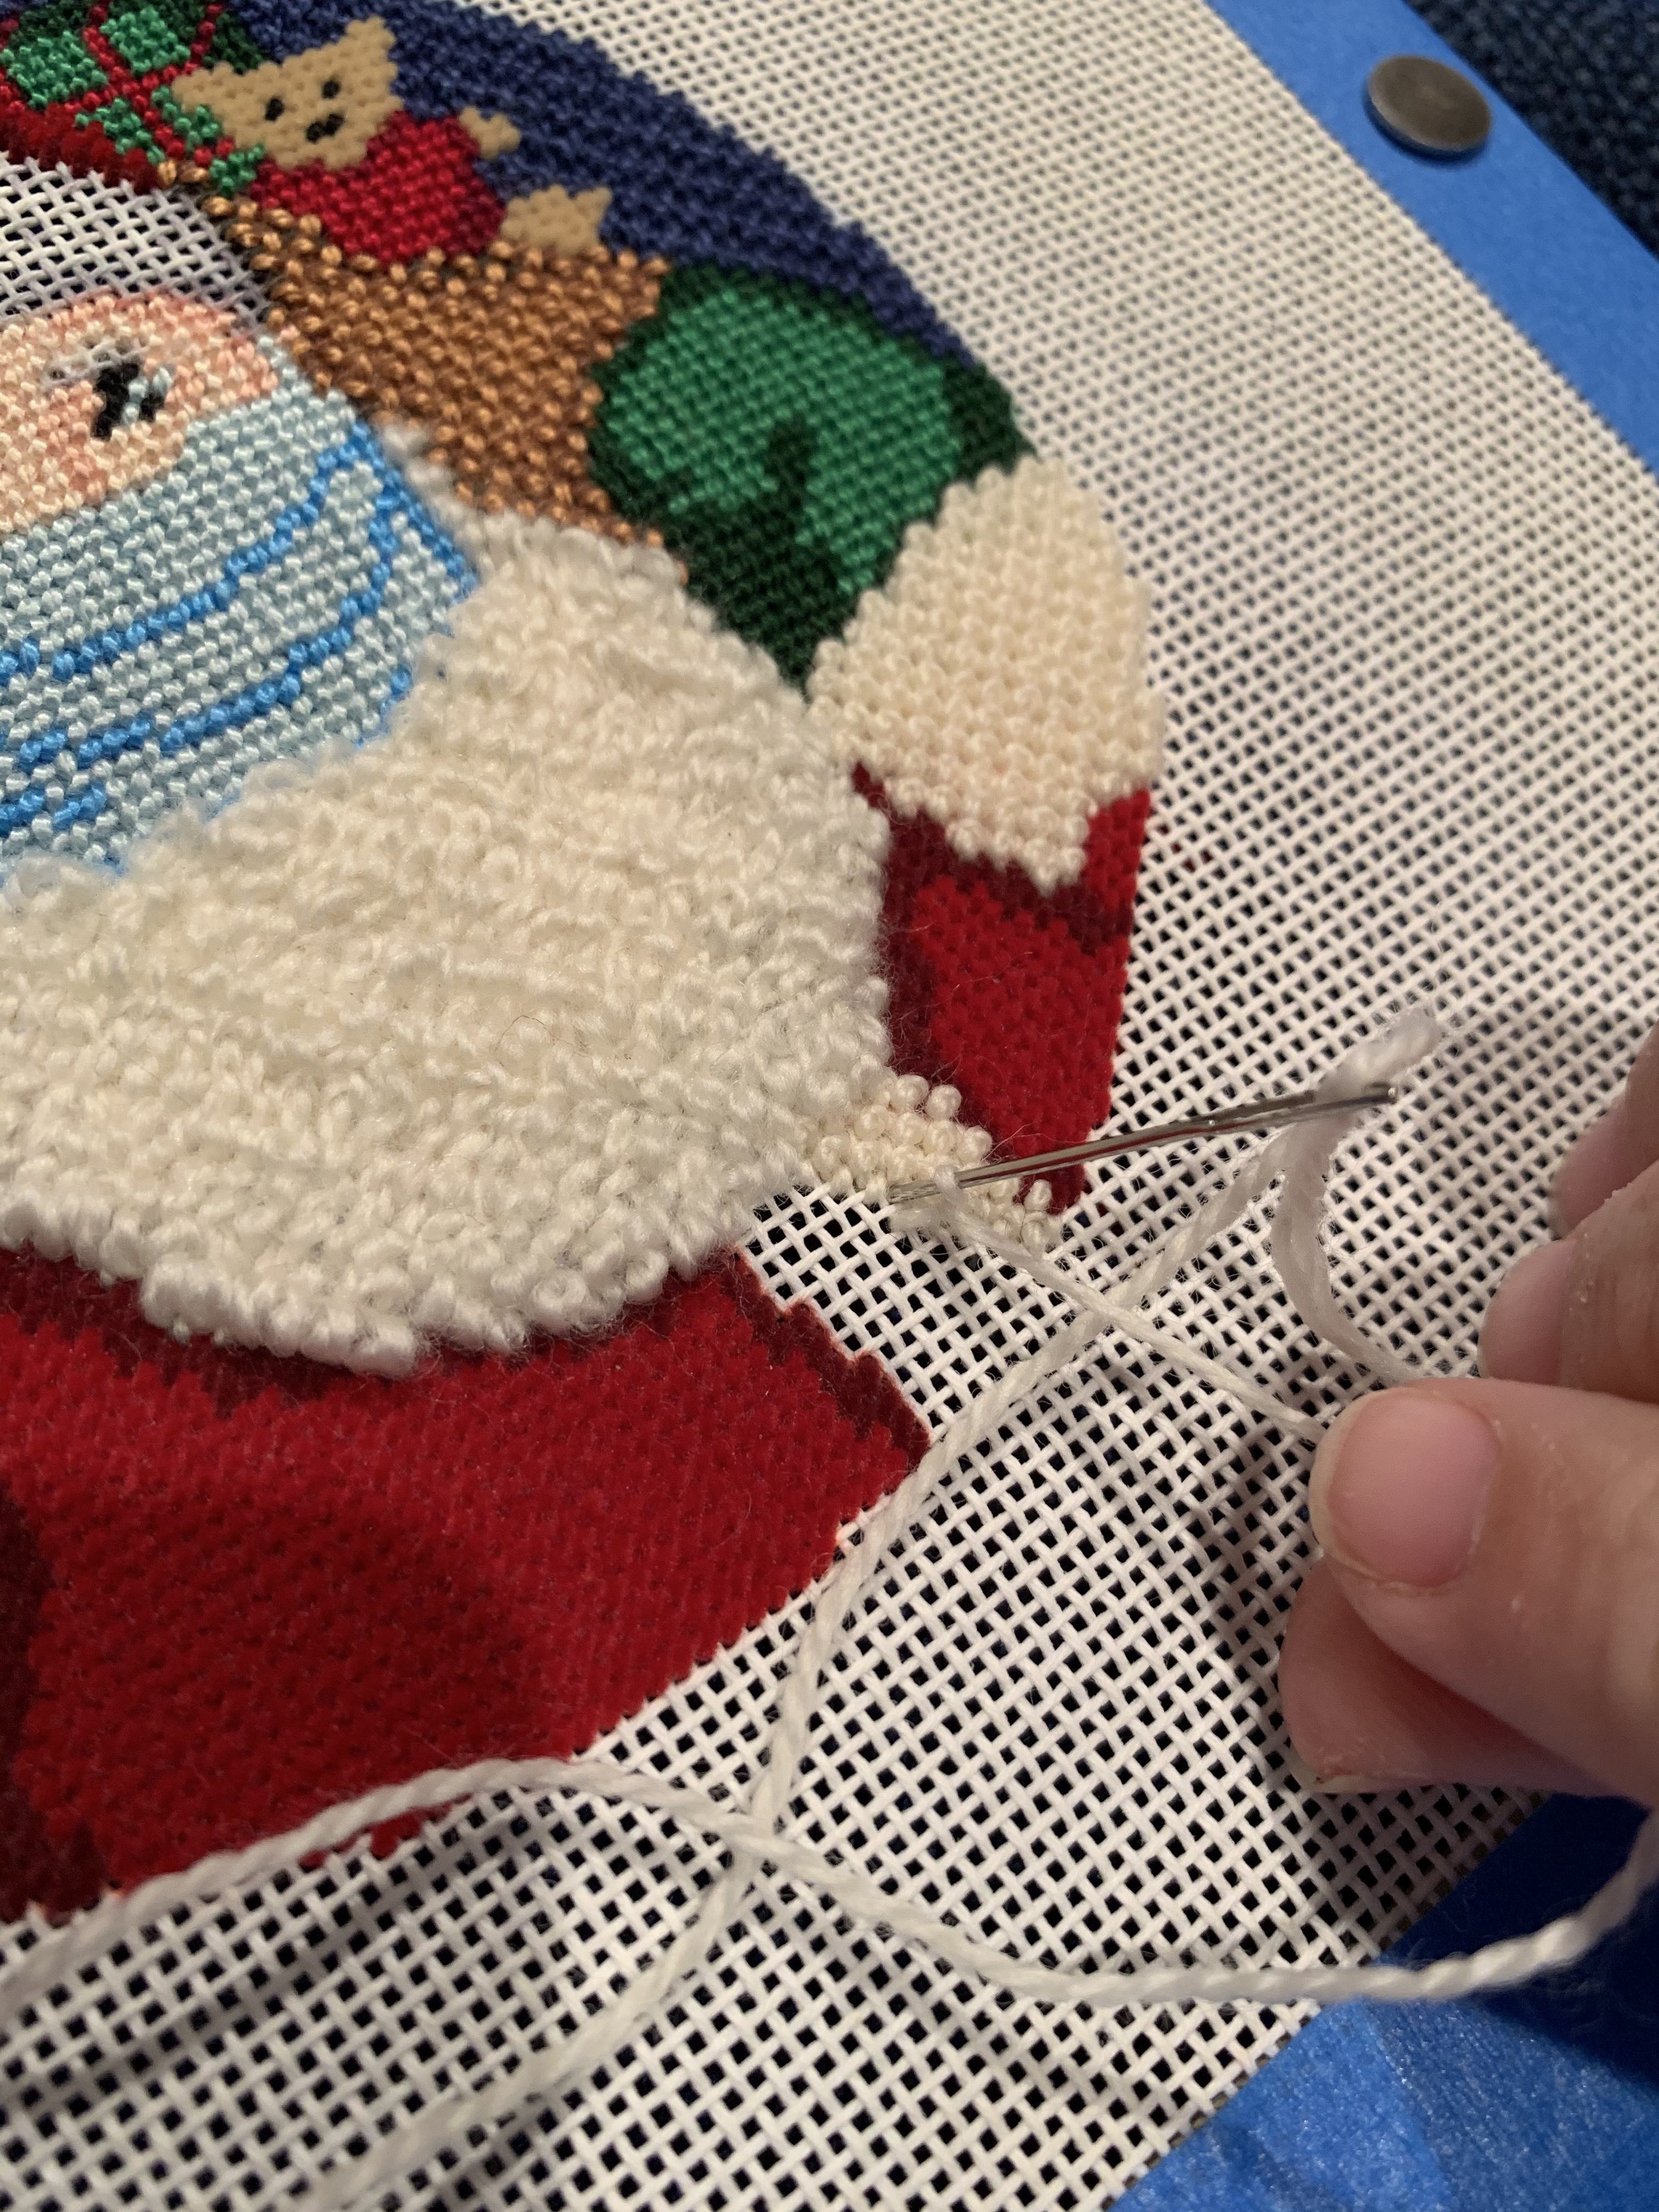
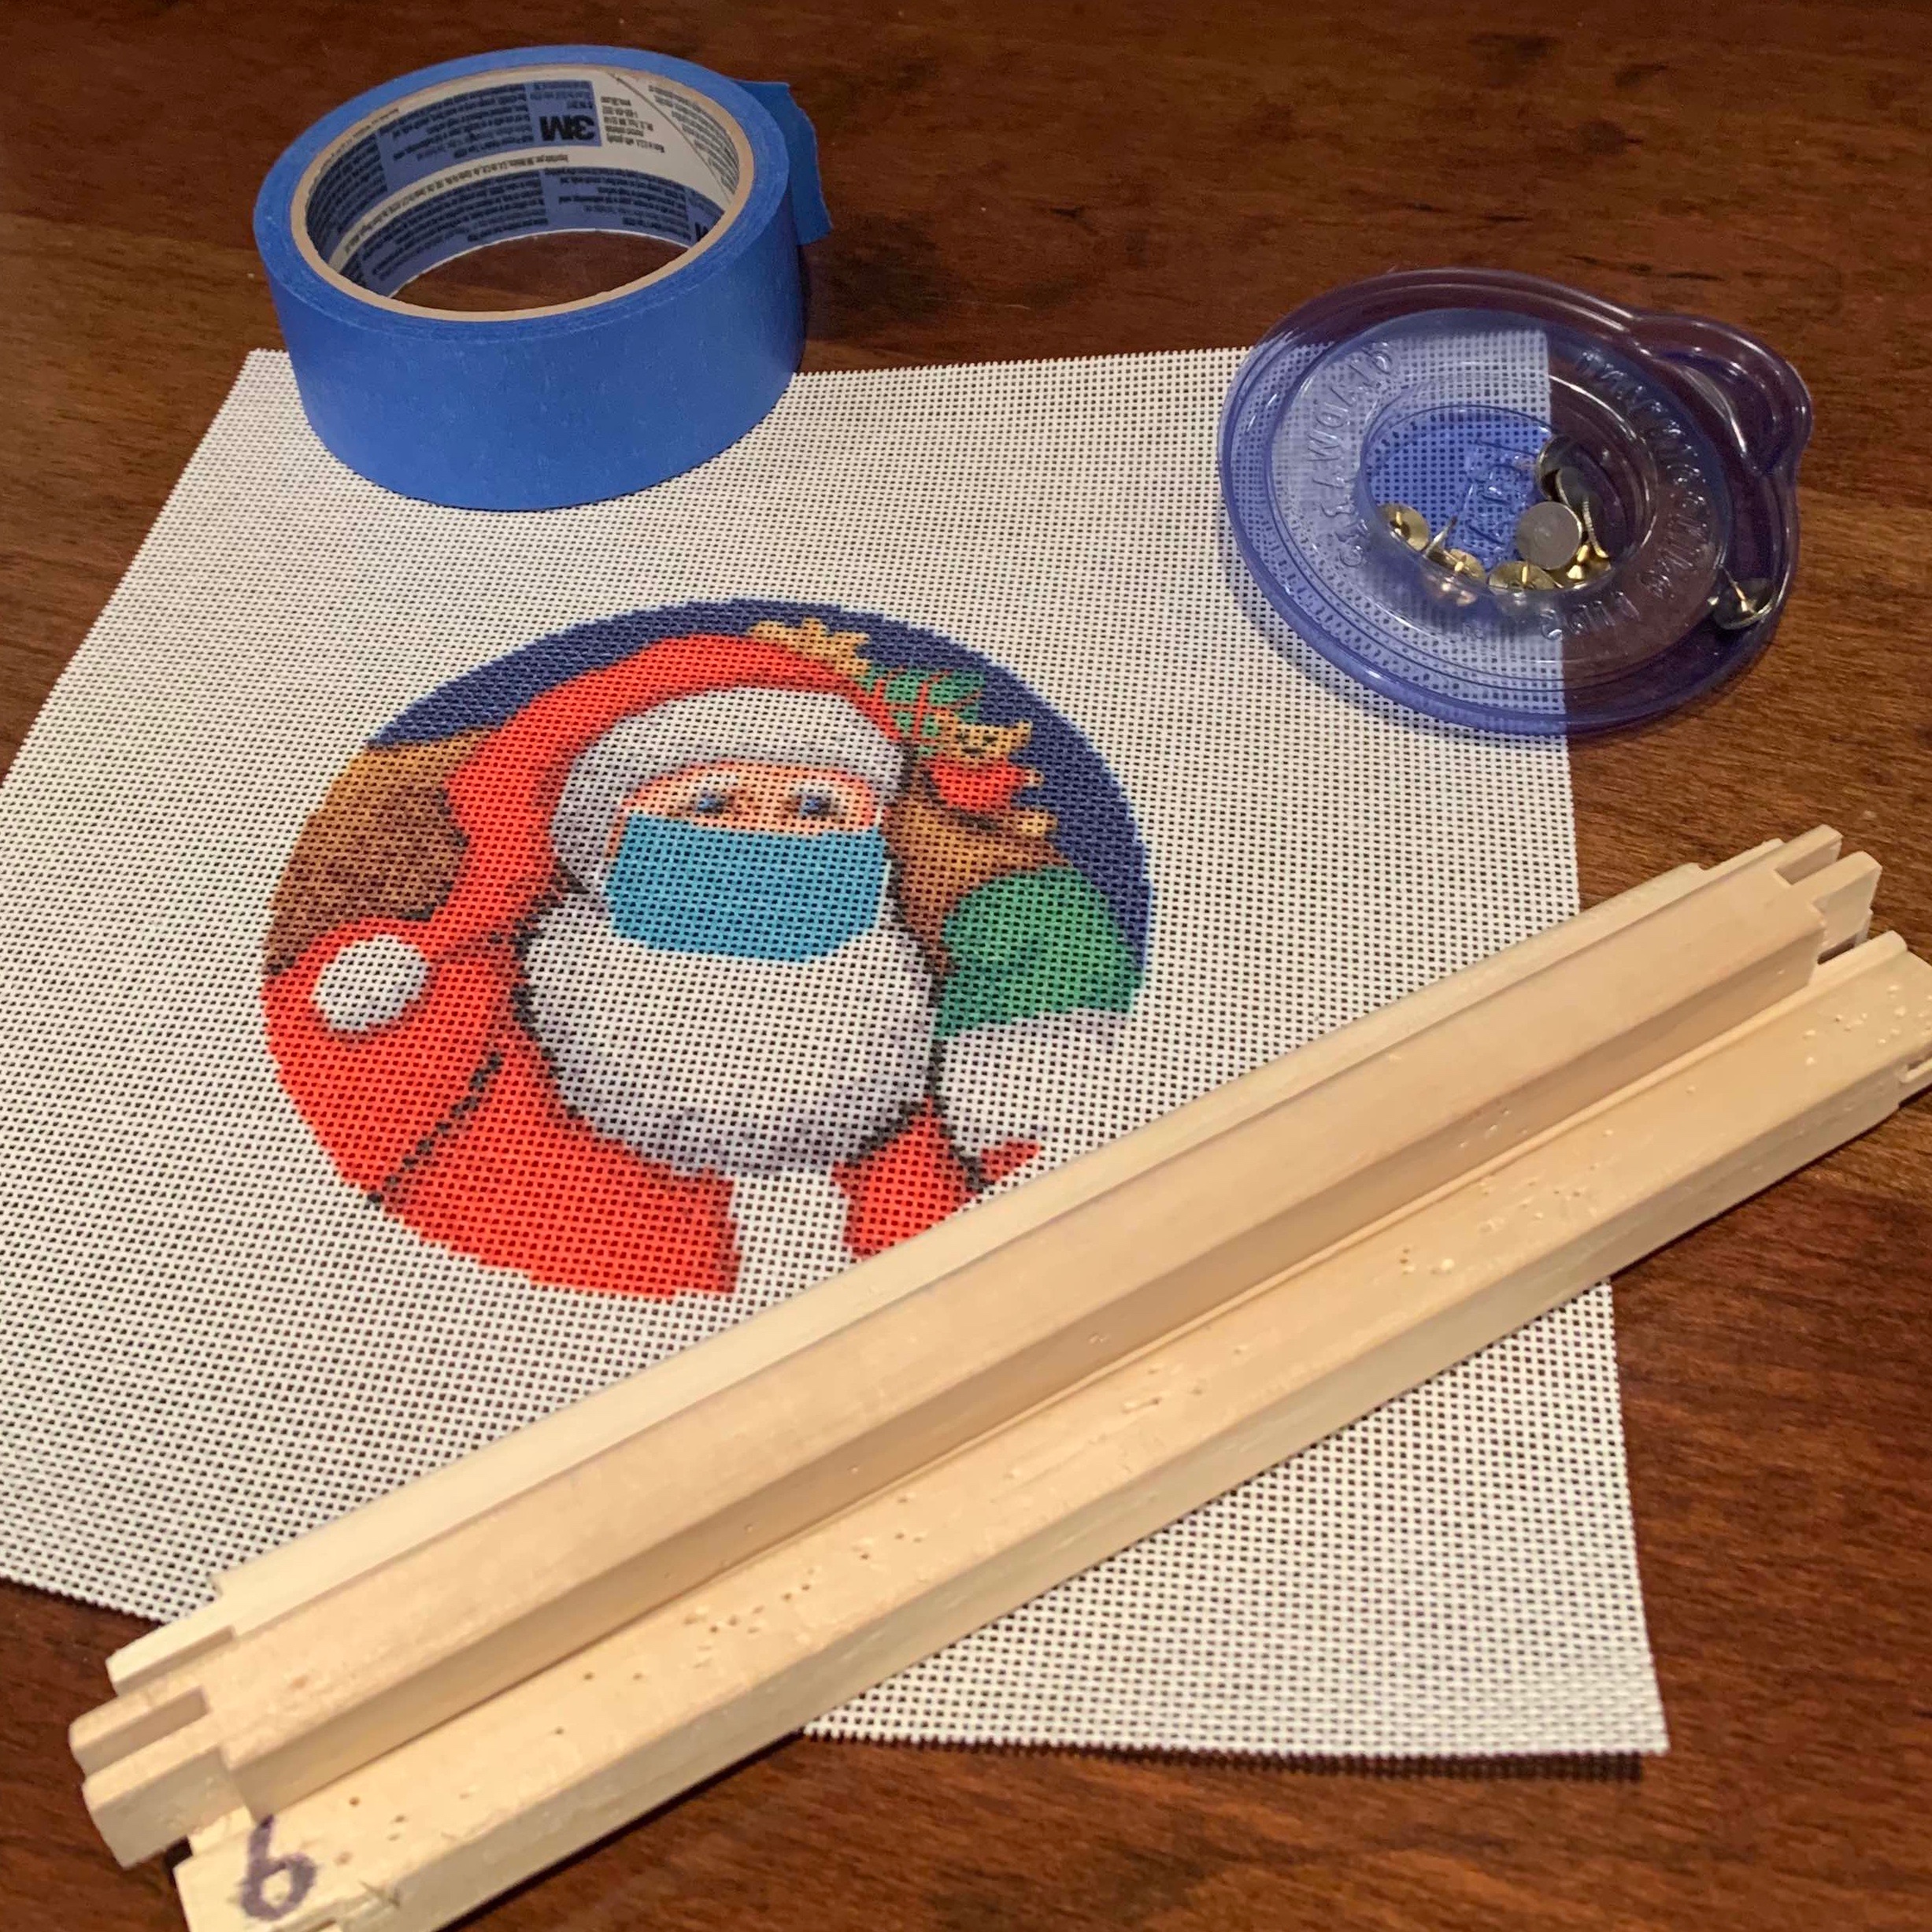
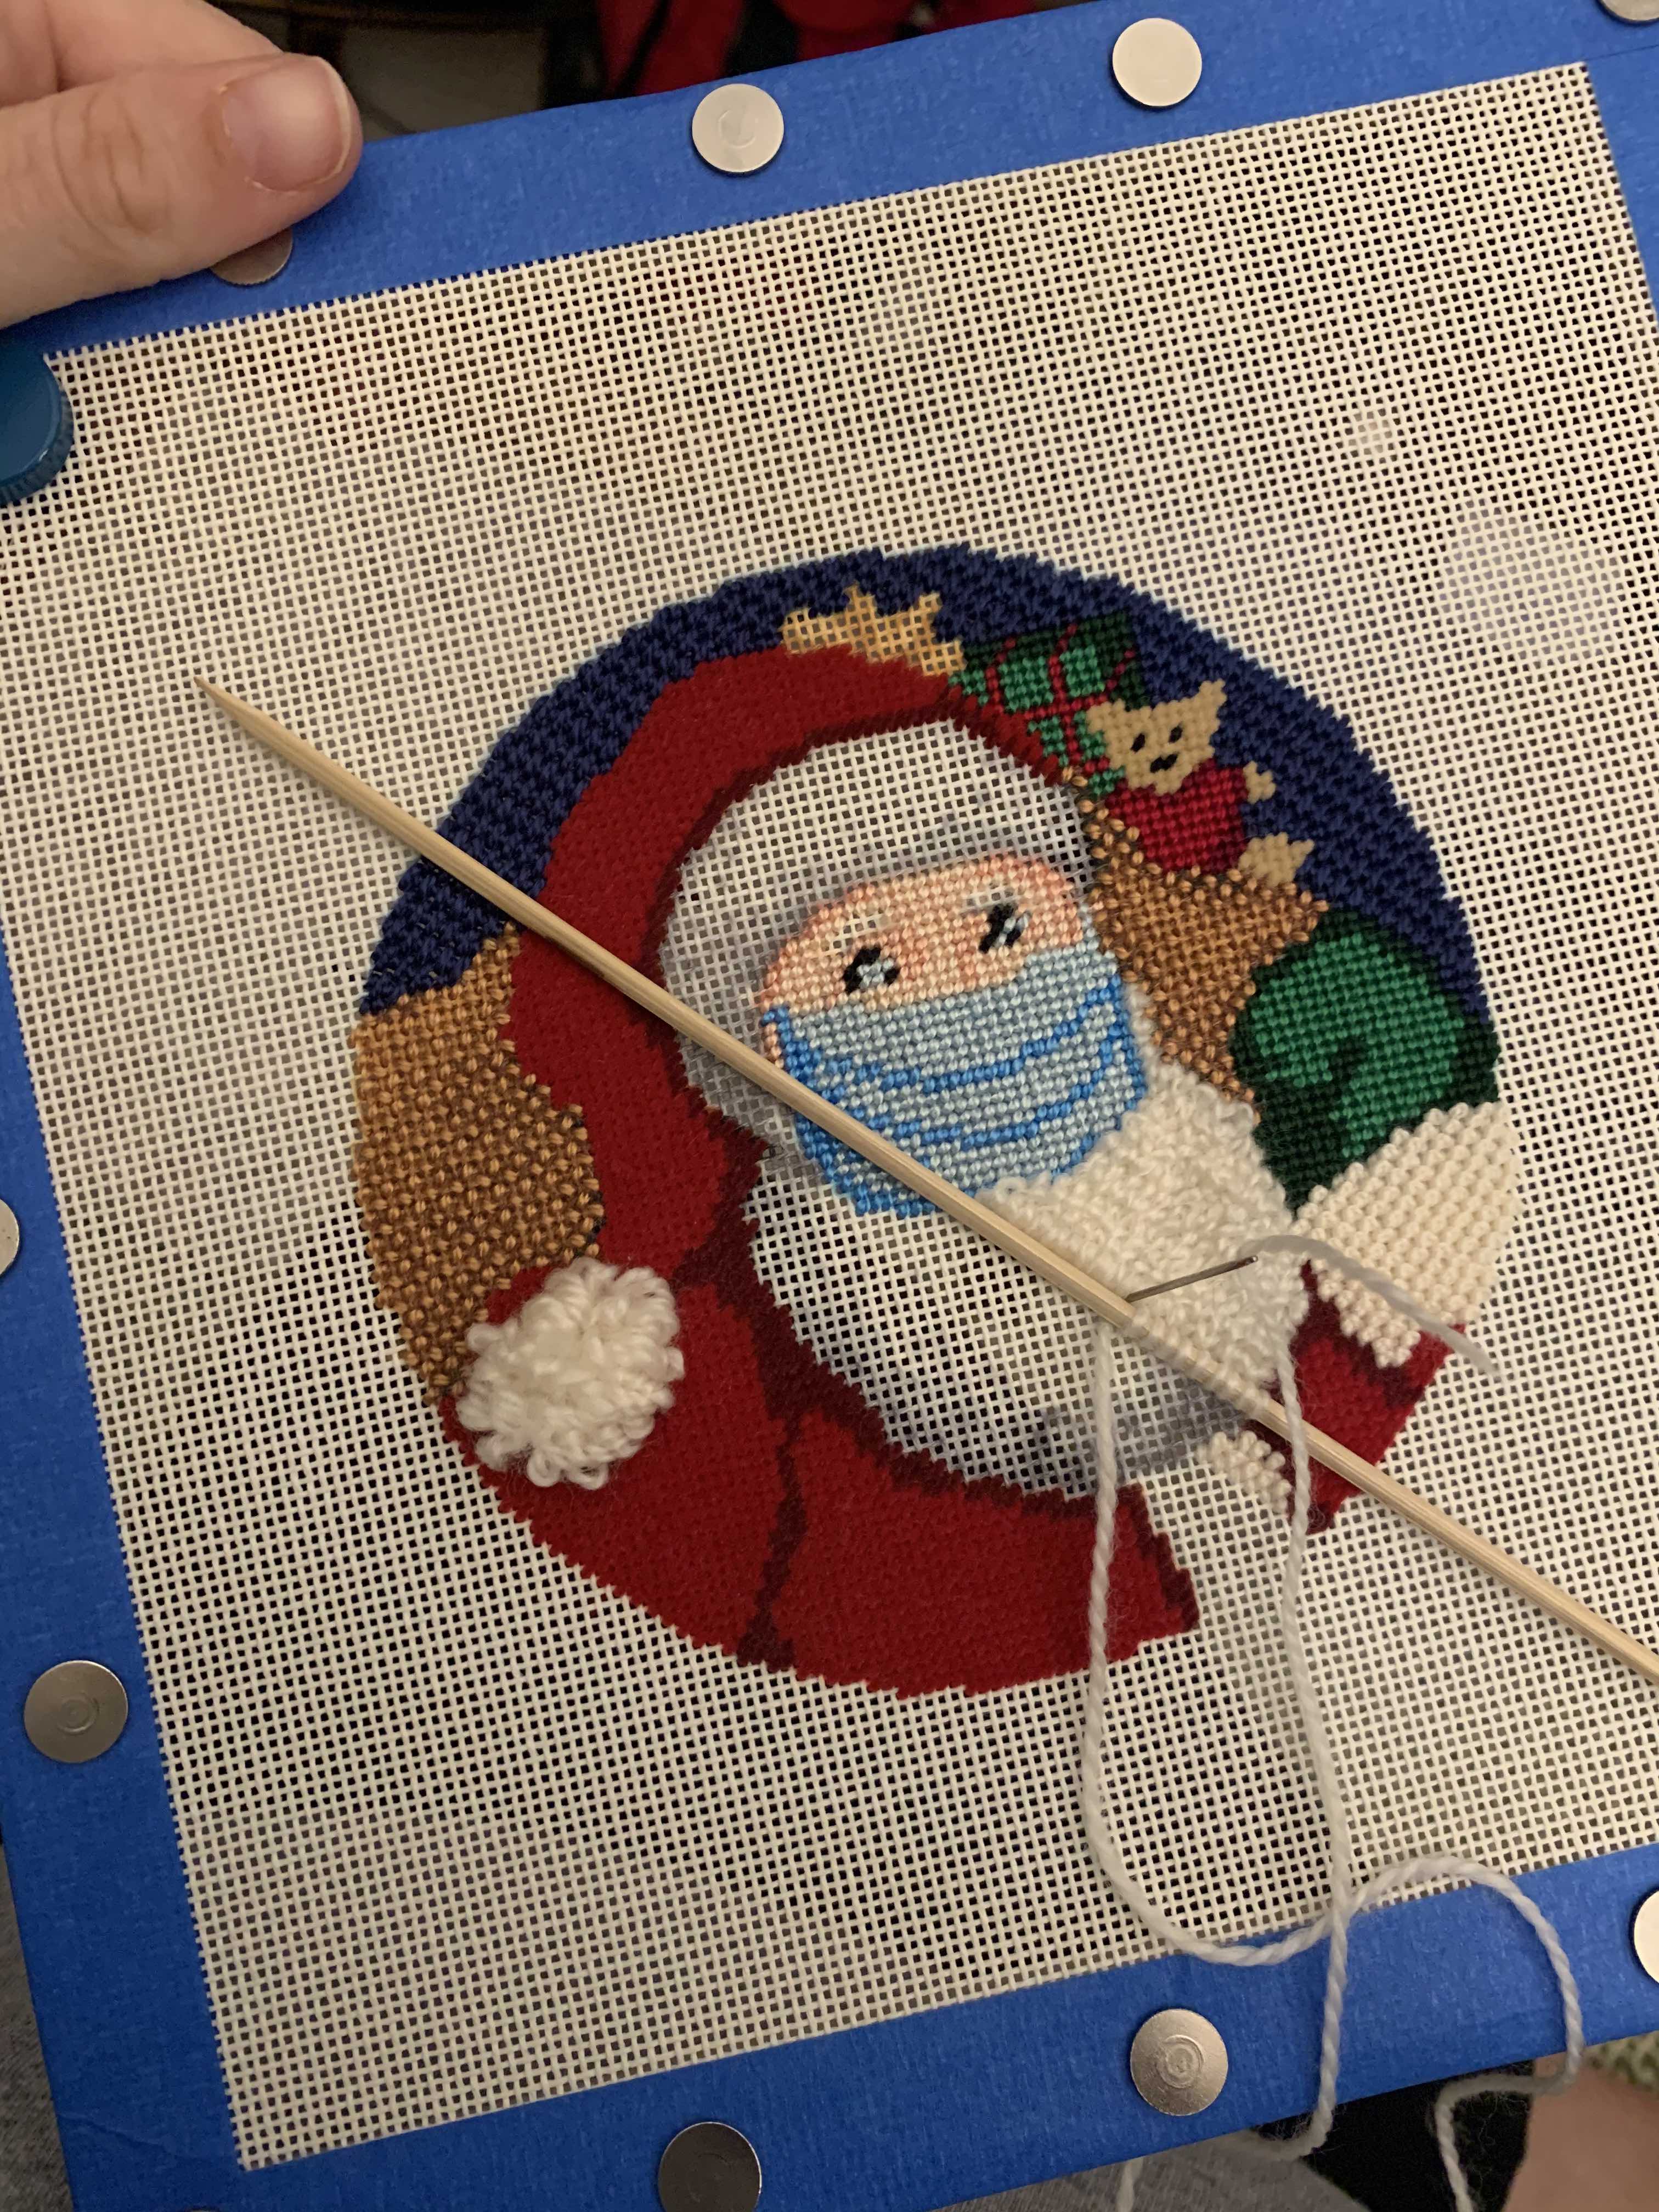
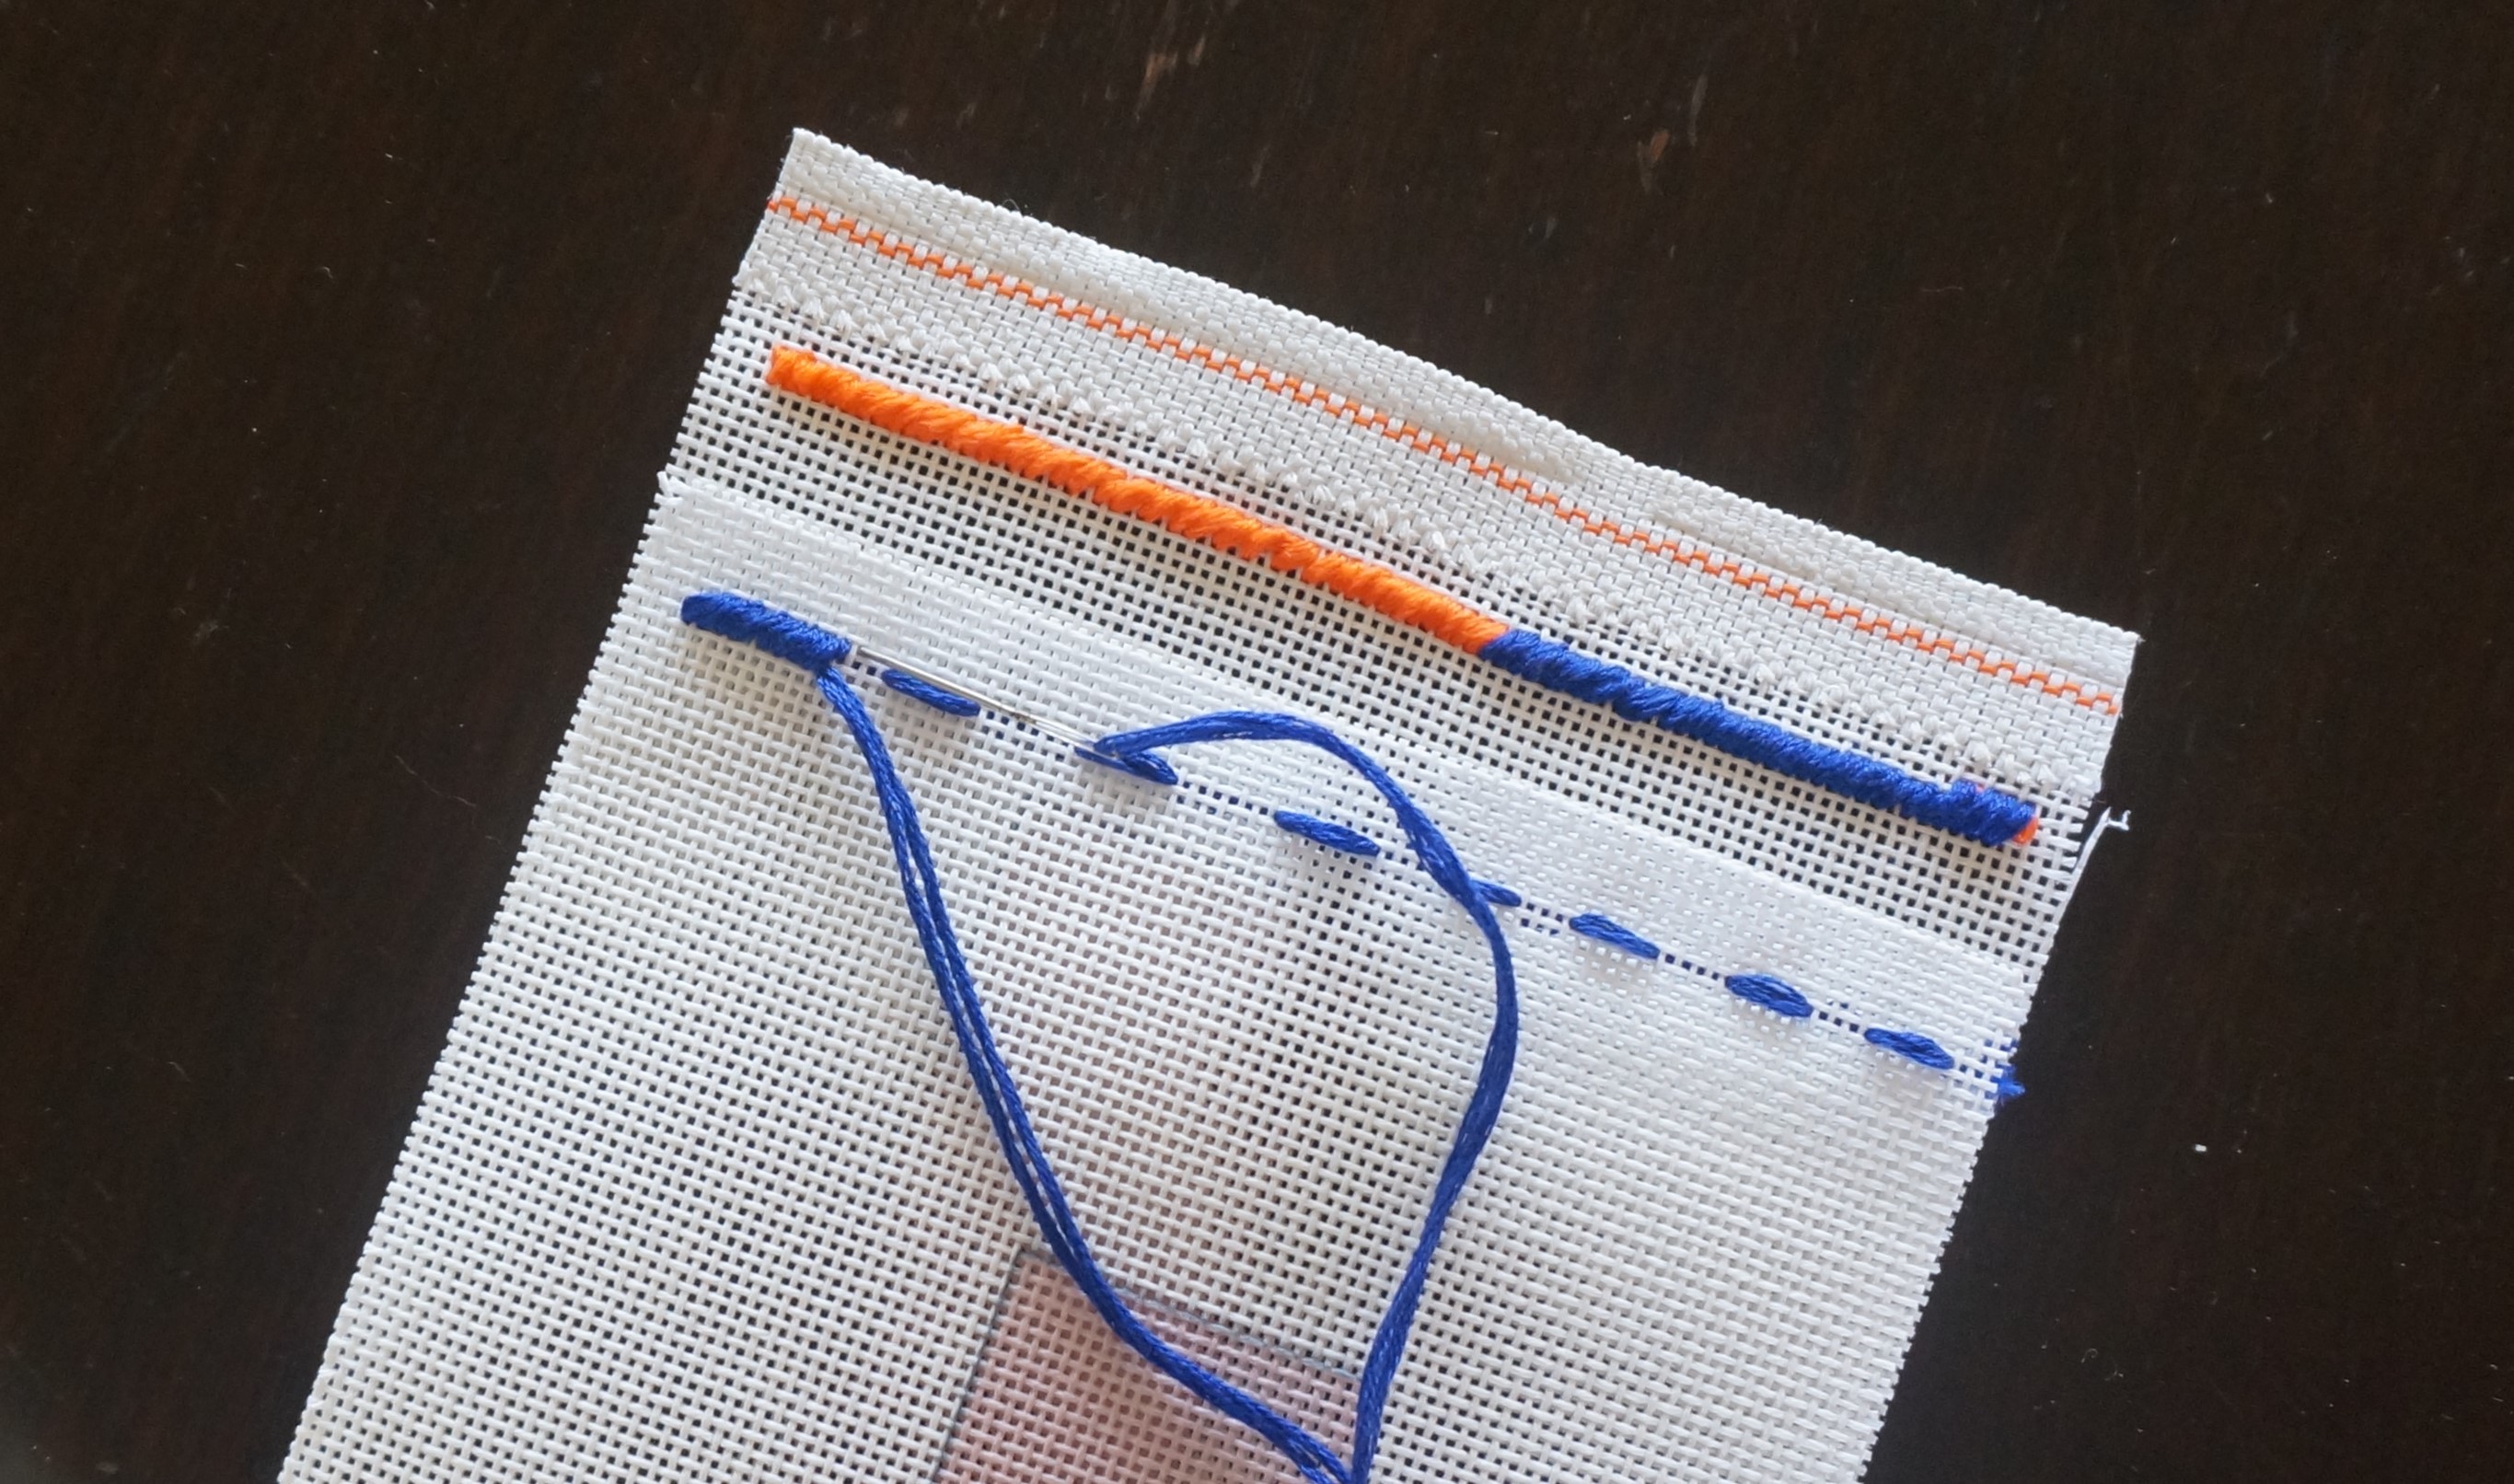
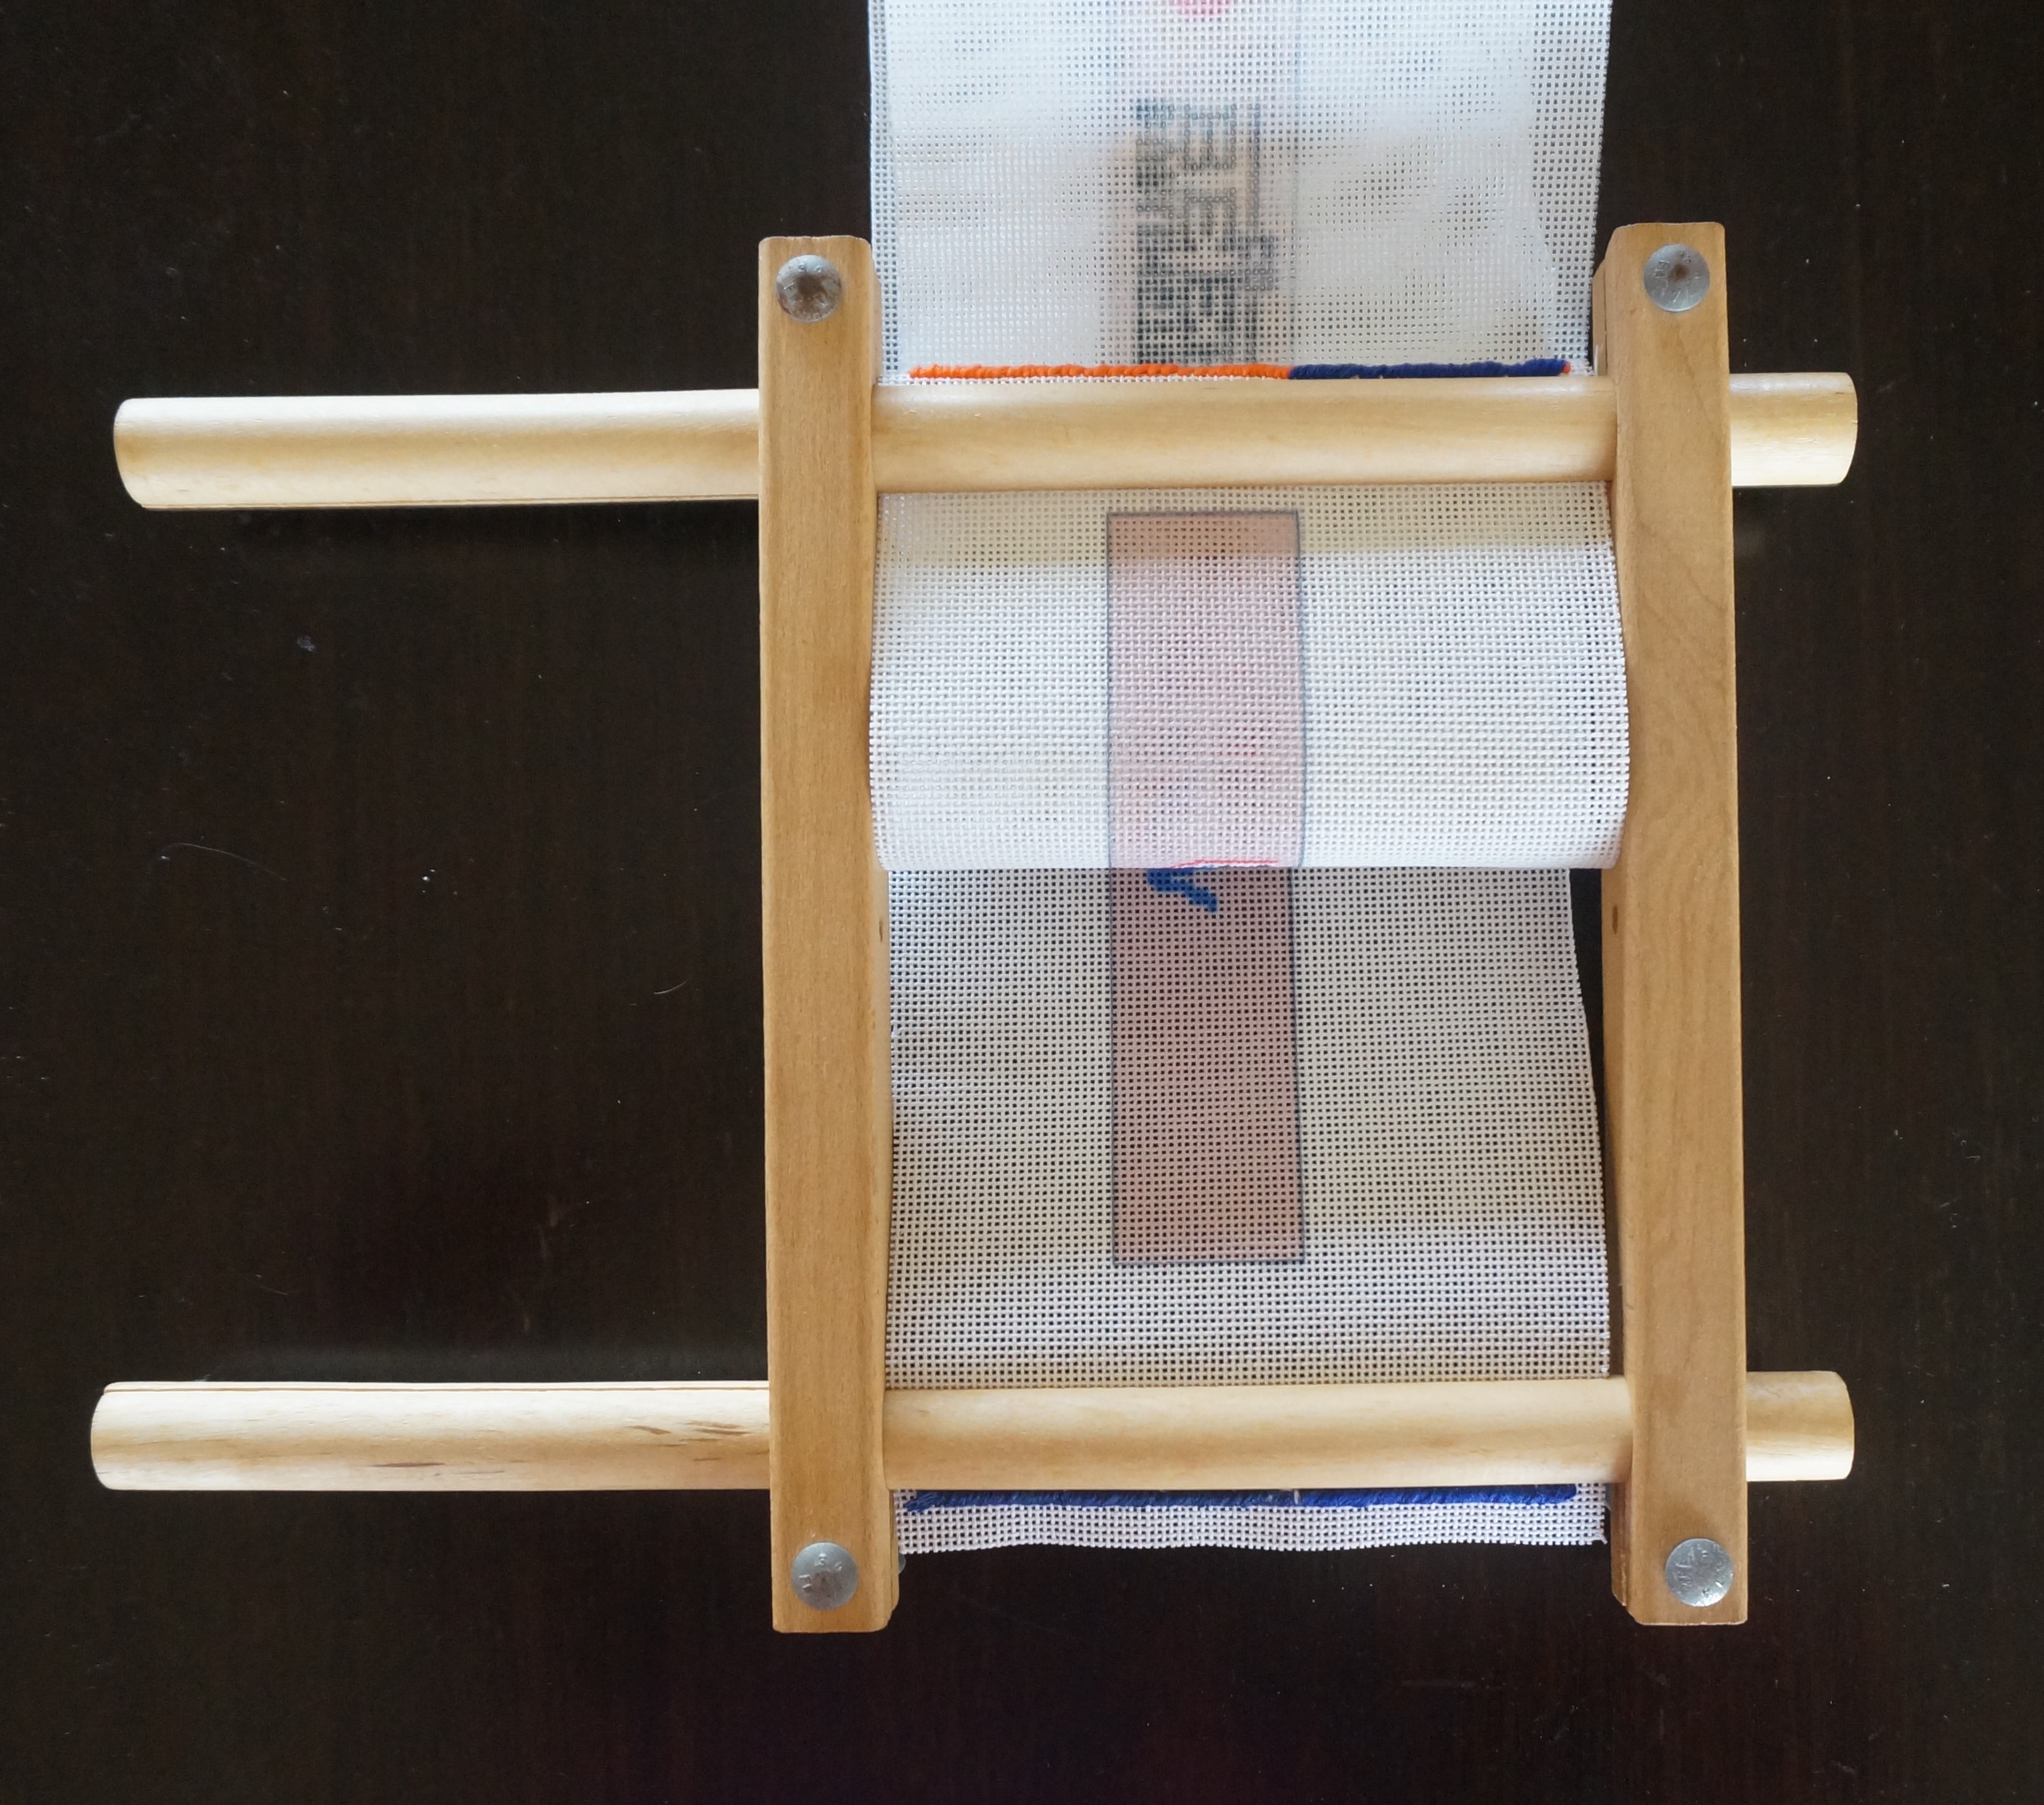
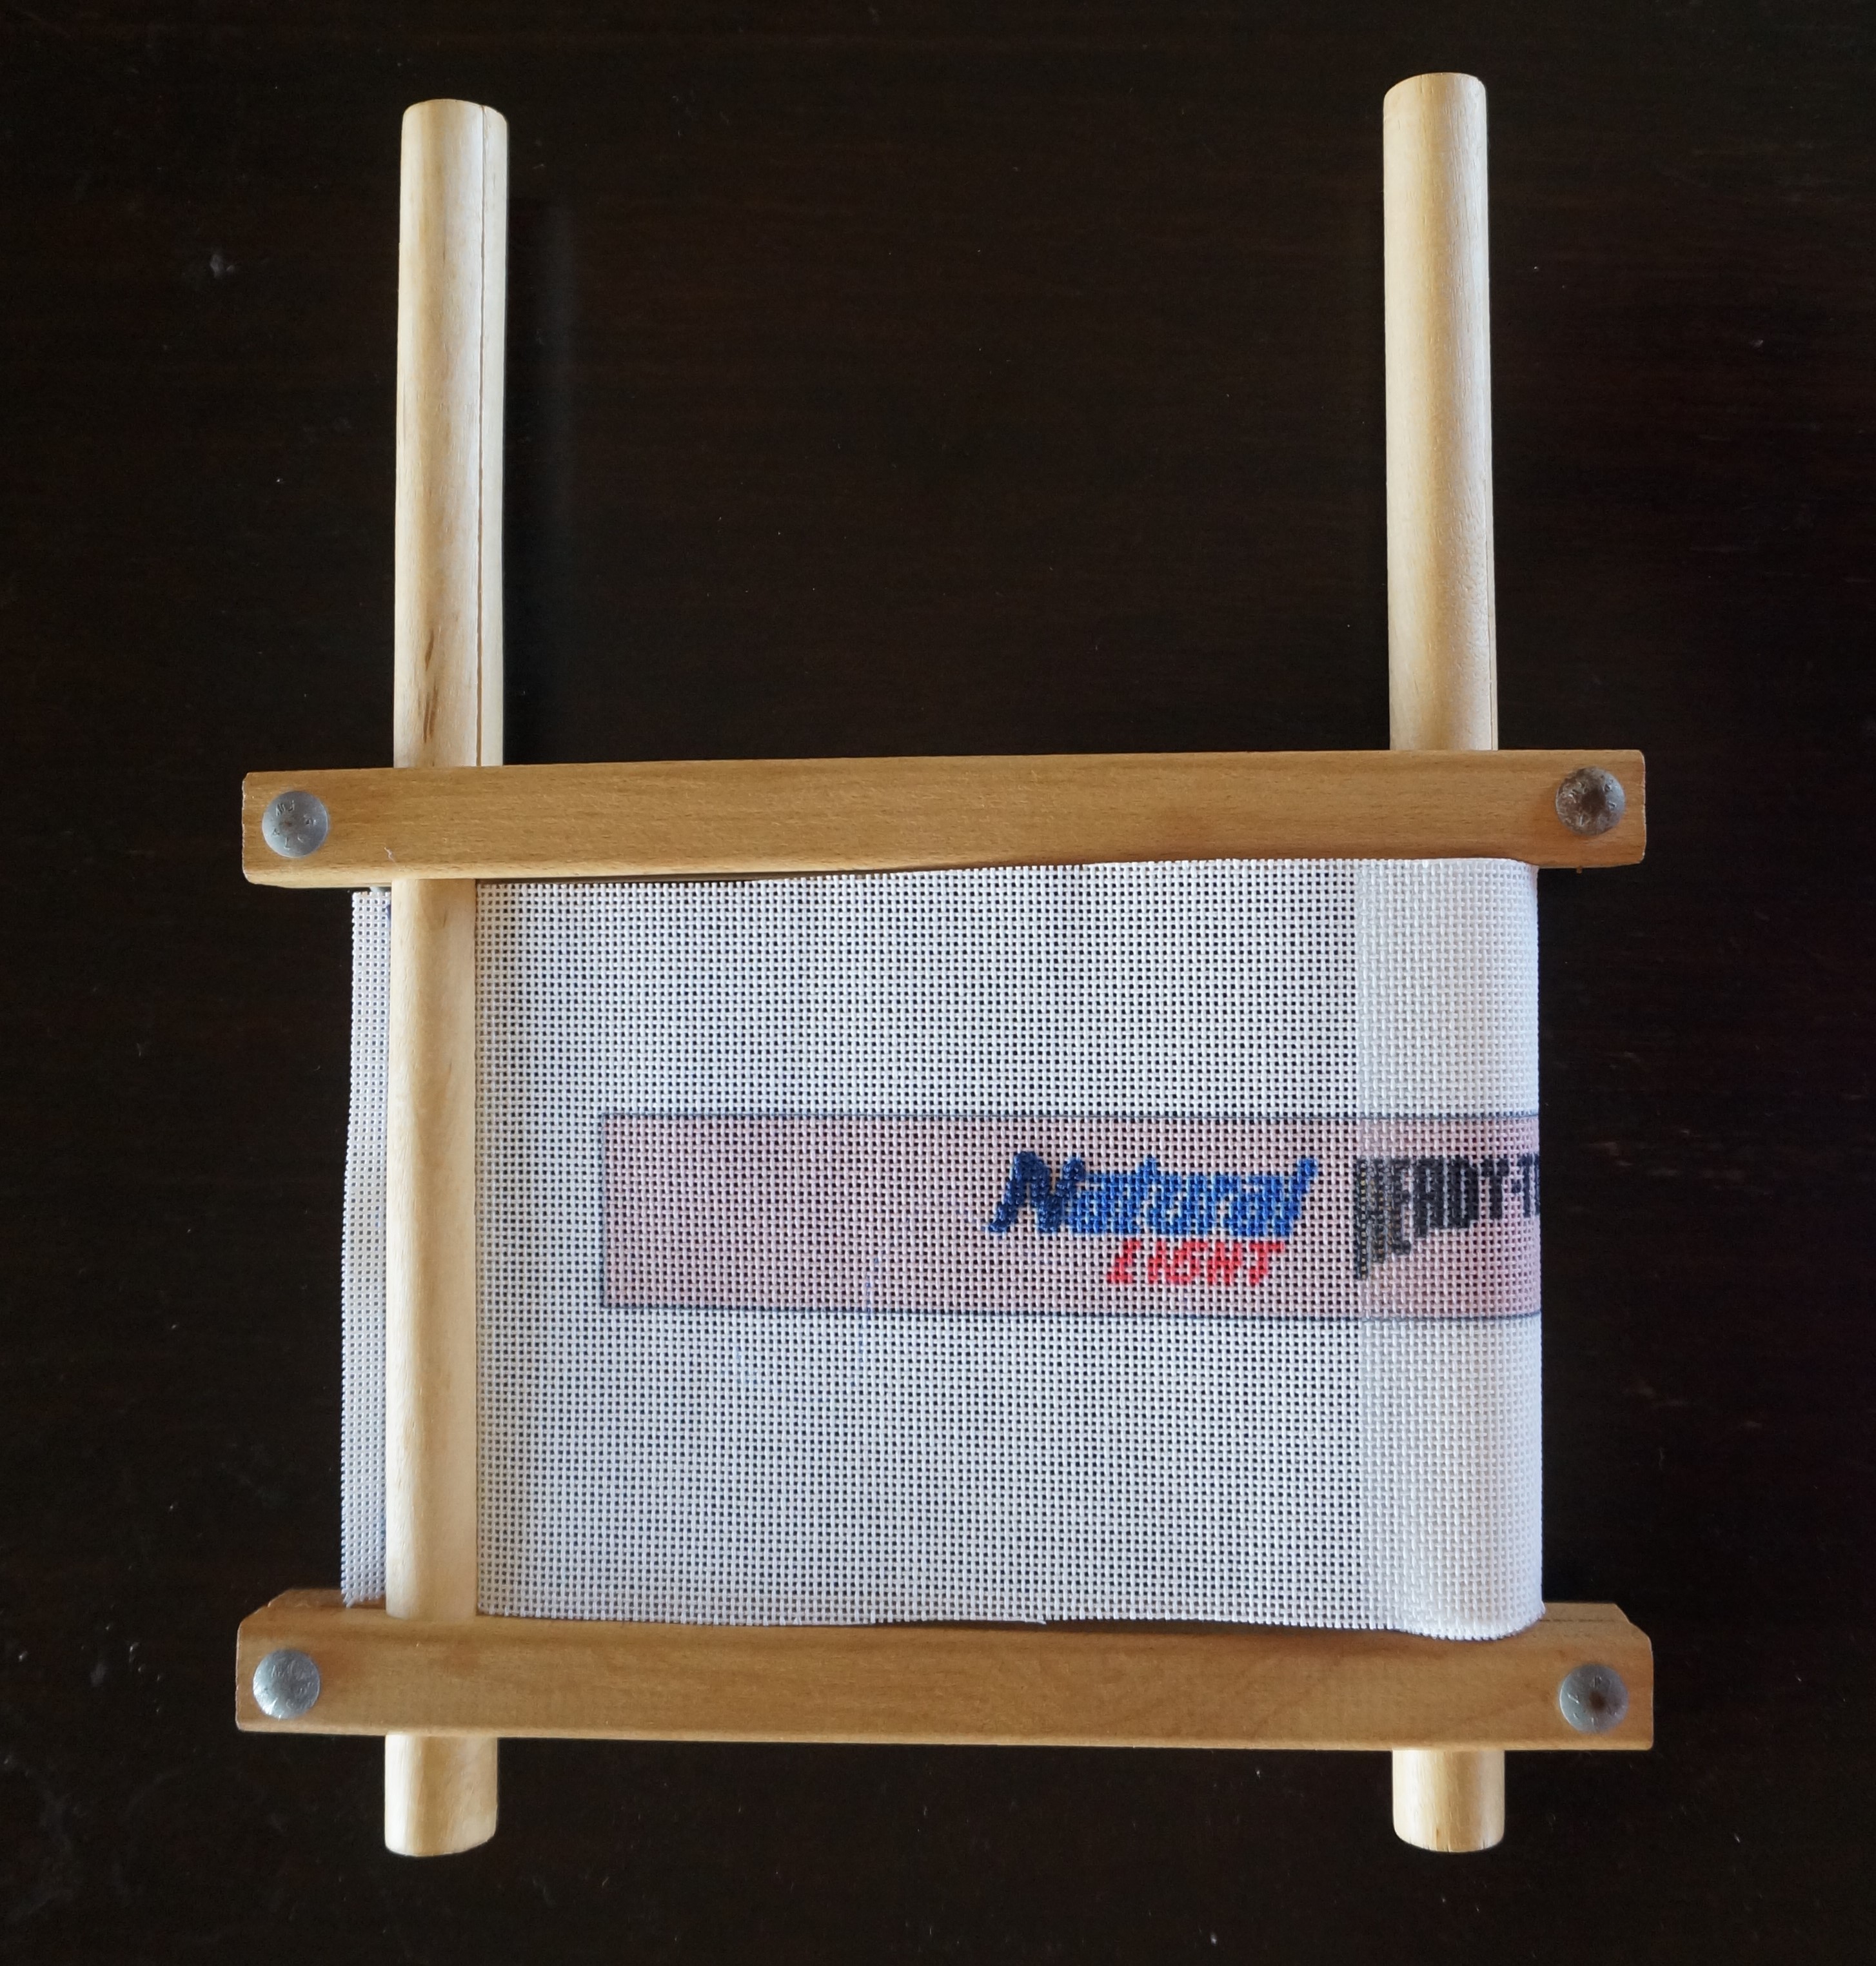
When doing decorative stitches (especially anything involving French knots), I always stitch on a frame. I have tried several different kinds, but my favorites are the mini stretcher bars (see first photo) from FA Edmunds https://faedmunds.com/needlepoint/.

NeedlePaint Santa's X Mask ornament.5

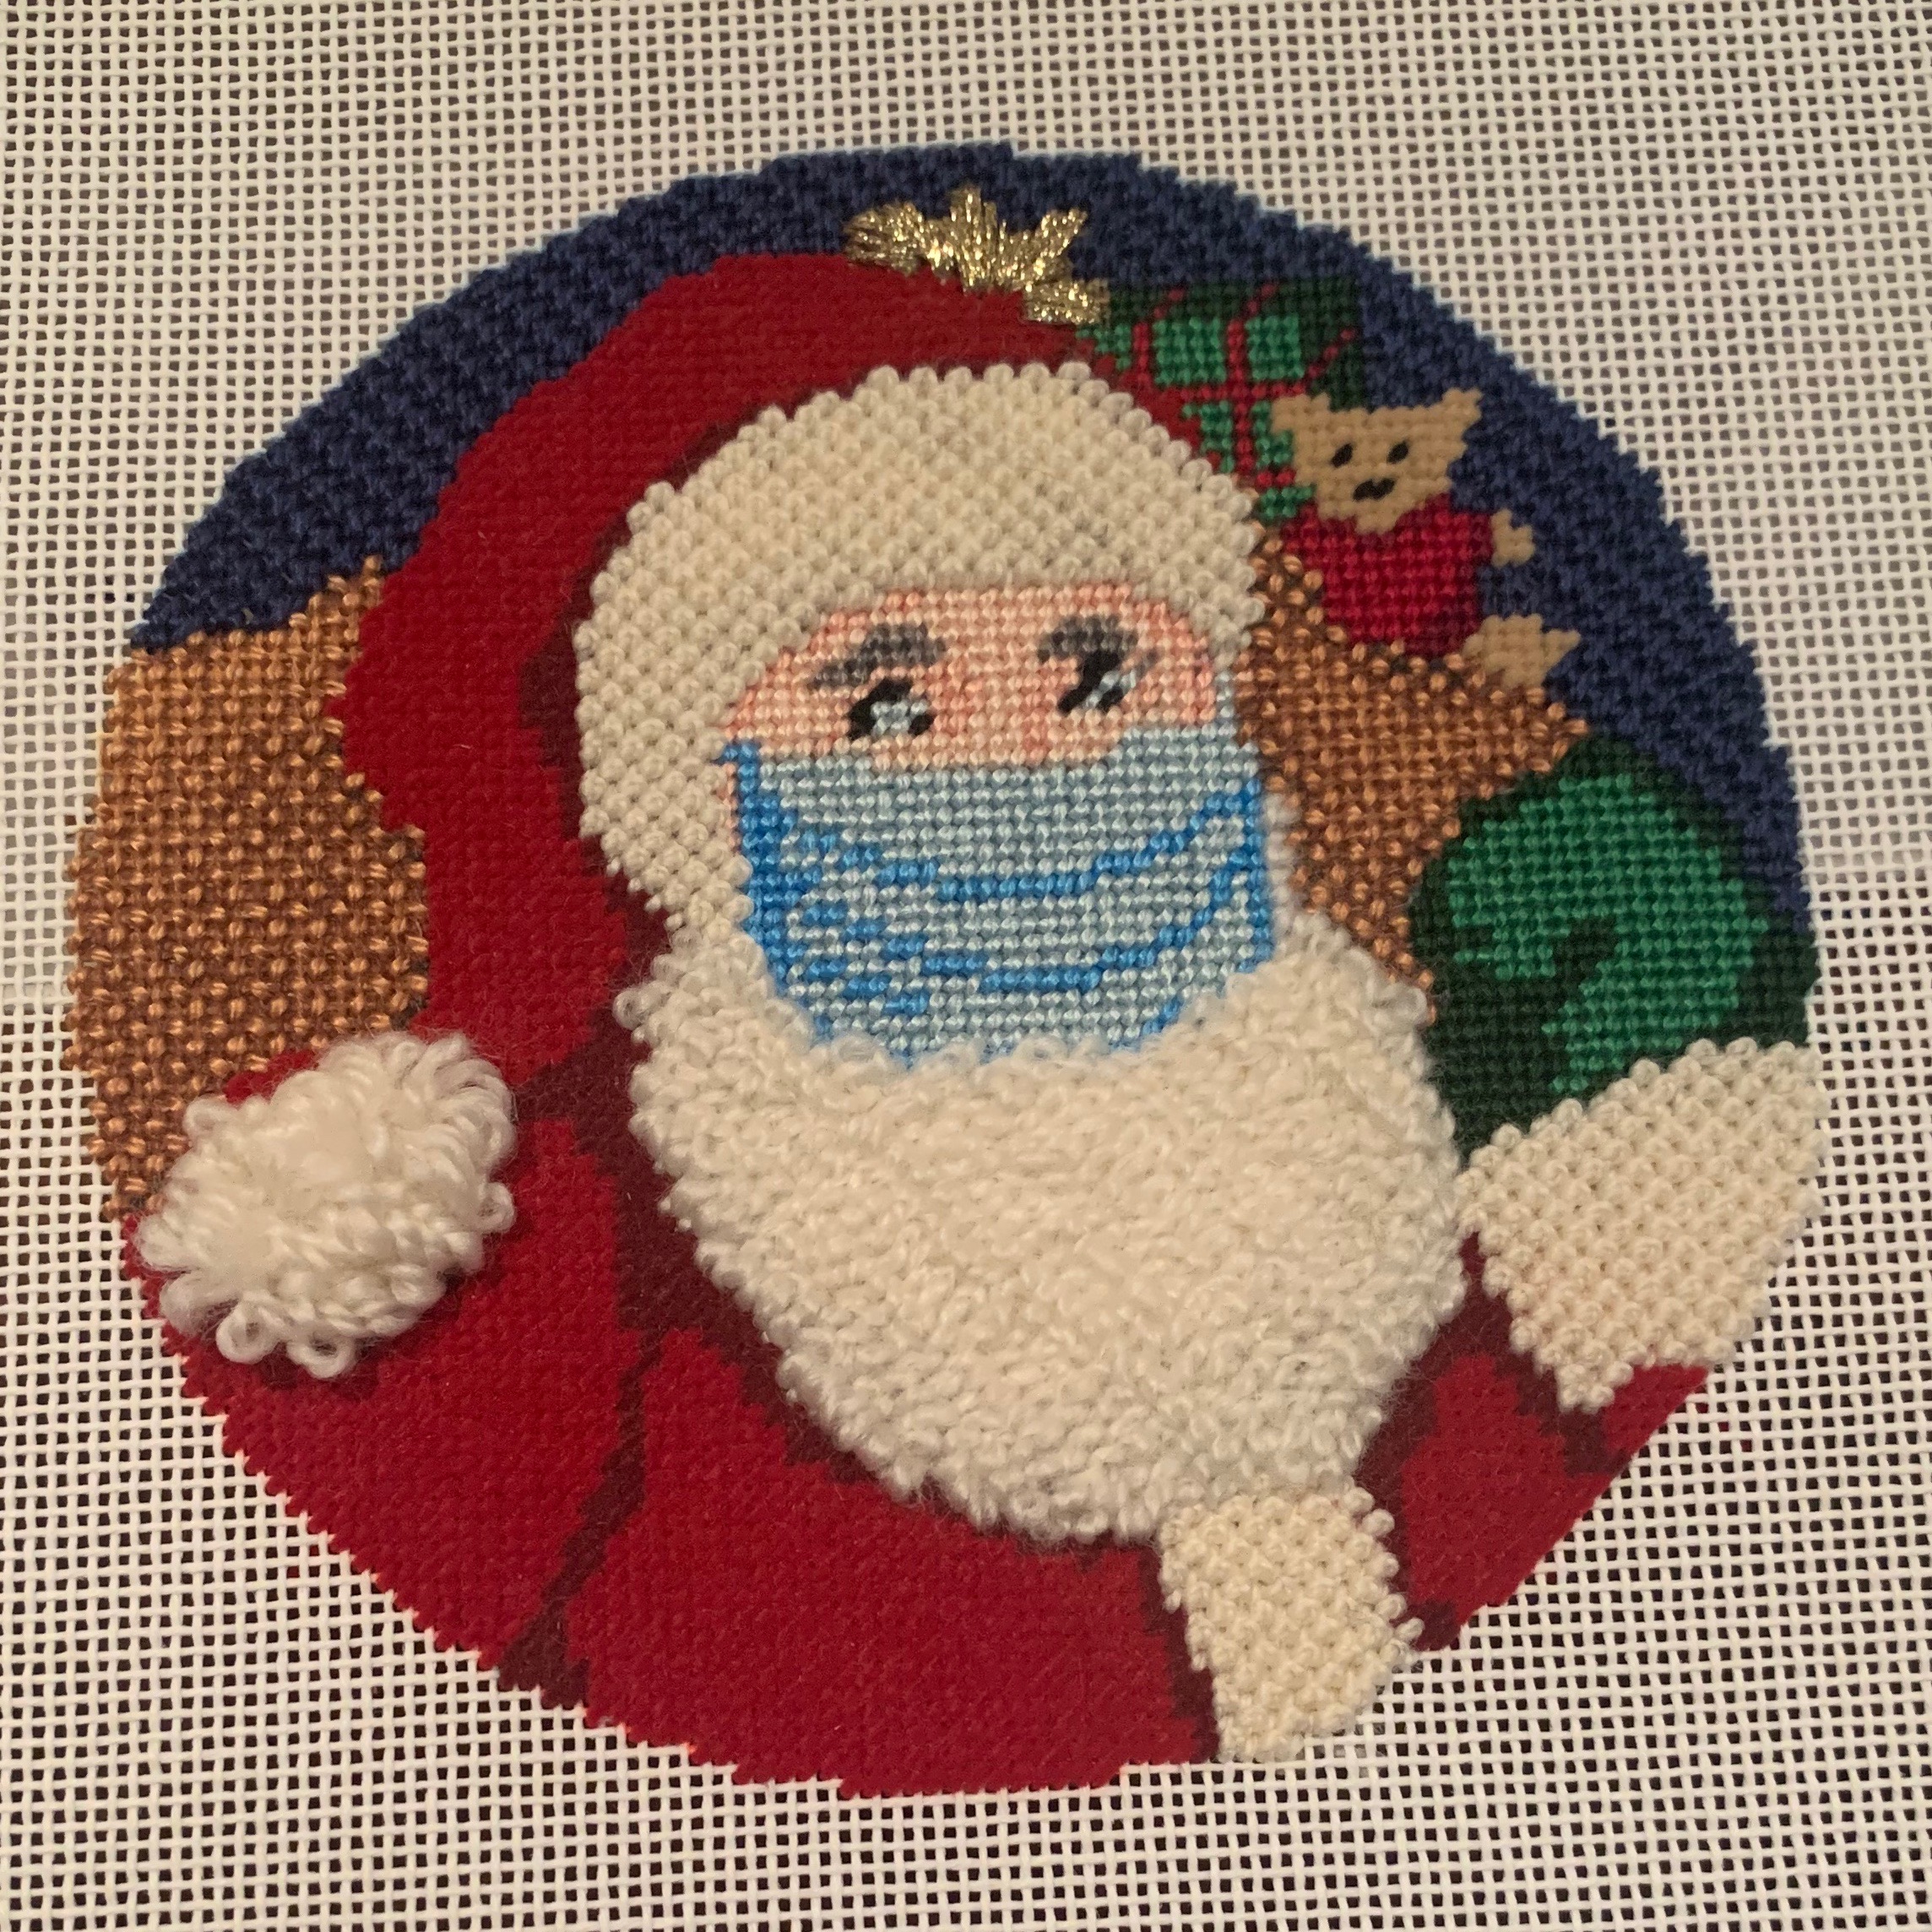
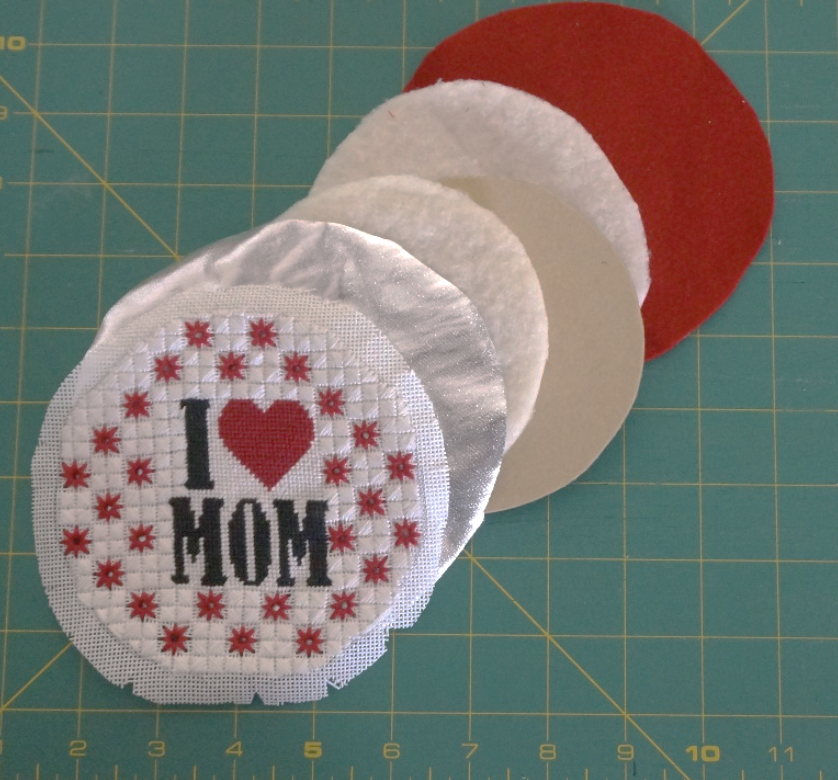
All finished stitching!

Stitches and fibers I used on this ornament canvas:

Background: Diagonal mosaic stitch in DMC Perle Cotton #5

Santa’s Bag: Alternating skip tent stitch in DMC Perle Cotton #5

Santa’s Glove, Face and Mask: Basketweave in DMC Perle Cotton #5

Presents: Basketweave in DMC Perle Cotton #5 and RG Petite Very Velvet

Bow on Present: Long stitch in Kreinik Gold Braid

Santa’s Suit: Basketweave in Petite Very Velvet

Santa’s Beard: Basketweave alternating stick in Planet Earth Wool

Santa’s Fur Trim: Alternating French knots and basketweave in Vineyard Merino Wool

Pompom: Turkey work (unclipped) in Planet Earth Wool

St. Nick's Delivery Needlepoint Ornament Canvas

Fingers crossed, Santa won’t need a mask next Christmas!
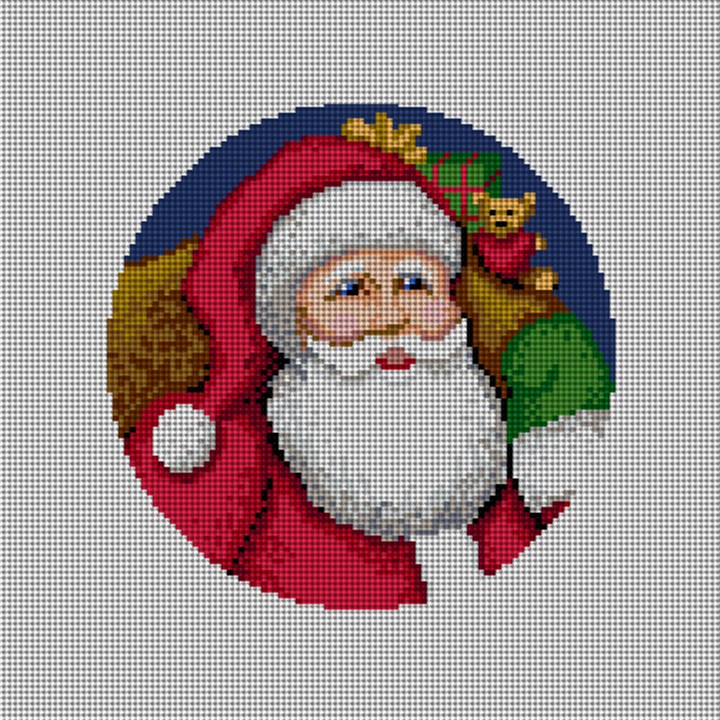
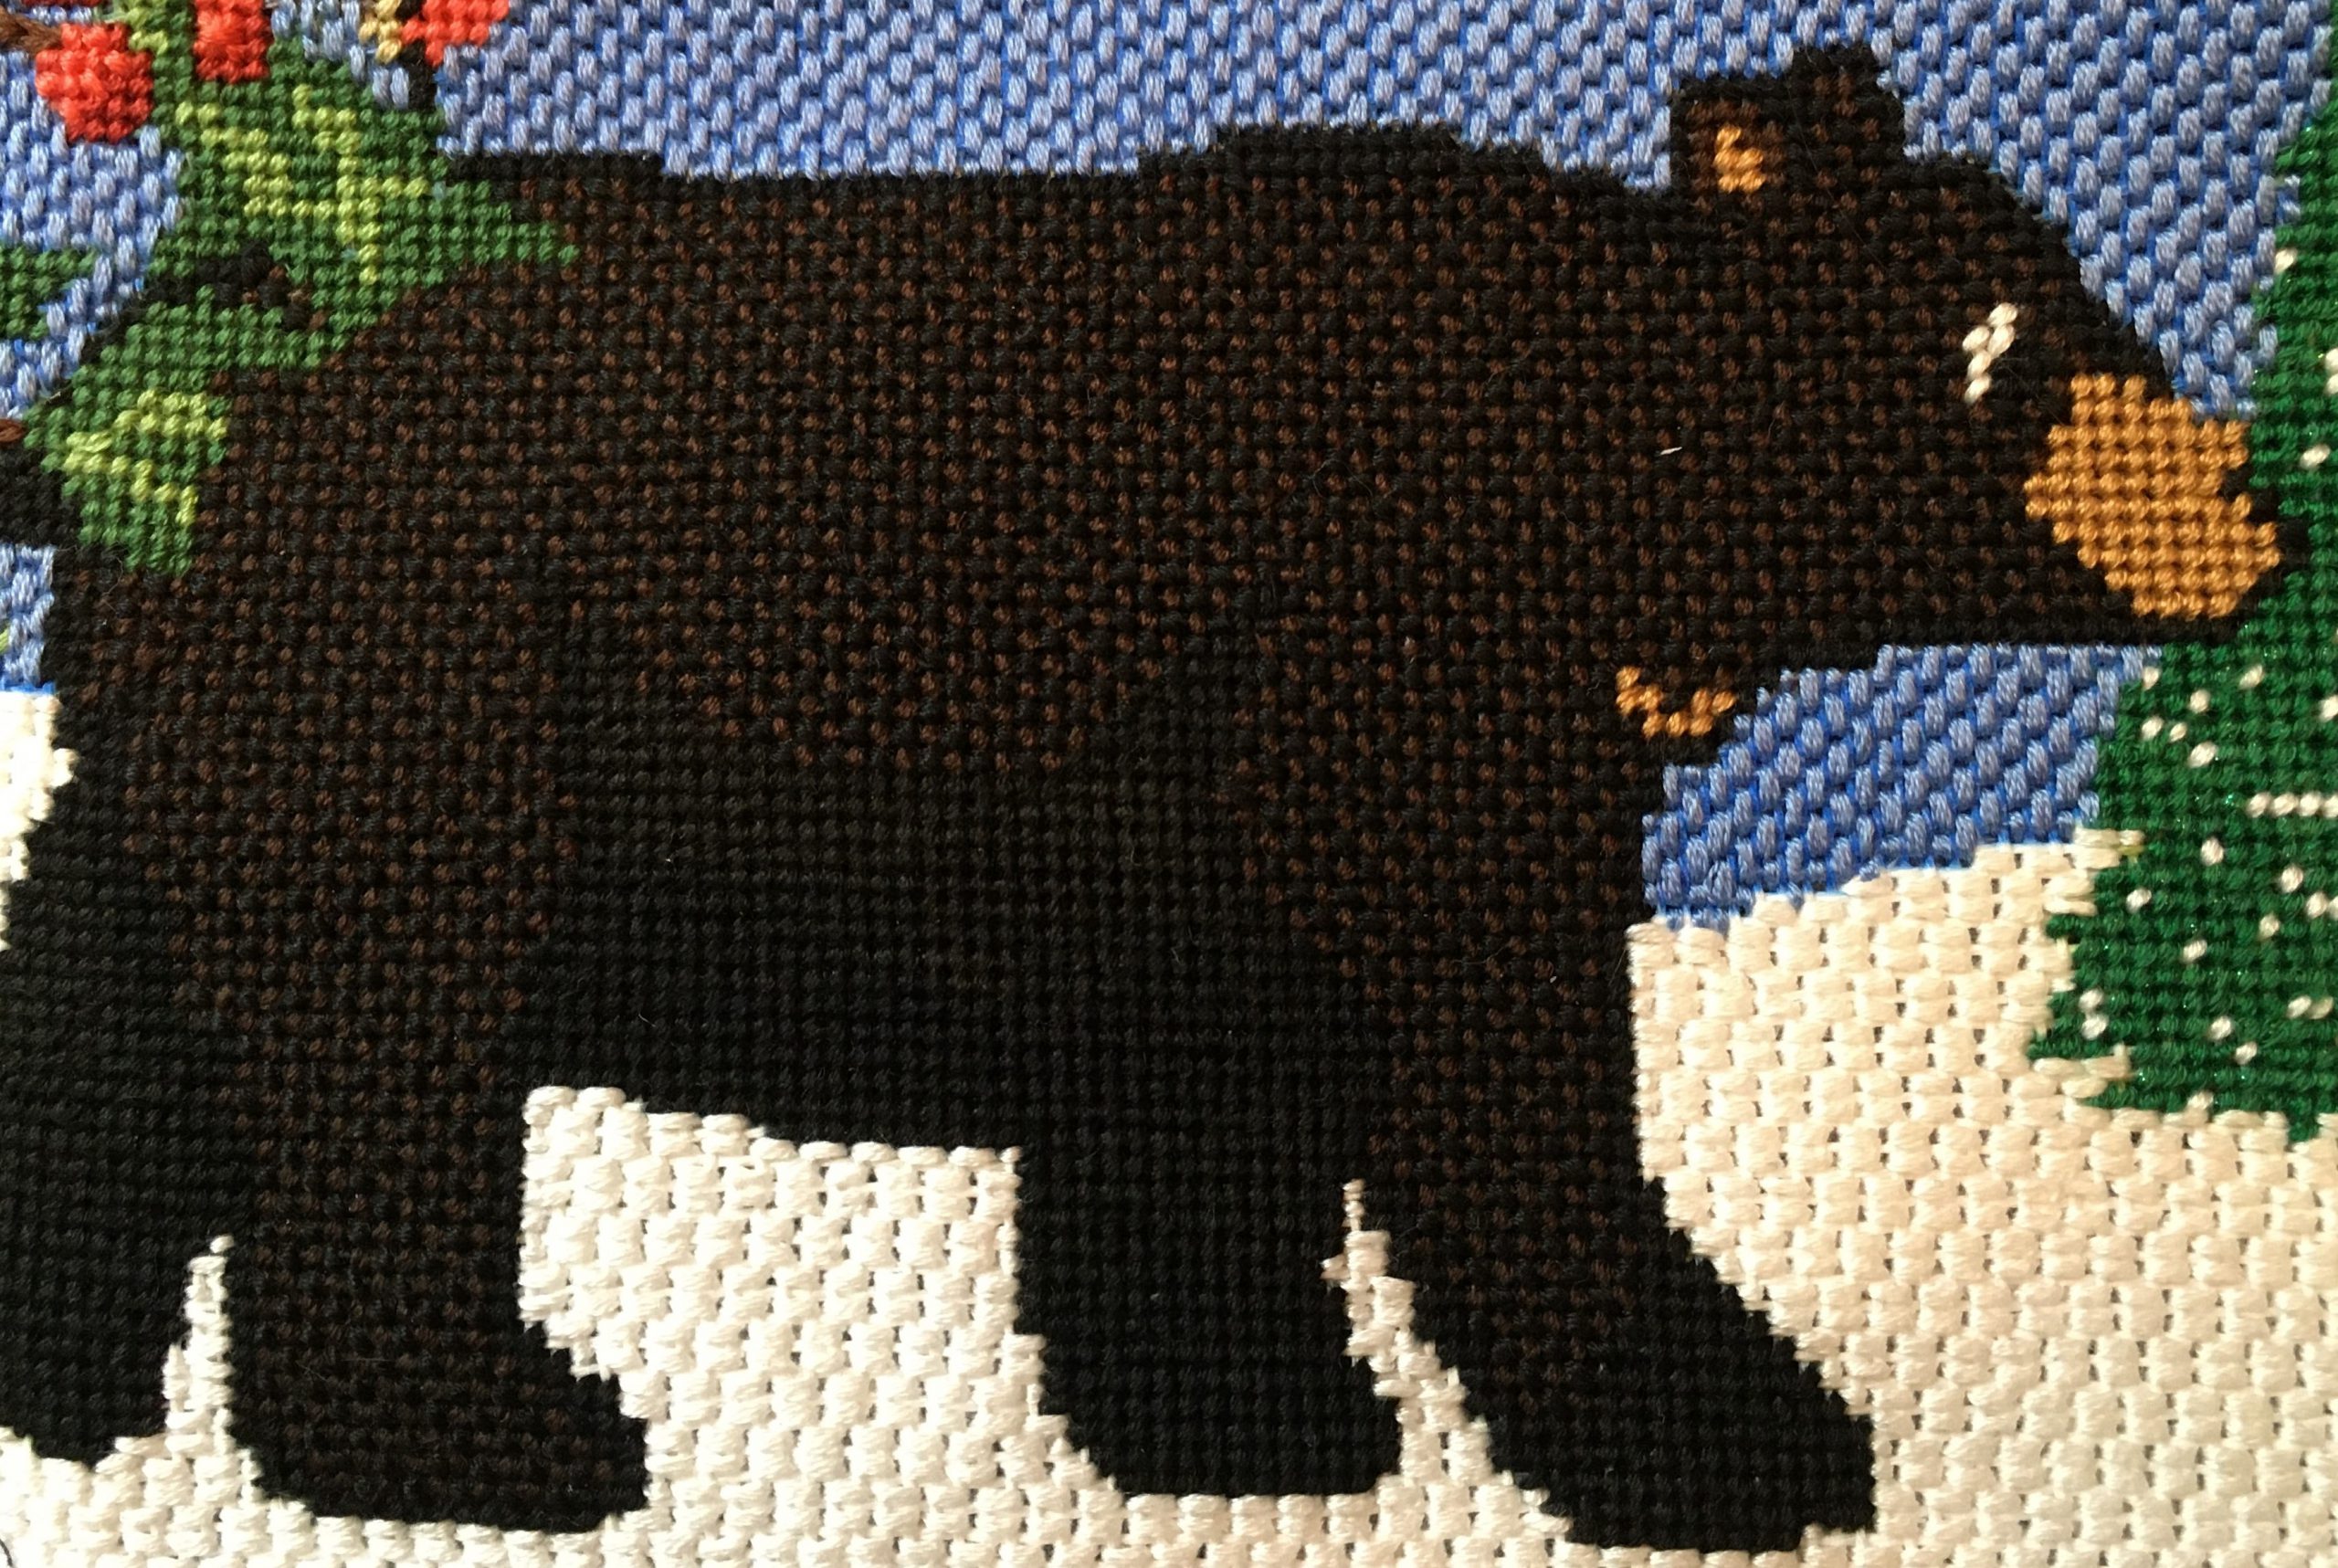
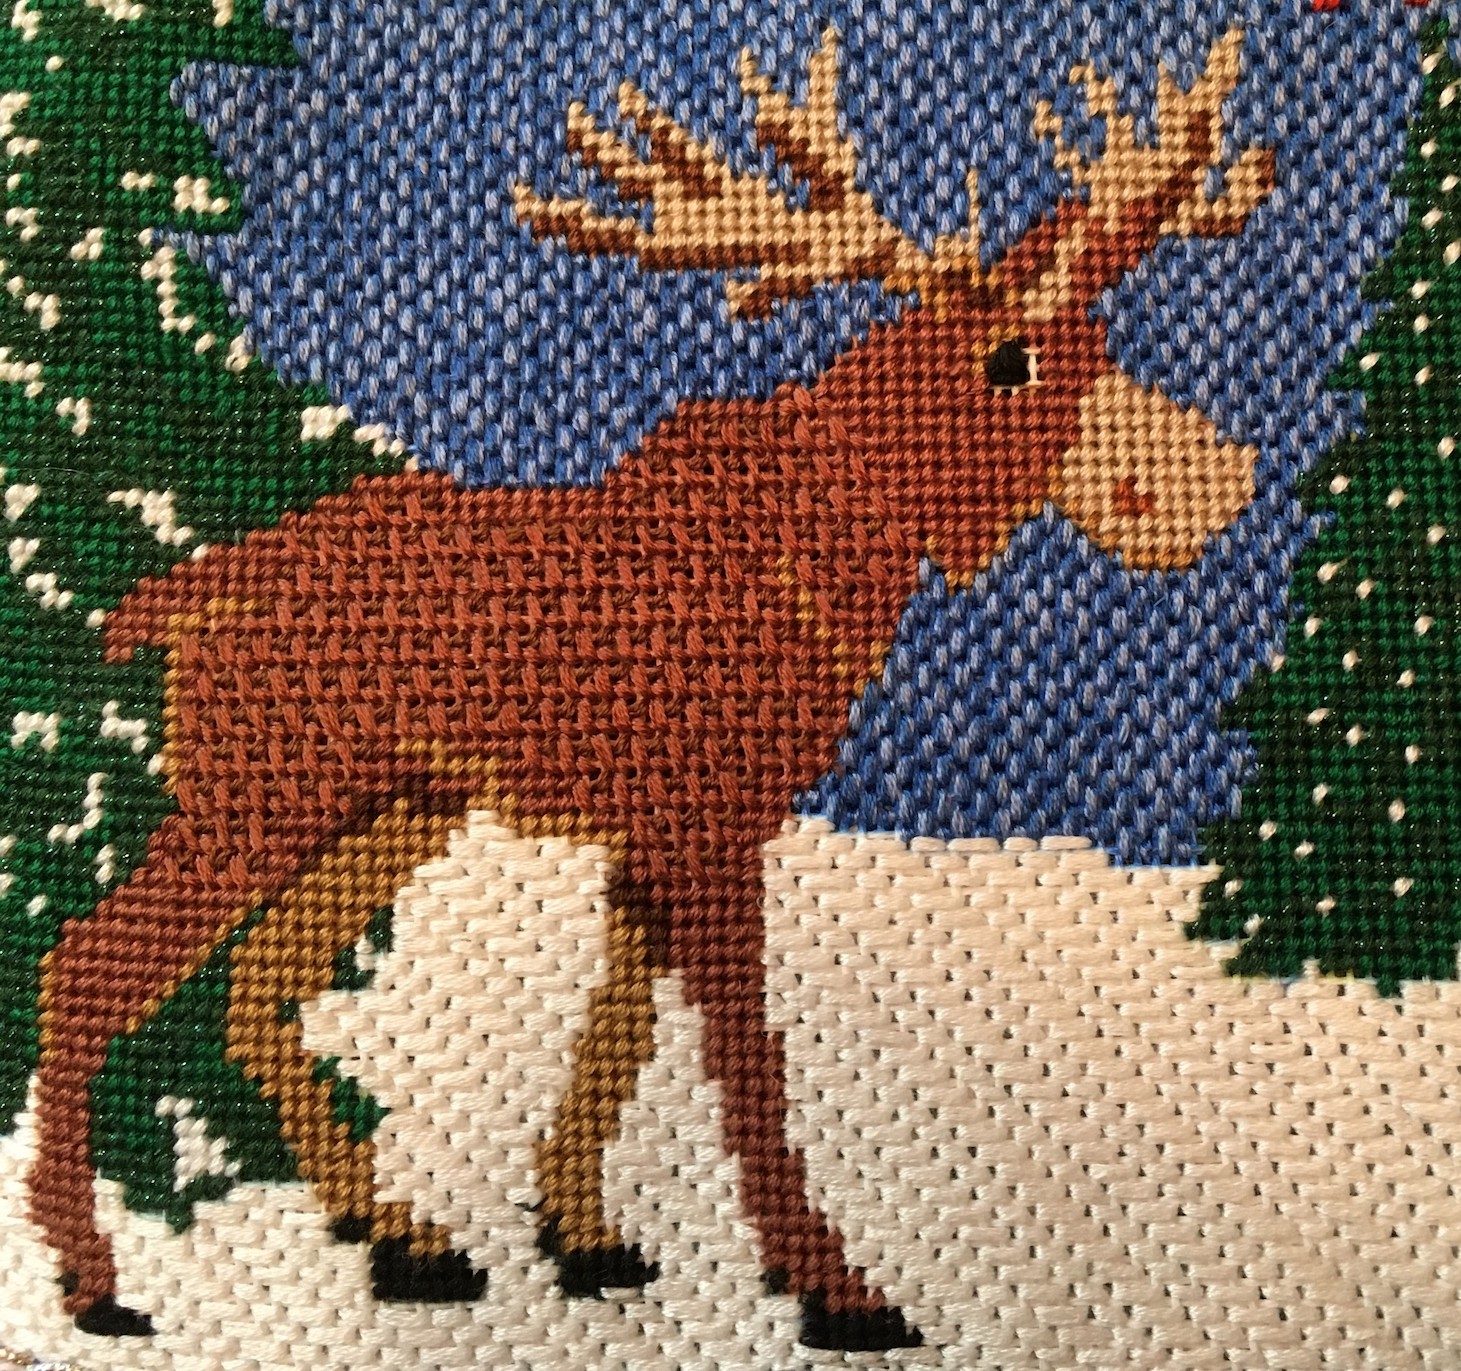
St. Nick’s Delivery Needlepoint Ornament Canvas

We’ll be checking in occasionally with Caroline to see what she’s been working on. If you have any questions: on this canvas, about our ornament finishing service, or any project that you may be working on, don’t hesitate to send her an email: info@needlepaint.com.

H a p p y  S t i t c h i n g !

How To Stitch A Needlepoint Belt Canvas

By Peggy Bond

So you have a 5-inch wide by yard long printed needlepoint canvas for a belt. Where do we go now? To a split rail scroll frame which will keep your canvas relatively square while allowing you to access sections of the canvas without having to remove and reposition it.

The F.A. Edmunds 6” x 12” scroll frame is a great option. 

Before putting the canvas in the scroll frame, create “end stops” along the short sides of the canvas. The end stop is made with a doubled length of thread (i.e., 12 strands of floss or 2 strands of wool). First, do running stitches along one row as shown below. Then stitch over that row with a 2 x 2 Continental stitch. The end stops will prevent the canvas from slipping through the slotted dowel rod of the frame.

End Stop

End Stop Diagram

The narrow ends of the canvas are slid into the slotted dowel rods and should go all the way against the end of the slot. Insert the dowel rods into the frame’s spreader rails as shown below. The spreader rails should be flush with the edges of the belt canvas to reduce warping the canvas while stitching. 

In the Frame

Even when the rails’ wing nuts are not tight, the end stops should not be able to be pulled through the dowels and the frame should be a rectangle. The dowels can be turned to roll the canvas as it is worked. After positioning the canvas to a section for stitching, tighten the wing nuts on the rails.

Read to stitch

Where to start the stitching and in what order to do it is a personal choice. Personally, I prefer to stitch all of the images before attacking the background. There is no reason why images and elements can’t be done together as the canvas is wound on the dowels. The only thing to remember is not to stop the background stitches at the same vertical spot on each row.

Belts are most frequently stitched with the Tent stitches. For the belt shown below, the Continental and Half Cross Tent stitches were used for the images and lettering, and for filling in where the background stitch couldn’t fill. The background stitch is the Upright Cross. 

CTF Belt Section

Look for our future post on background stitches.

Here at NeedlePaint, we have a large assortment of needlepoint belt canvases we know you will love stitching!