Back to Christmas Needlepoint Stockings
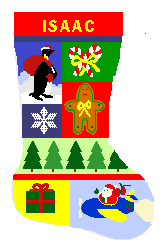
(Written by Peggy Bond) I had a little more time this year than I had with the War and Peace stocking. Time is not the issue but the challenge is two needlepoint stockings for my nephew’s twins Alex and Isaac – same but different designs are the order of the day.

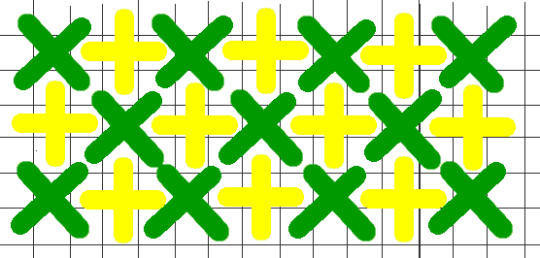
With plenty of time this season, I decided to experiment with some texture and color variations while stitching. For example, I dressed up the Christmas present in the heel of Isaac’s with a green and yellow checkerboard pattern.
And, then I stitched the background in an oblong reversed cashmere box stitch, but in two different shades of yellow.
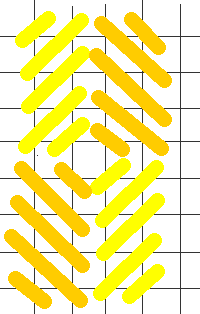
For the background diagram above, I have accentuated the yellow color differences. The finished stitching is below. Unless you are aware of the slight variation in the yellows, you probably wouldn’t notice it. However, it does give the finished stocking an added dimension. It almost looks like variegated thread.
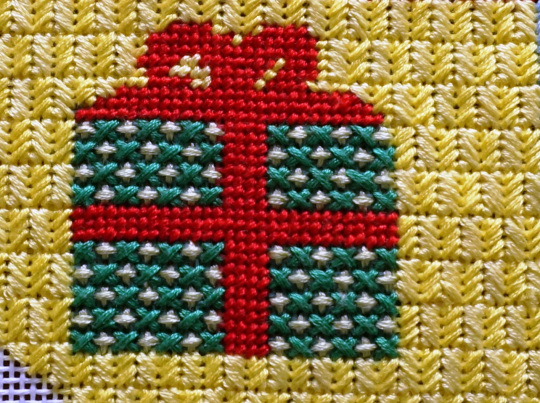
Close up of Present Needlepoint Stitches
More information on these stitches can be found in The Needlepoint Book by Joe Ippolito Christensen.
I am now working on the Isaac’s penguin walking along the powdery snow, and will post my progress in a day or so…


Recent Comments