Written by Peggy Bond
Santa Claus is Coming To Town And He Has New Wheels!
Santa’s reindeer refused to work in the summer heat, so Santa Claus had to find new wheels. NeedlePaint came to his rescue with their newly designed 3-D needlepoint station wagon, stitched on 18 mesh canvas with DMC thread. After Santa is done using it for warm weather transport, it will make an unforgettable stocking stuffer toy or Christmas mantle decoration.
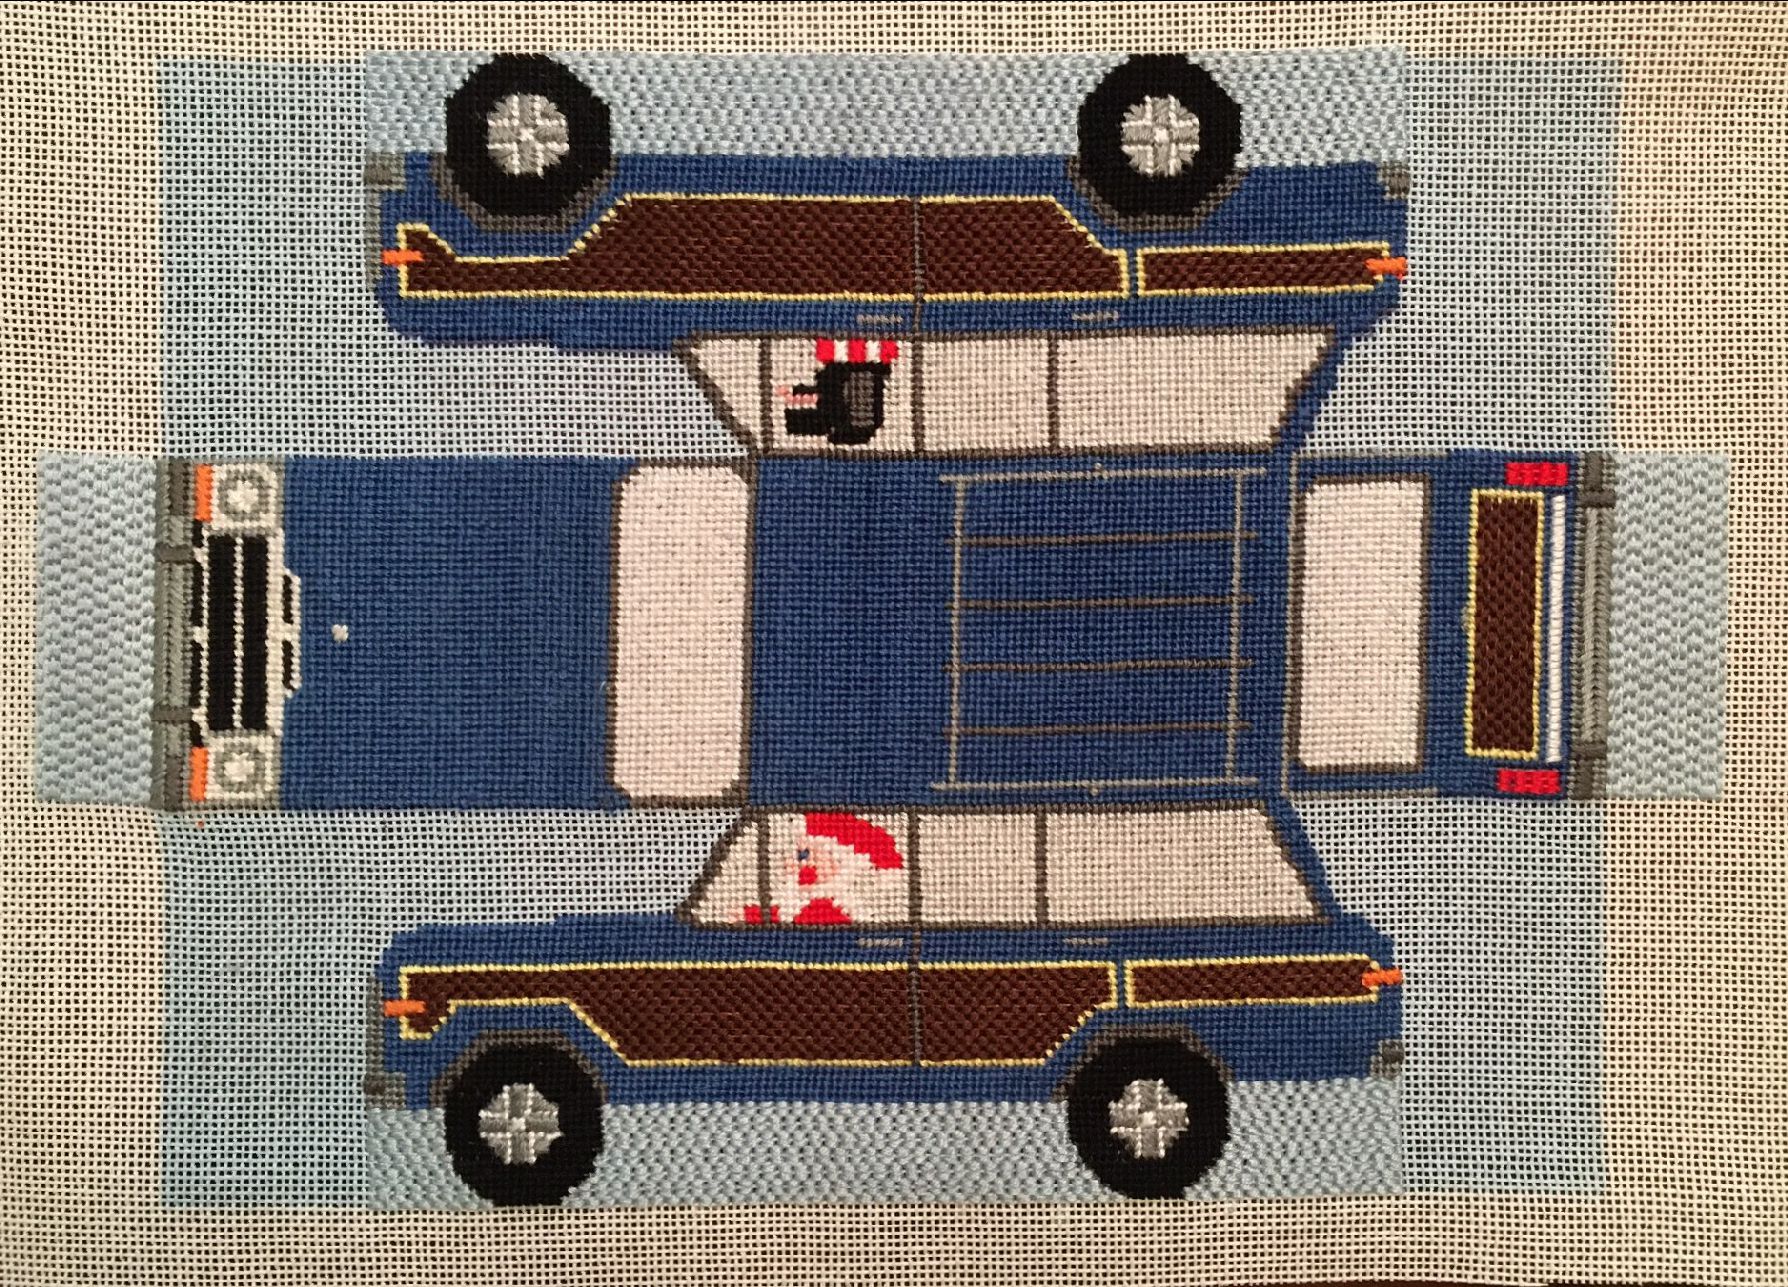
Stitched car canvas:
The main body of the car and window were stitched with only four strands of the DMC thread, so that it will be less bulky to sew together. Santa, his dog, and the remainder of the car were stitched with all six strands of the DMC thread which makes them stand out from the background. The brick stitch is used for the wood panel on the car, and the double brick stitch is used for the light blue underbody of the car.
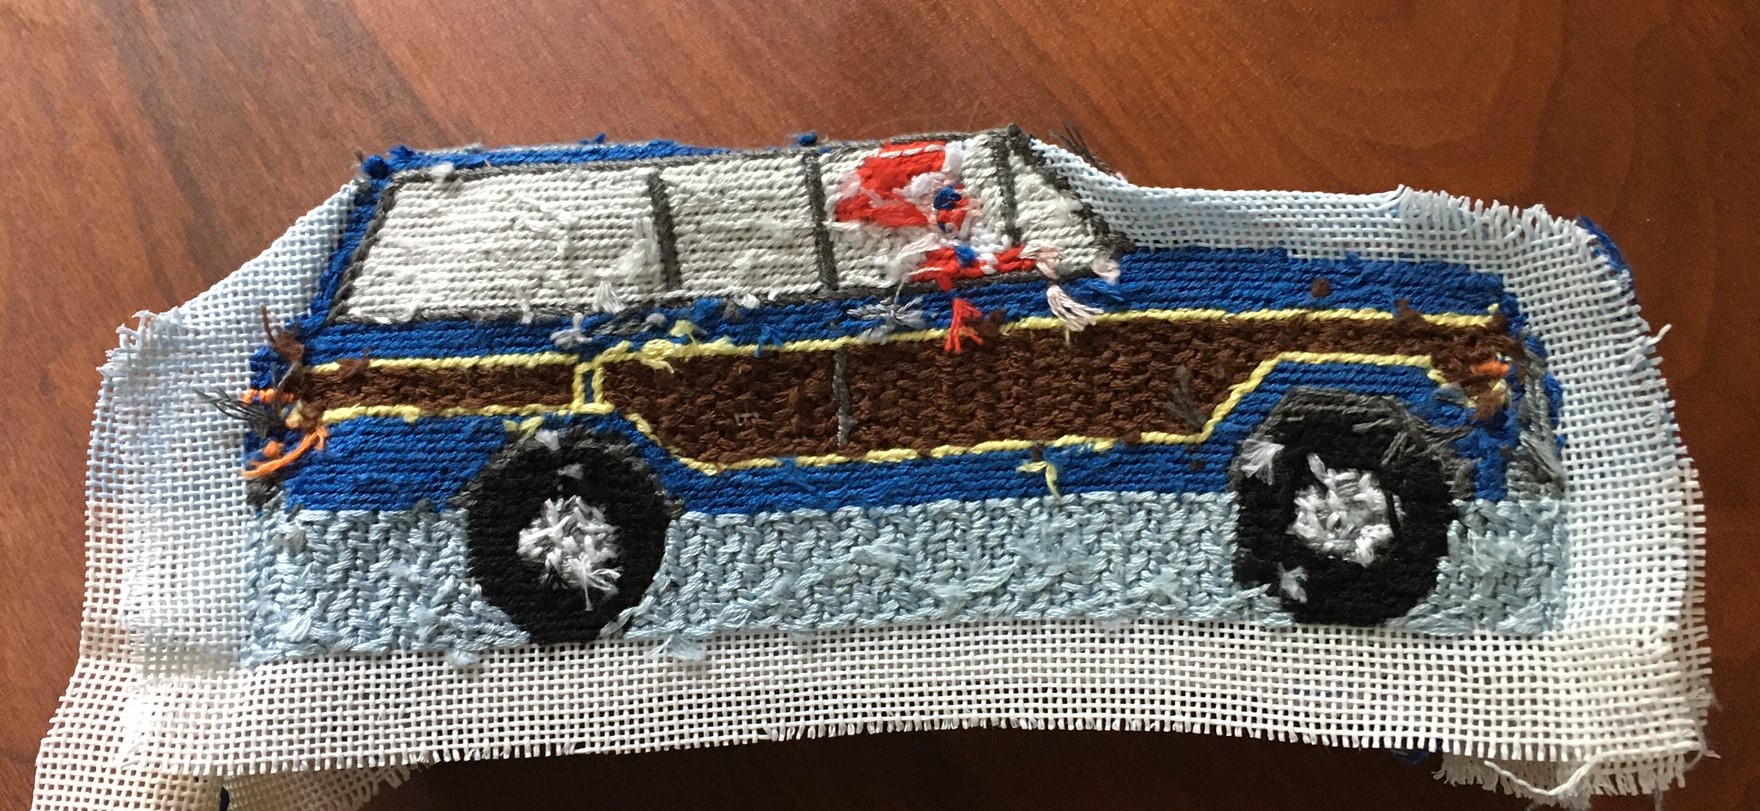
Inside-out:
Finishing the car was a bit more challenging than finishing a brick door stop, because there was not a solid frame and the car has curves. I trimmed the canvas closer to the stitching, leaving at least a ¾ inch of blank canvas. Folding the stitched portion of the canvas with right sides together to join the hood and trunk to the sides, is a delicate operation requiring that the curves are the same for each side. It took me a couple of tries to get that right. The stitching was done with thread of the same color as the sections being joined. For example, the front window was joined with dark grey, the hood and side with blue, and the underbody with light blue. There were a lot of tiny stitches and knots!
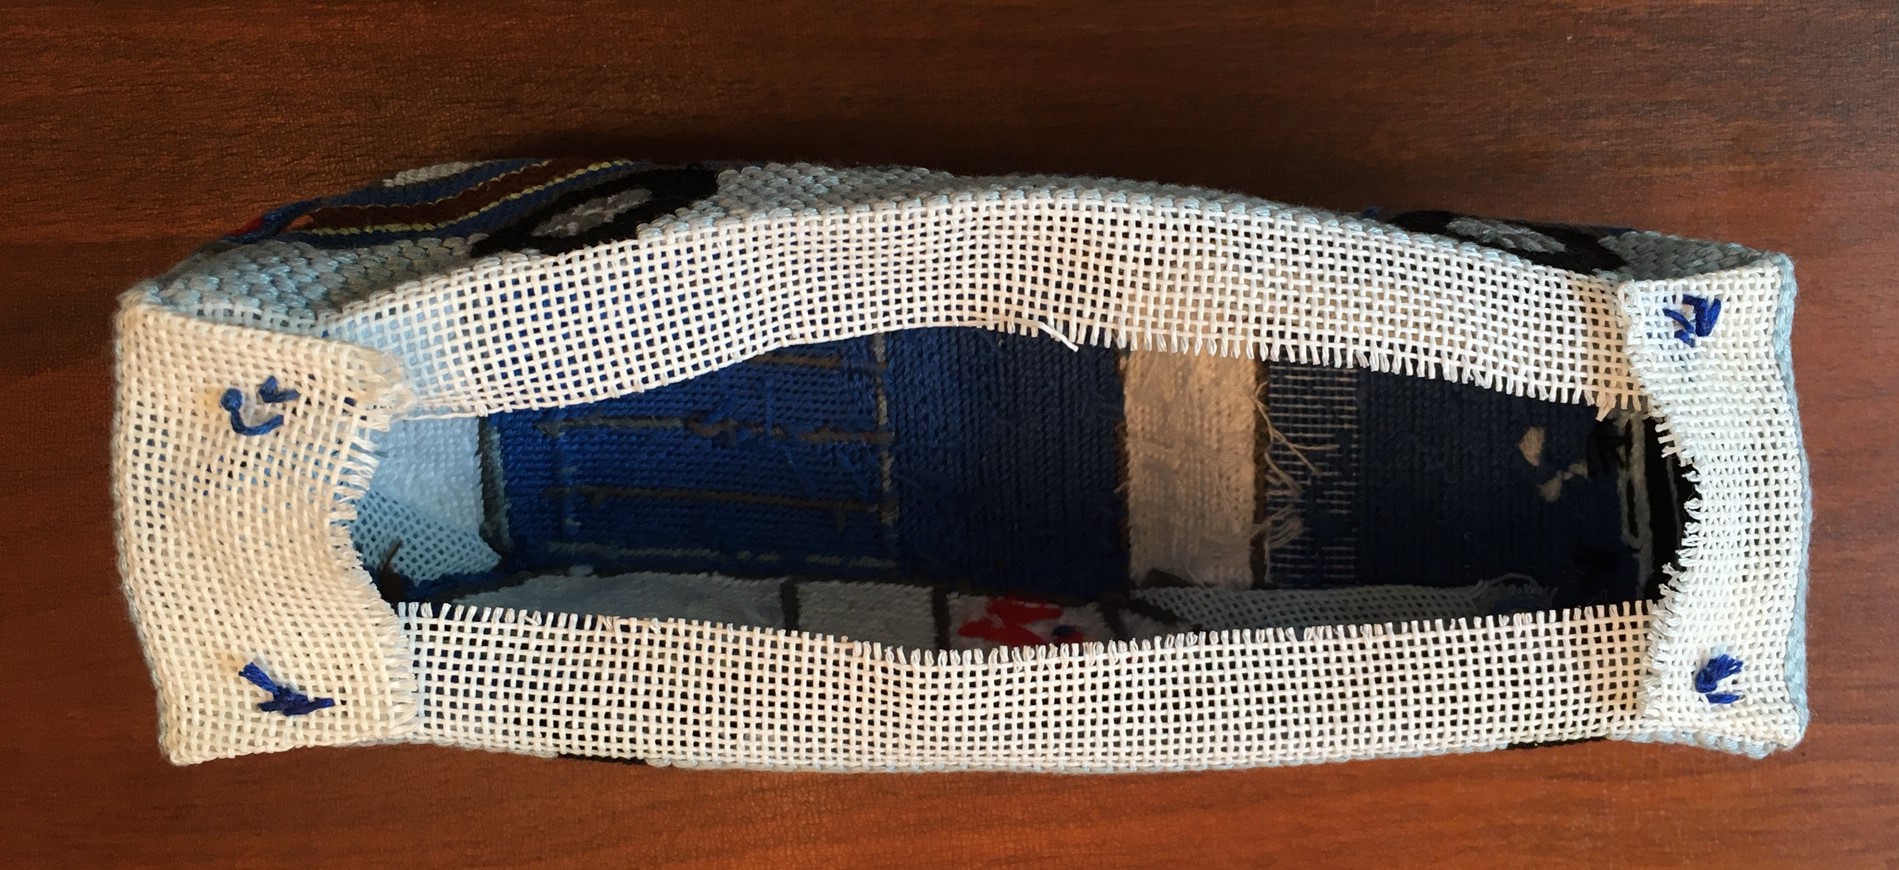
Sew car inside-out:
To prepare the car form before stuffing, I pressed the seams open and tacked down the corners as shown.
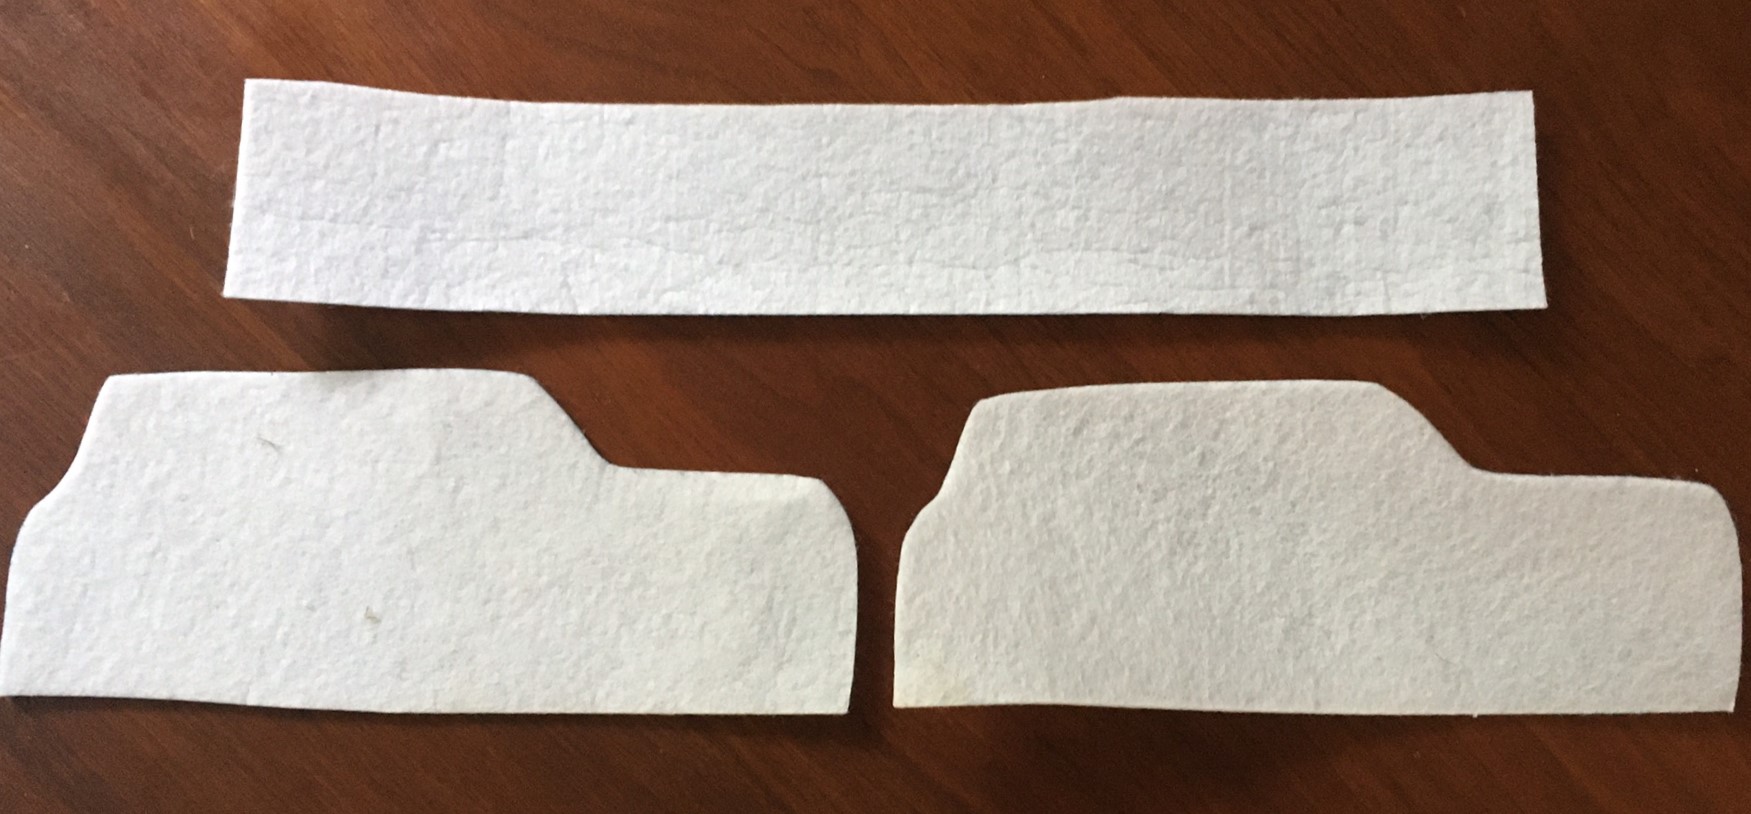
Addition of Pellon stiffeners:
I inserted 3 pieces of heavyweight Pellon interfacing to give the car some rigidity. It is not necessary, but I found this gives the car sharper edges. More rigid inserts would give even sharper edges. It is a matter of taste!
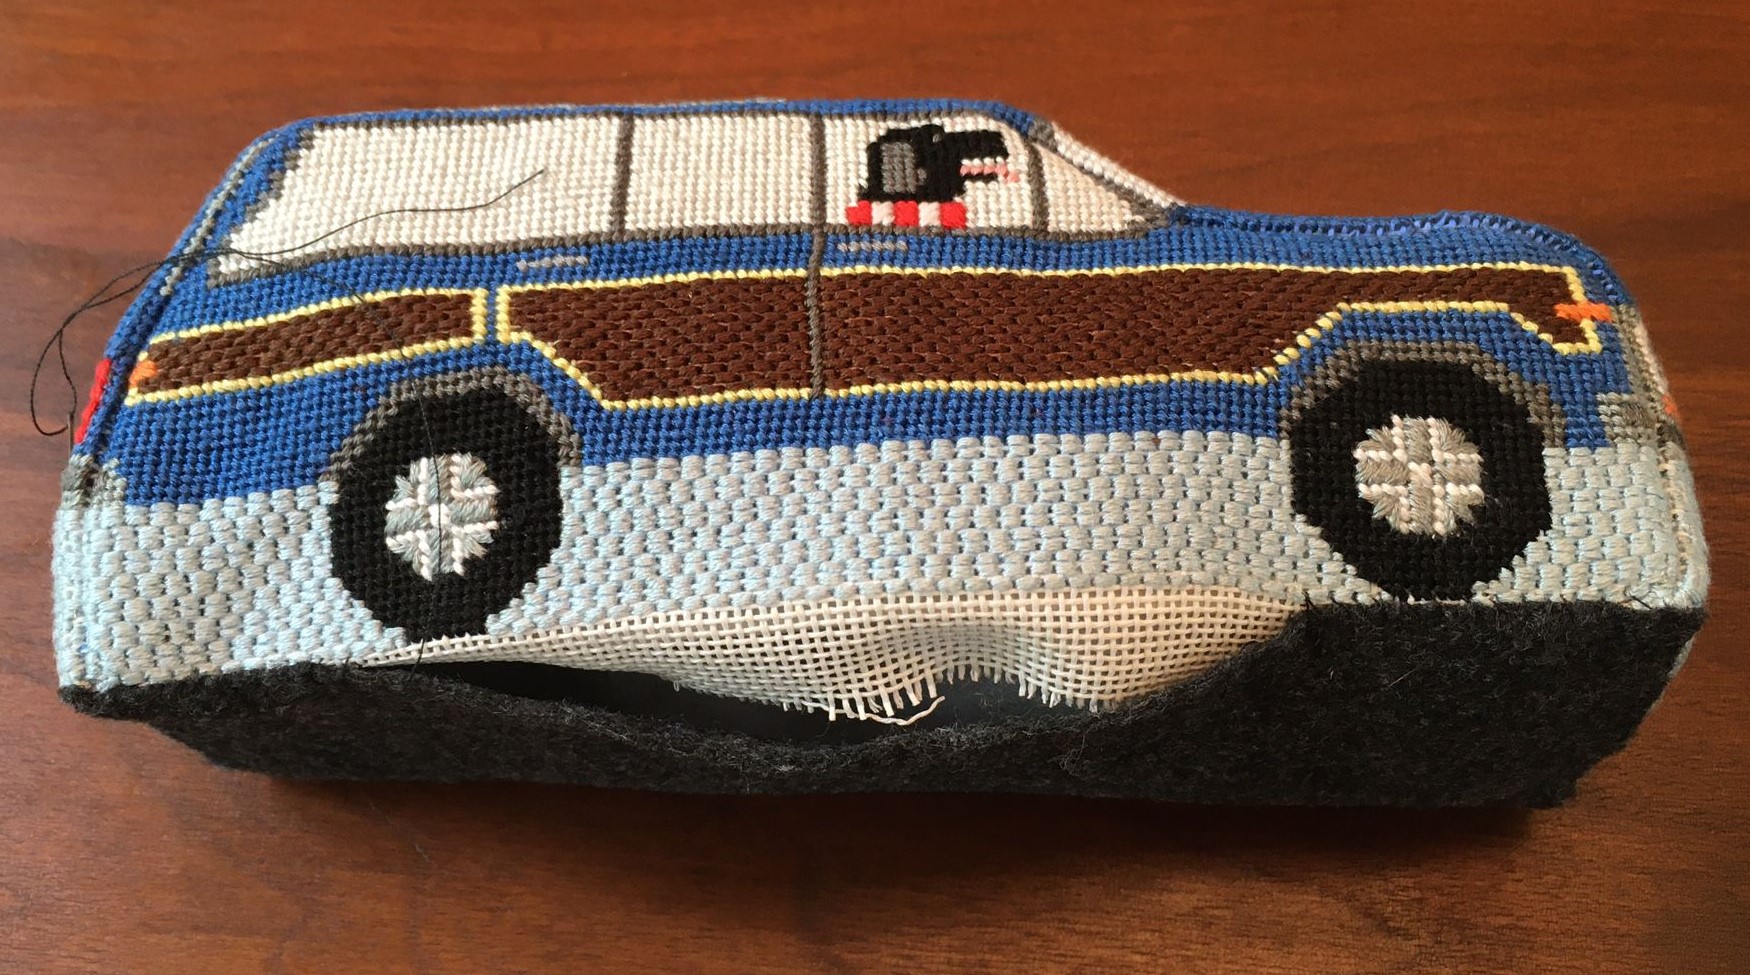
Stuffing in progress:
I used heavy felt for the bottom of the car, similar to the finishing technique I used for the needlepoint brick covers. I stitch most of the bottom in place, leaving a four inch opening on one side before stuffing the car.
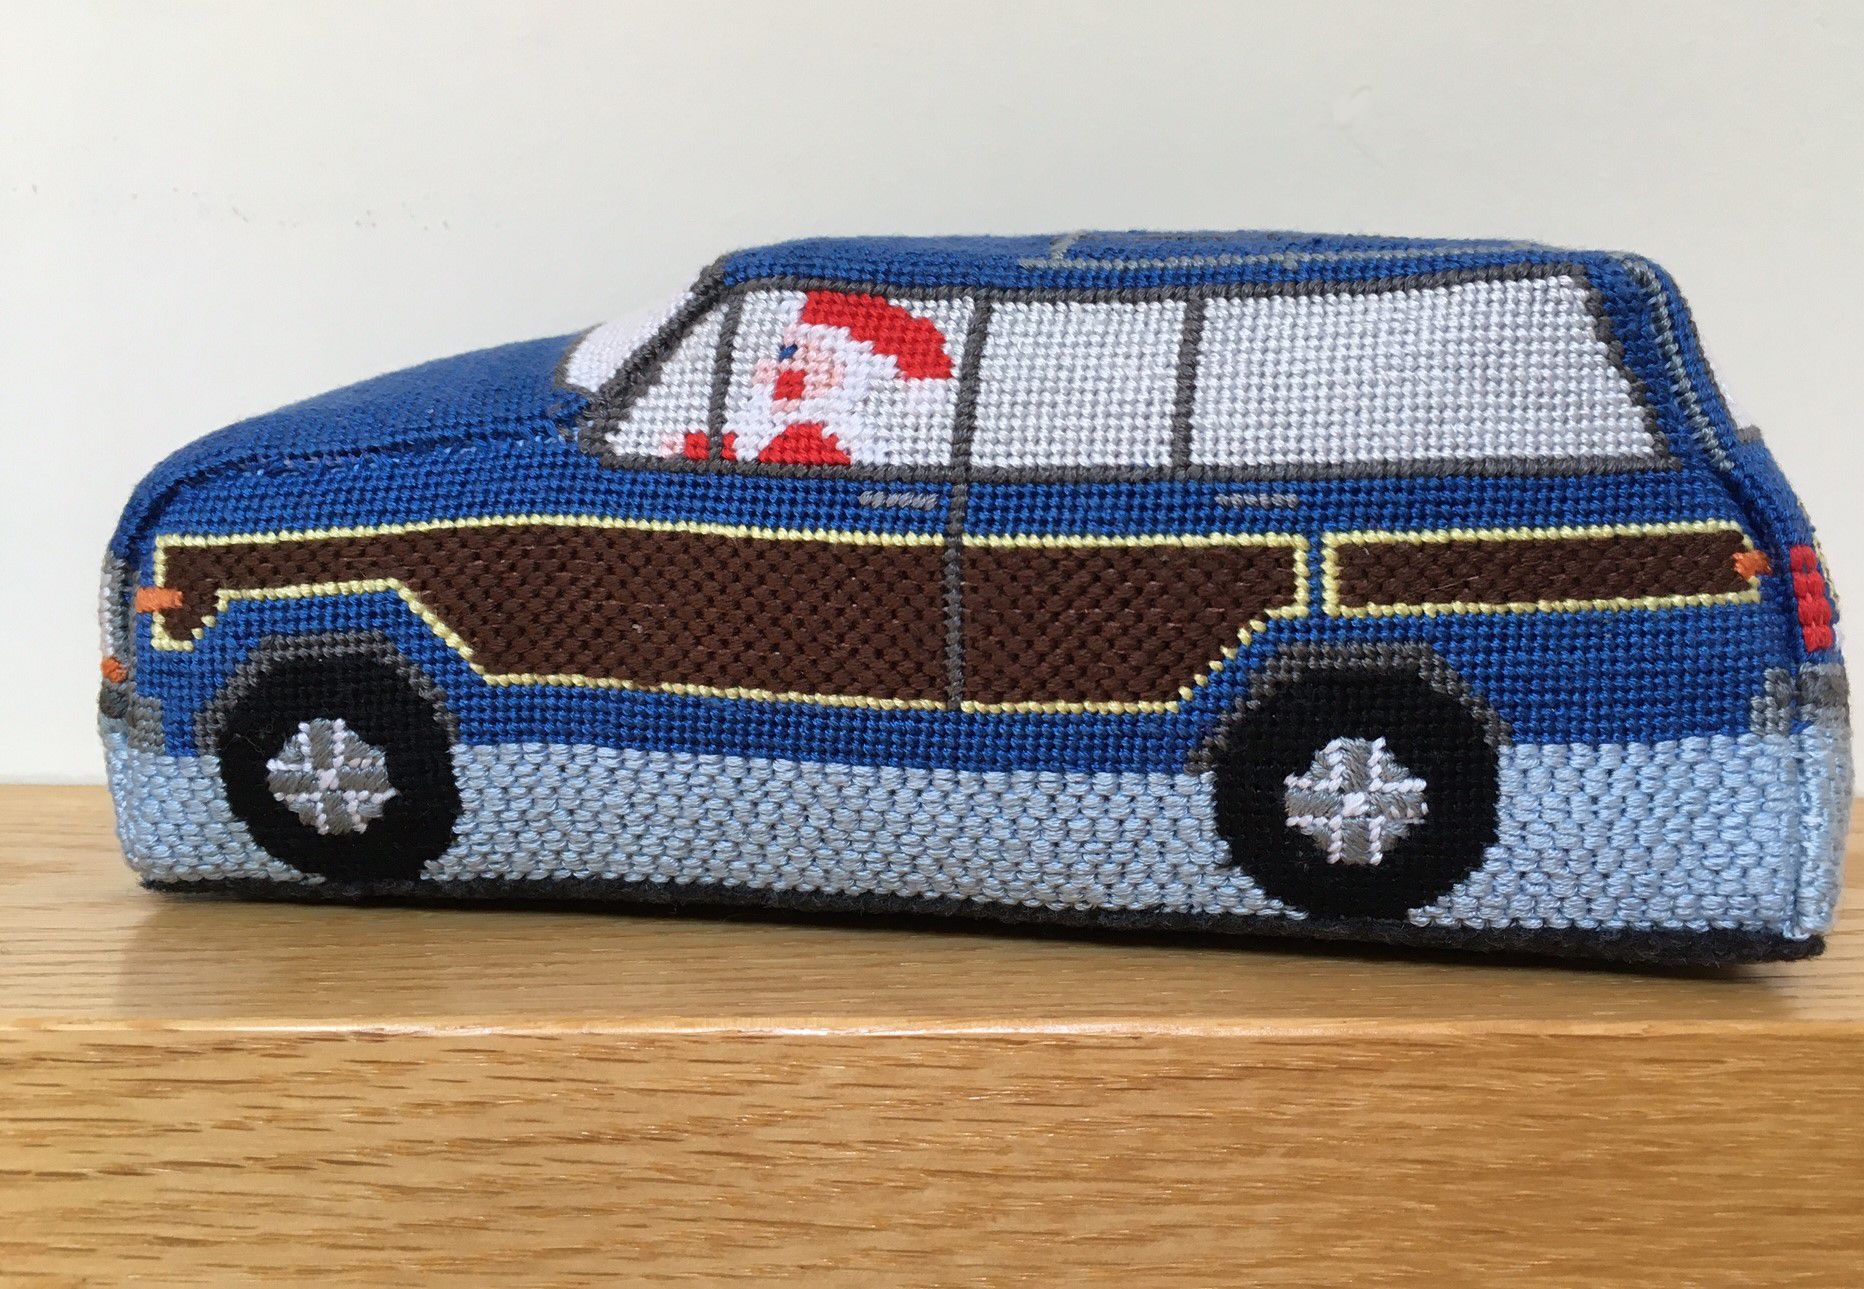
Stuffed and sewn up!
I gave Santa and the car another steaming to crispen up the edges of the roof and seams. He says that his new wheels and helpful dog will guarantee a Merry Christmas to All!
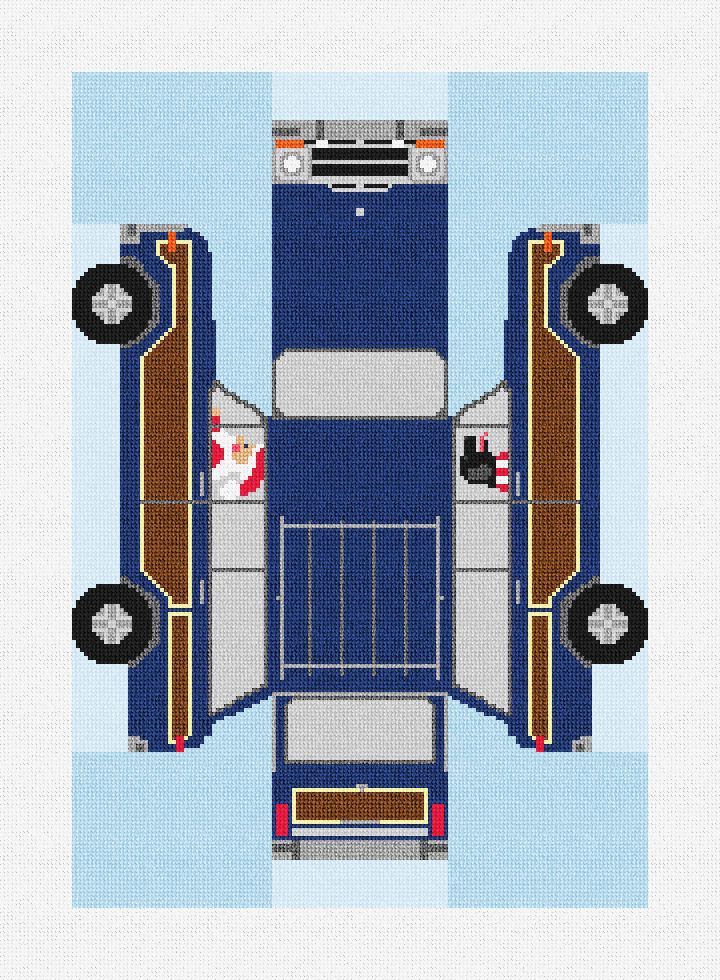
Santa’s New Ride Three Dimensional Needlepoint Kit
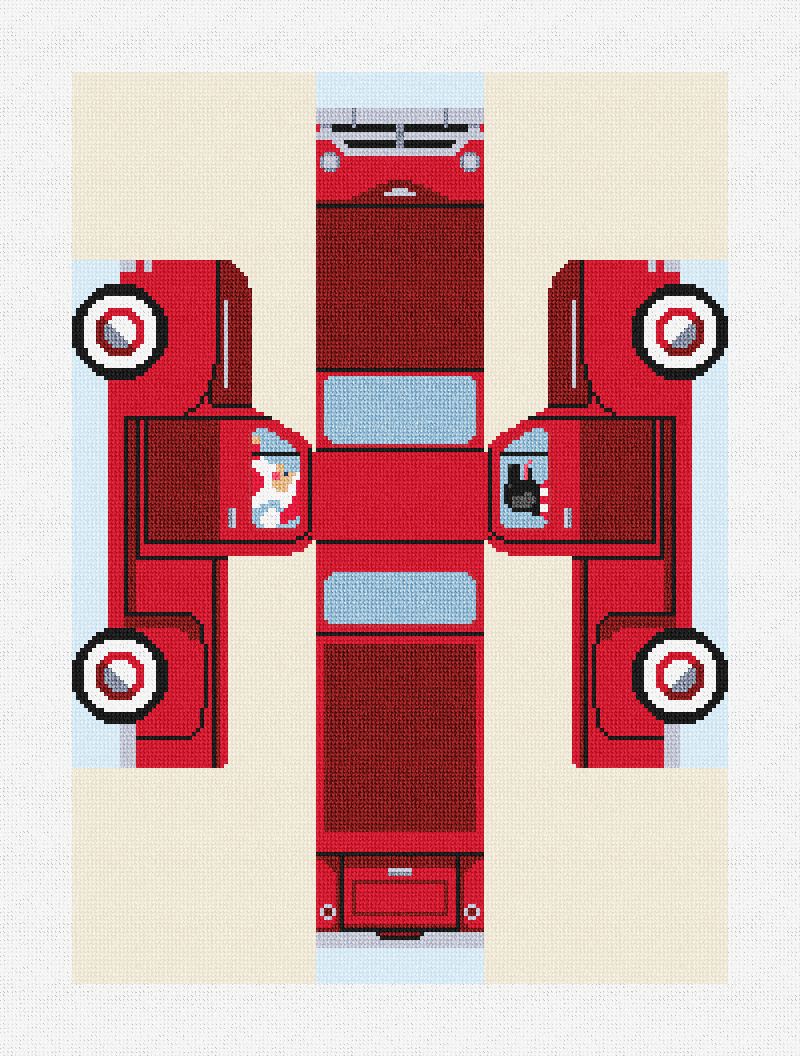
Red Truck Three Dimensional Needlepoint Kit
We would love to help you with all of your holiday decorations!
Please feel free to contact us with any questions you may have at: info@needlepaint.com
Stitch up some magic this holiday season!

Written by Karen Mason
Leave a comment